Honda Civic Service Manual: Rear Door Glass Removal and Installation (4-door)
829100 LEFT
830100 RIGHT

Removal
| 1. |
Rear Door Power Window Switch Panel |
|

|
|
1.
|
Remove the power window switch panel (A).
|
|
|
|
|
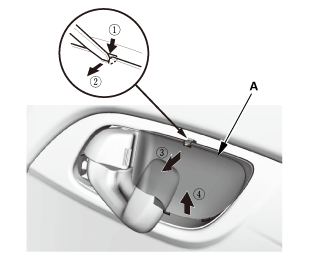
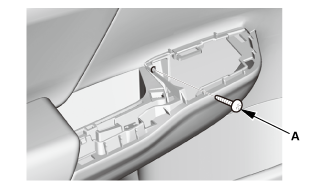
1.
|
Remove the inner handle cap (A).
|
|
|

|
|
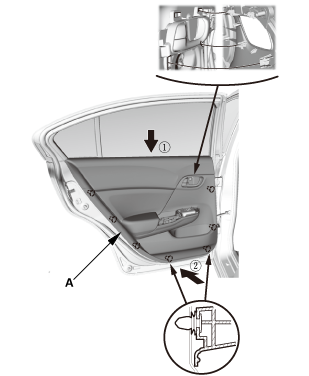
4.
|
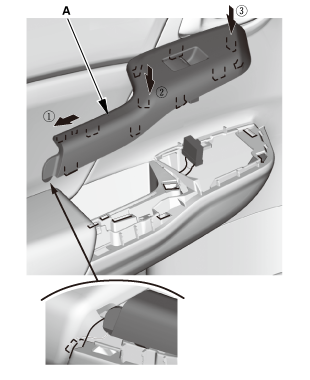
Remove the door panel (A).
|
|
| 3. |
Rear Door Plastic Cover |
|
|
|
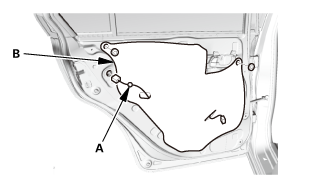
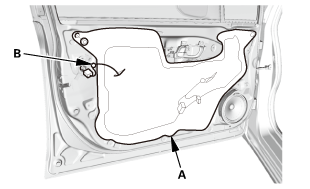
1.
|
Detach the harness clip (A).
|
|
2.
|
Remove the plastic cover (B).
|
|
| 4. |
Rear Door Rear Lower Channel |
|
|
|
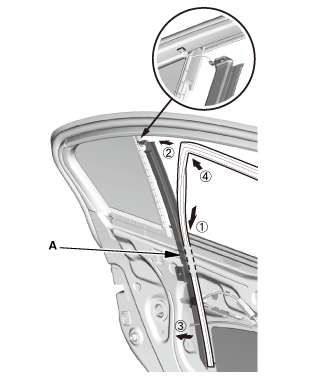
1.
|
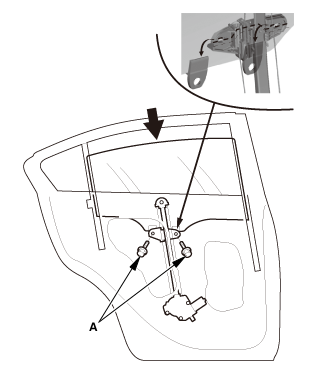
Remove the screw (A) and the bolt (B).
|
|
|

|
|
2.
|
Remove the rear lower channel (A).
|
|

Installation
|

|
|
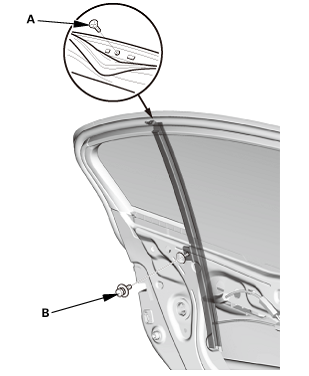
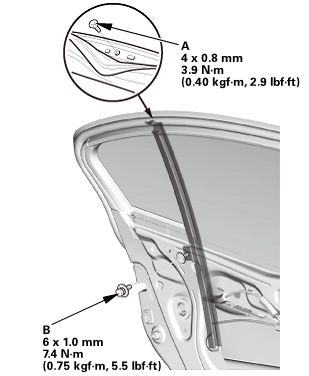
1.
|
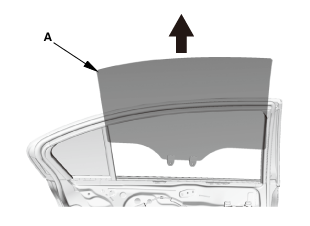
Install the glass (A).
|
|
|
|
|
2.
|
Install the bolts (A).
|
|
| 2. |
Rear Door Rear Lower Channel |
|
|
|
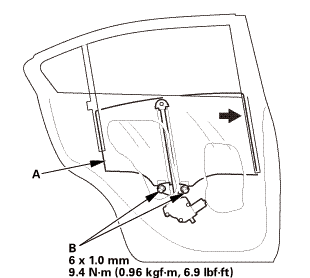
1.
|
Install the rear lower channel (A).
|
|
|
 onmmlnmmto onmmlnmmto
|
|
2.
|
Install the screw (A) and the bolt (B).
|
|
| 3. |
Rear Door Glass - Adjustment |
|
|
|
NOTE: Check the door weatherstrip and the glass run channel
for damage or deterioration, and replace them if necessary.
|
|
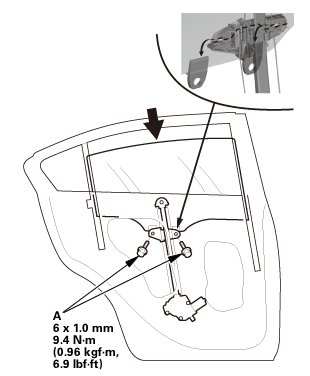
1.
|
Place the vehicle on a firm, level surface when adjusting
the door glass.
|
|
2.
|
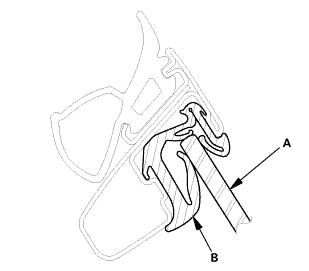
Carefully lower the glass (A) until you can see the glass
mounting bolts (B), then loosen them.
|
|
3.
|
Push the glass against the glass run channel, then tighten
the glass mounting bolts.
|
|
4.
|
Check that the glass moves smoothly.
|
|
|
|
|
5.
|
Raise the glass fully, and check for gaps. Also make
sure that the glass (A) contacts the glass run channel (B)
evenly.
|
|
| 4. |
Rear Door Plastic Cover |
|
|
|
1.
|
Install the plastic cover (A).
|
|
2.
|
Install the harness clip (B).
|
|
|
|
|
1.
|
Install the door panel (A).
|
|
|
|
|
2.
|
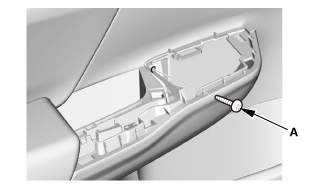
Install the screw (A).
|
|
|
|
|
3.
|
Install the screw (A).
|
|
|
|
|
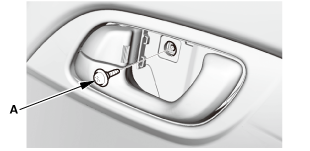
4.
|
Install the inner handle cap (A).
|
|
| 6. |
Rear Door Power Window Switch Panel |
|
|
|
1.
|
Install the power window switch panel (A).
|
|
8241F0 LEFT
8251F1 RIGHT
Removal
1.
Rear Door Power Window Switch Panel
1.
...
821140 LEFT
822140 RIGHT
Removal
1.
Rear Door Power Window Switch Panel
1.
...
 Rear Door Glass Outer Weatherstrip Removal and Installation (4-door)
 Rear Door Inner Handle Removal and Installation (4-door)