|

|
Aiming should be done in a well-lighted area.
|
|
|
|
There should be no bright objects at the back of the
target (sunlight, windows, illumination, or reflectors)
or design similar to the target pattern.
|
|
|
|
If the aiming procedure fails, try changing the lighting
to make it lighter or darker to see if the current lighting
is affecting the aiming.
|
|
|
|
LaneWatch camera aiming should be done on a flat place.
|
|
|
|
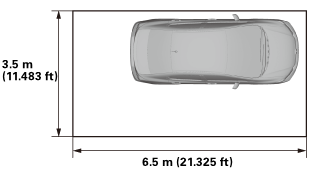
Park the vehicle on level ground in a wide open area
to avoid any reflection from objects that could affect the
alignment procedure. Make sure you have at least the following
amount of space around the vehicle: 6.5 m (21.325 ft) in
length, 3.5 m (11.483 ft) in width.
|
|
|
|
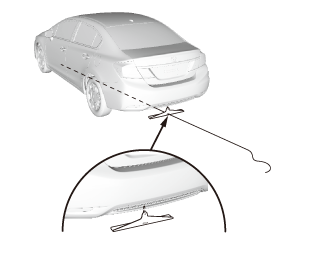
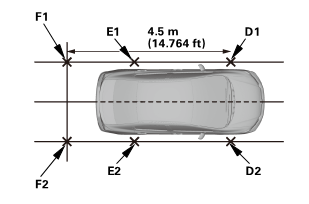
Do the aiming in a proper place where you can obtain
the about 4.5 m (14.764 ft) distance between a target pattern
and the vehicle (from the center of the front wheel hub).
|
|
|
|
Make sure the suspension has not been modified.
|
|
|
|
Make sure all the tire sizes are correct and that their
pressure is correct.
|
|
|
|
Make sure the fuel tank is full.
|
|
|
|
Remove all cargo from the vehicle except the tool kit.
|
|
|
|
Make sure the steering wheel is pointed straight ahead,
and do not turn it after setting the vehicle.
|
|
|
|
With the transmission in P or N, and apply the parking
brake.
|
|


 mm
mm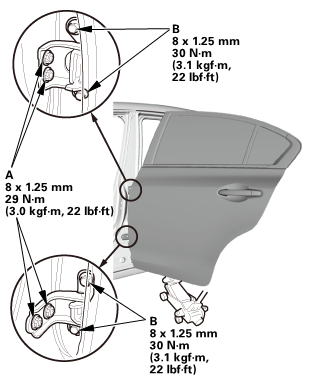

 nuunmlzuzs
 (innon
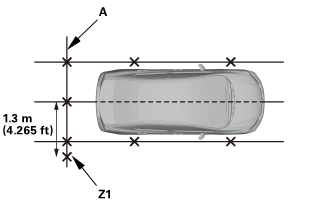 n)
n)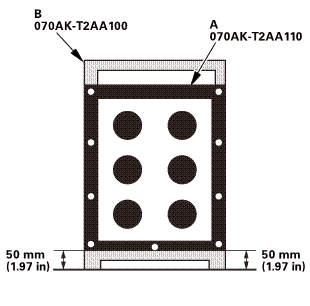 o7oakr2aaiiosommin)
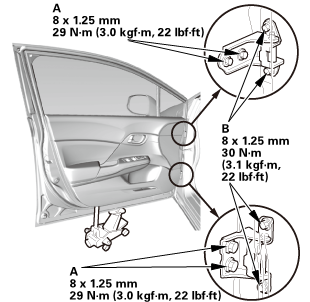
 Door Position Adjustment (2-door)
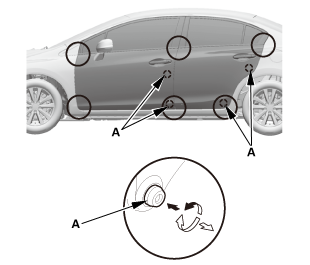
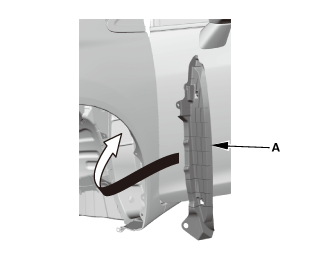
 Driver's Front Door Sill Trim Removal and Installation