Honda Civic Service Manual: Carpet Removal and Installation (4-door A/T)
847100

|
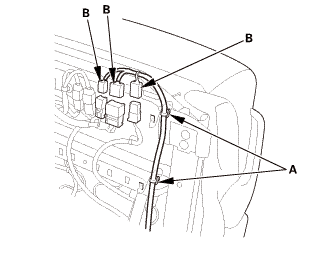
SRS components are located in this area. Review the SRS component locations
and the precautions and procedures before doing repairs or service.
|
| 1. |
Battery Terminal (SRS) - Disconnection |
|

|
|
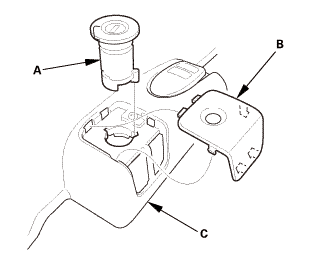
1.
|
Make sure the ignition switch is in LOCK (0).
|
|
2.
|
Disconnect and isolate the negative cable with the battery sensor
(A) from the battery.
|
|
NOTE:
|
|

|
Always disconnect the negative side first.
|
|
|
|
To protect the battery sensor connector (B) from
damage, do not hold it when removing the negative
terminal.
|
|
|
|
Do not disconnect the battery sensor from the
negative terminal (C).
|
|
|
|
3.
|
Disconnect the positive cable (D) from the battery.
|
|
4.
|
Wait at least 3 minutes before starting work.
|
|
| 2. |
Both Front Seat Belt Lower Anchor Bolts |
|
|
|
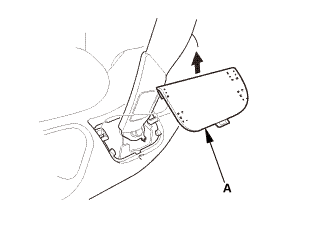
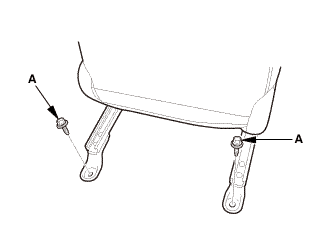
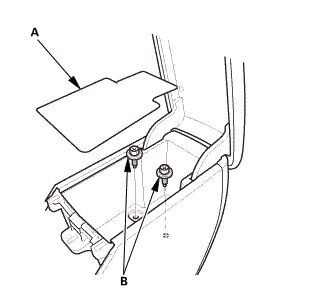
1.
|
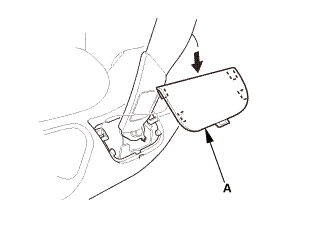
Remove the anchor cover (A).
|
|
2.
|
The driver's seat is shown; repeat on the passenger's seat.
|
|
|
|
|
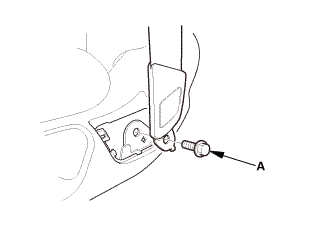
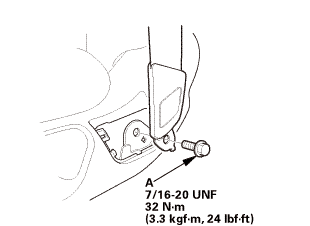
3.
|
Remove the lower anchor bolt (A).
|
|
4.
|
The driver's seat is shown; repeat on the passenger's seat.
|
|
| 3. |
Left Front Seat Belt Lower Anchor |
|
 unn-mmlmlzaiu.m:n.5 unn-mmlmlzaiu.m:n.5
|
|
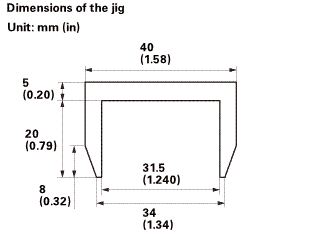
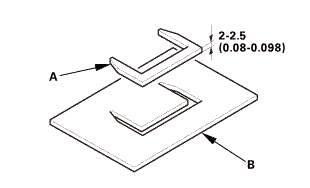
1.
|
Prepare a sheet of cardboard which is 2-2.5 mm (0.08-0.098 in)
thick.
|
|
NOTE: If there is no suitable cardboard, put some seats of thin
paper together until they will be required thick.
|
|
2.
|
Make a jig (A) from the prepared cardboard (B).
|
|
|
|
|
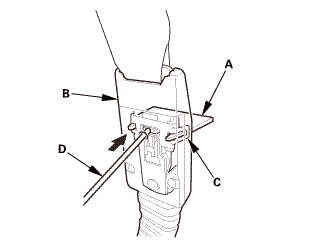
3.
|
Slide the front seat forward fully.
|
|
4.
|
Slowly insert the jig (A) into holes (B) in the back of the lap
connector cover (C) to release the sublatch spring (D). Be sure
the jig is inserted vertically.
|
|
|
|
|
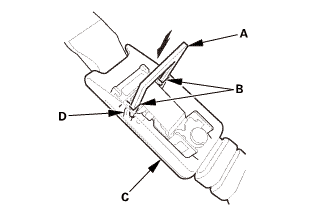
5.
|
Leave the jig (A) set in the lap connector cover (B) to keep
the sublatch spring (C) open. Carefully insert the tip of a small
screwdriver (D) into the hole in the lap connector cover, and unlock
the lap connector by pushing in on the screwdriver.
|
|
|

|
|
7.
|
While pulling the front seat belt (B) upward, remove the screwdriver
(C). As soon as you remove the screwdriver from the lap connector
(D), the anchor connector will come off the lap connector.
|
|
|
|
|
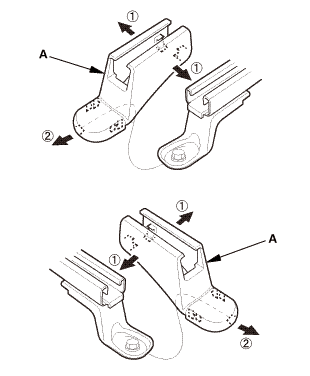
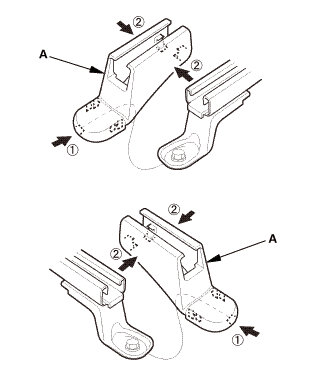
1.
|
Remove both seat track end covers (A).
|
|
2.
|
The driver's seat is shown; repeat on the passenger's seat.
|
|
|
Front side
Rear side
|
|
3.
|
Remove the seat mounting bolts (A).
|
|
4.
|
The driver's seat is shown; repeat on the passenger's seat.
|
|
|
Power seat
Manual seat
|
|
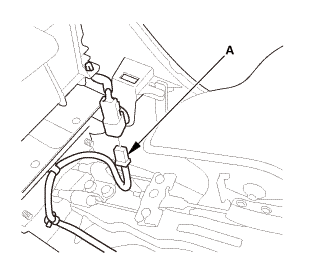
5.
|
Disconnect the connectors (A).
|
|
6.
|
Detach the harness clips (B).
|
|
7.
|
The driver's seat is shown; repeat on the passenger's seat.
|
|
8.
|
With the help of an assistant, carefully remove both front seats
through the front door opening.
|
|
|
|
|
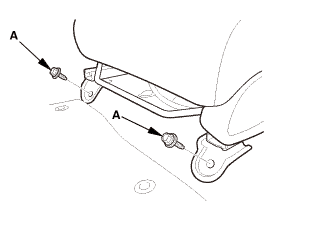
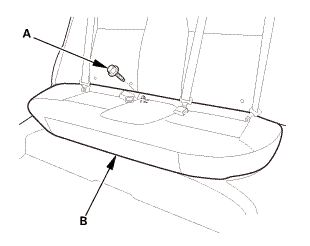
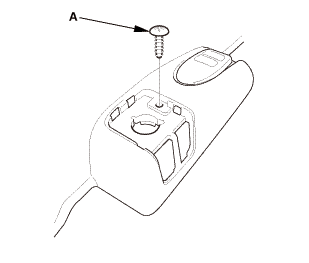
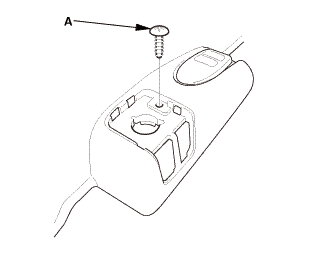
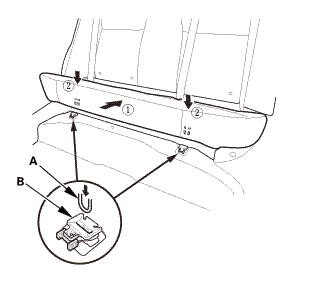
1.
|
Remove the bolt (A) securing the rear seat cushion (B).
|
|
|
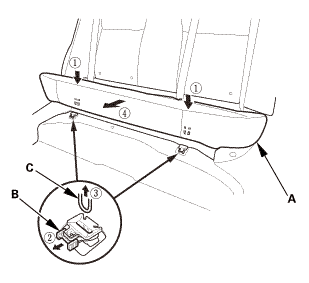
|
|
2.
|
While pushing down the rear seat cushion (A), pull the seat hook
handles (B) to release the hooks (C).
|
|
3.
|
Remove the rear seat cushion.
|
|
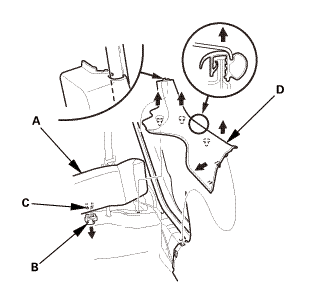
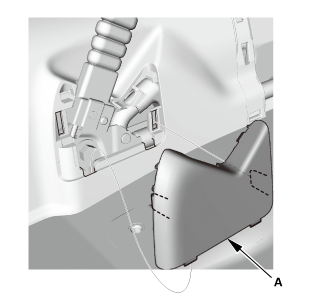
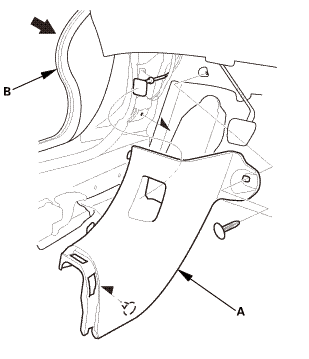
| 6. |
Both Front Door Sill Trims |
|

|
|
1.
|
Driver's side: Remove the cap (A) from the front door sill trim
(B).
|
|
2.
|
Driver's side: Remove the opener lock cylinder (C).
|
|
|
|
|
3.
|
Driver's side: Remove the screw (A).
|
|
|
Driver's side
Passenger's side

|
|
4.
|
Remove both front door sill trims (A).
|
|
|
Driver's side
Passenger's side
|
|
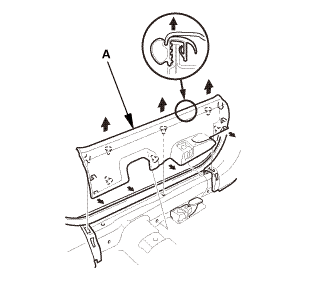
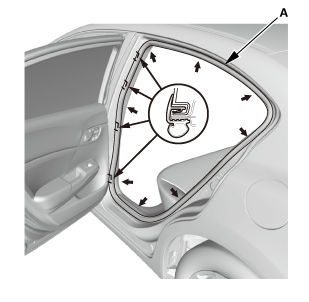
1.
|
Pull out both front door opening seals (A) as needed.
|
|
2.
|
Remove both kick panels (B).
|
|
| 8. |
Both Rear Door Sill Trims |
|
|
|
1.
|
While pushing down on the rear seat cushion (A), pull the seat
hook handle (B) to release the hook (C).
|
|
2.
|
While pulling up the seat cushion, remove the rear door sill
trim (D).
|
|
3.
|
The left side is shown; repeat on the right side.
|
|
| 9. |
Front Door Opening Seal As Needed Both |
|

|
|
1.
|
Remove front door opening seal (A) as needed.
|
|
2.
|
Repeat on the opposite side.
|
|
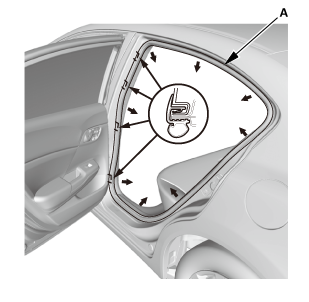
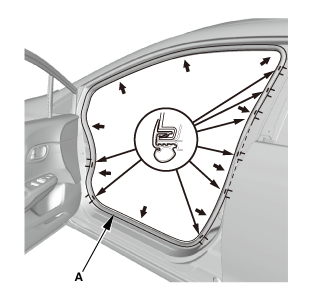
| 10. |
Both Rear Door Opening Seals as Needed |
|
|
|
1.
|
Remove the rear door opening seal (A) as needed.
|
|
2.
|
The left side is shown; repeat on the right side.
|
|
| 11. |
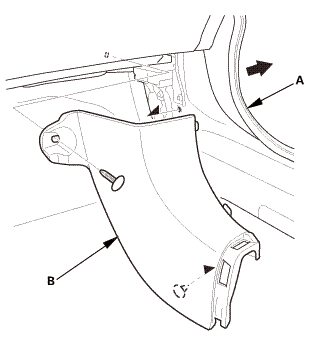
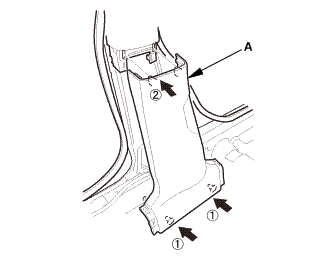
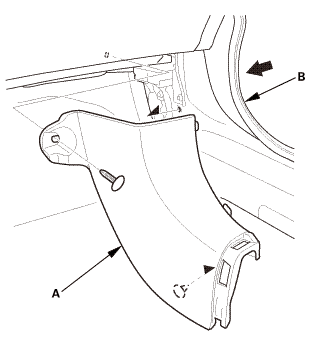
Both B-Pillar Lower Trims |
|
|
|
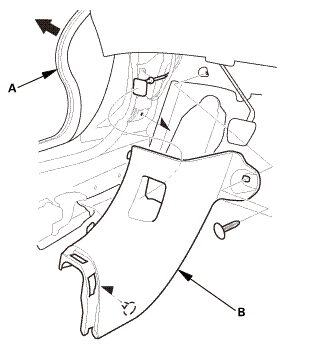
1.
|
Slide the front seat forward fully.
|
|
2.
|
'13 Model (driver's side): Remove the B-pillar lower cover (A).
|
|
|
'12 Model
'13 Model
|
|
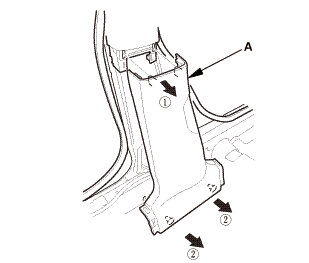
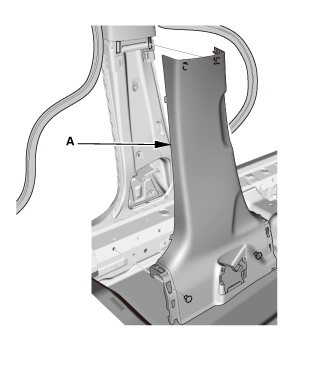
3.
|
Remove the B-pillar lower trim (A).
|
|
4.
|
'12 Model: The left side is shown; repeat on the right side.
|
|
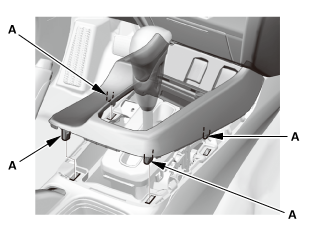
| 12. |
Center Console Panel Assembly (Except '12M M/T) |
|
|
|
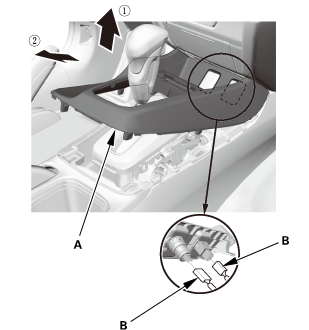
2.
|
Remove the center console panel (A).
|
|
3.
|
For some models: Disconnect the connector(s) (B).
|
|
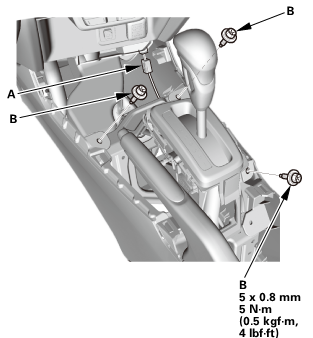
| 13. |
Cup Holder Panel Assembly |
|
|
|
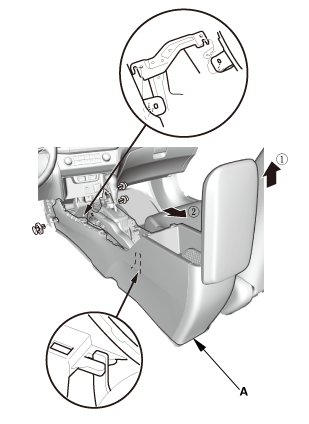
1.
|
Remove the cup holder panel assembly (A).
|
|
|

|
|
2.
|
Disconnect the connector (B).
|
|
|
|
|
3.
|
Remove the console box mat (A).
|
|
|
|
|
5.
|
Disconnect the connector (A).
|
|
|
|
|
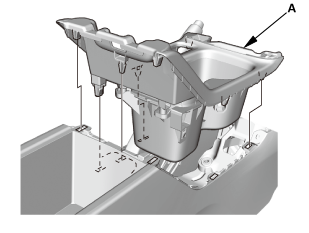
6.
|
Remove the center console (A).
|
|
|
|
|
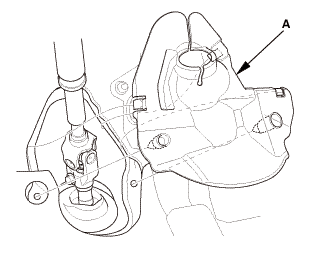
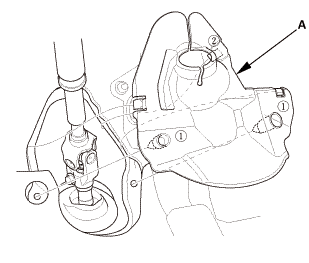
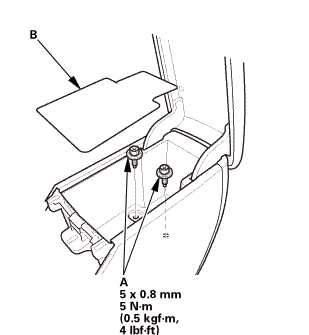
1.
|
Remove the steering joint cover (A).
|
|
|

|
|
1.
|
For some models: Remove the lower clip (A) from the stud bolt
(B) with a 6 mm hex socket wrench.
|
|
2.
|
For some models: Remove the upper clip (C) from the stud bolt
(D) with a flat-tip screwdriver, then remove the footrest (E).
|
|
| 17. |
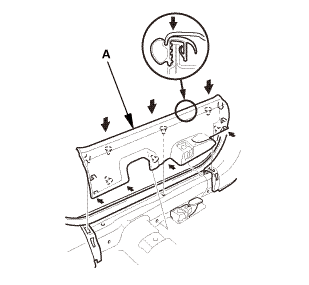
Floor Carpet - 4-Door (A/T) |
|
|
|
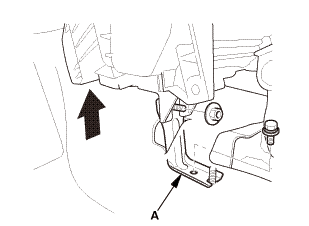
1.
|
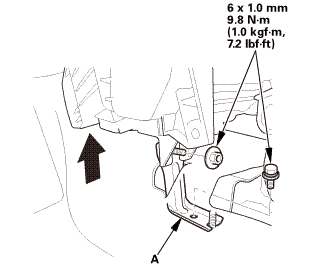
Remove the HVAC bracket (A).
|
|
|
|
|
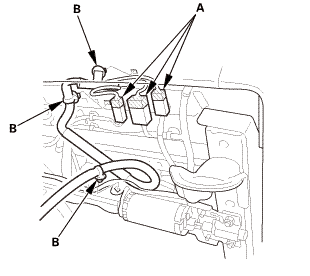
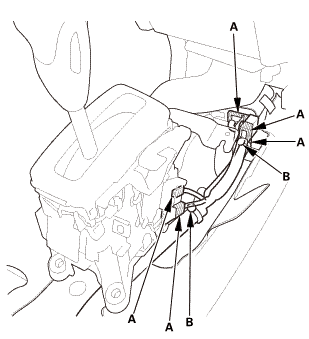
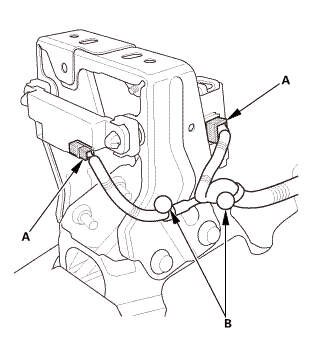
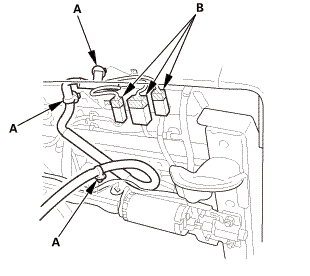
2.
|
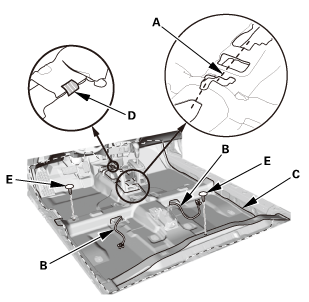
Disconnect the connectors (A) and the harness clips (B).
|
|
|
Without load ABS box
With load ABS box
|
|
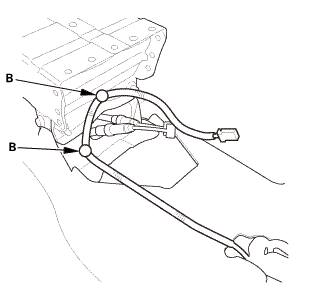
3.
|
Disconnect the connectors (A), and detach the harness clips (B).
|
|
|

|
|
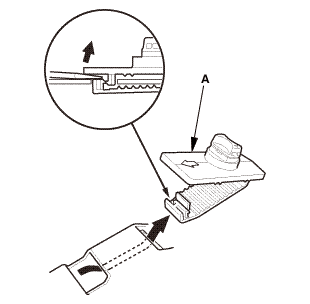
5.
|
Release the hook and loop fastener (B).
|
|
6.
|
Cut the carpet (C) in the area (D) as shown.
|
|
7.
|
Pull out the seat harnesses (E), then remove the carpet.
|
|
|
|
|
8.
|
If necessary, remove the floor mat holder (A).
|
|

|
SRS components are located in this area. Review the SRS component locations
and the precautions and procedures before doing repairs or service.
|
| 1. |
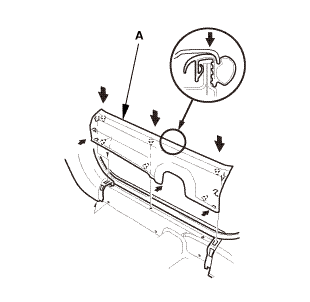
Floor Carpet - 4-Door (A/T) |
|
|
|
1.
|
If necessary, install the floor mat holder (A).
|
|
|
|
|
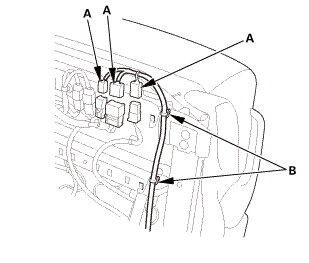
2.
|
When installing the new carpet, cut the carpet in the area (A)
as shown.
|
|
3.
|
Pass the seat harnesses (B), then install the carpet (C).
|
|
4.
|
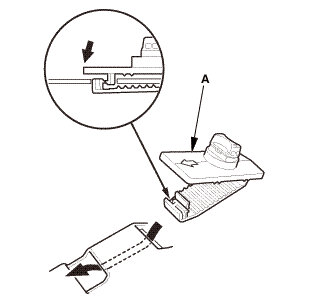
Install the hook and loop fastener (D).
|
|
5.
|
Install the clips (E).
|
|
|
Without load ABS box
With load ABS box
|
|
6.
|
Connect the connectors (A), and install the harness clips (B).
|
|
|

|
|
7.
|
Connect the connectors (A) and the harness clips (B).
|
|
|
|
|
8.
|
Install the HVAC bracket (A).
|
|
|

|
|
1.
|
For some models: Install the upper clip (A) to the stud bolt
(B).
|
|
2.
|
For some models: Install the lower clip (C) to the stud bolt
(D), then install the footrest (E).
|
|
|
|
|
1.
|
Install the steering joint cover (A) in the sequence shown.
|
|
|

|
|
1.
|
Install the center console (A).
|
|
|
|
|
2.
|
Connect the connector (A).
|
|
|
|
|
3.
|
Install the bolts (A).
|
|
4.
|
Install the console box mat (B).
|
|
|
|
|
5.
|
Connect the connector (A).
|
|
6.
|
Install the bolts (B).
|
|
| 5. |
Cup Holder Panel Assembly |
|
|
|
1.
|
Install the cup holder panel assembly (A).
|
|
| 6. |
Center Console Panel Assembly (Except '12M M/T) |
|

|
|
1.
|
For some models: Connect the connector(s) (A).
|
|
2.
|
Install the center console panel (B).
|
|
|
|
|
3.
|
Install the clips (A).
|
|
| 7. |
Both B-Pillar Lower Trims |
|
12 model
13 model
|
|
1.
|
Install the B-pillar lower trim (A).
|
|
2.
|
12 model: The left side is shown; repeat on the right side.
|
|
|
|
|
3.
|
13 model (driver's side): Install the B-pillar lower cover (A).
|
|
| 8. |
Both Rear Door Opening Seals as Needed |
|
|
|
1.
|
Install the rear door opening seal (A).
|
|
2.
|
The left side is shown; repeat on the right side.
|
|
| 9. |
Front Door Opening Seal as Needed Both |
|
|
|
1.
|
Install front door opening seal (A).
|
|
2.
|
Repeat on the opposite side.
|
|
| 10. |
Both Rear Door Sill Trims |
|

|
|
1.
|
While pulling up the rear seat cushion (A), install the rear
door sill trim (B).
|
|
2.
|
Push down the seat cushion, then install the hook (C) to the
rear seat cushion clip (D).
|
|
3.
|
The left side is shown; repeat on the right side.
|
|
|
Driver's side
Passenger's side
|
|
1.
|
Install both kick panels (A).
|
|
2.
|
Install both front door opening seals (B) as needed.
|
|
| 12. |
Both Front Door Sill Trims |
|
Driver's side
Passenger's side
|
|
1.
|
Install both front door sill trims (A).
|
|
|
|
|
2.
|
Driver's side: Install the screw (A).
|
|
|
|
|
3.
|
Driver's side: Install the opener lock cylinder (A).
|
|
4.
|
Driver's side: Install the cap (B) to the front door sill trim
(C).
|
|
|
|
|
1.
|
Install the hooks (A) to the rear seat cushion clips (B).
|
|
|
|
|
2.
|
Install the bolt (A) securing the rear seat cushion (B).
|
|
|
Power seat
Manual seat
|
|
1.
|
With the help of an assistant, carefully install both front seats
through the front door opening.
|
|
2.
|
Install the harness clips (A).
|
|
3.
|
Connect the connectors (B).
|
|
4.
|
The driver's seat is shown; repeat on the passenger's seat.
|
|
|
Front side
 1n25mman 1n25mman
Rear side
|
|
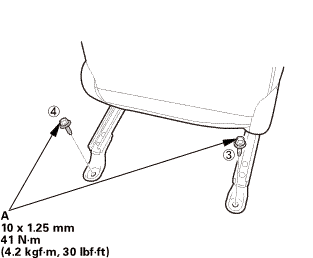
5.
|
Install the seat mounting bolts (A).
|
|
NOTE: Tighten the bolts to the specified torque in the sequence
shown.
|
|
|
Tighten the bolts by hand first, then tighten
them to the specified torque.
|
|
|
|
Tighten the seat mounting bolts to the specified
torque in the sequence shown. Slide the seat all
the way back and tighten 1 and 2, then slide it
forward and tighten 3 and 4.
|
|
|
|
6.
|
The driver's seat is shown; repeat on the passenger's seat.
|
|
|
|
|
7.
|
Install both seat track end covers (A).
|
|
8.
|
The driver's seat is shown; repeat on the passenger's seat.
|
|
| 15. |
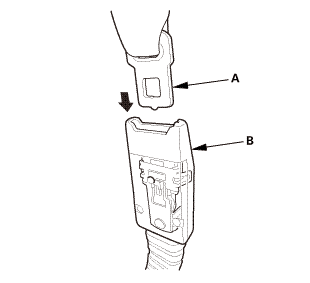
Left Front Seat Belt Lower Anchor |
|
|
|
1.
|
Install the front seat belt lower anchor (A) to the front seat
belt lap connector (B).
|
|
| 16. |
Both Front Seat Belt Lower Anchor Bolts |
|
 inmm inmm
|
|
1.
|
Install the lower anchor bolt (A).
|
|
2.
|
The driver's seat is shown; repeat on the passenger's seat.
|
|
|
|
|
3.
|
Install the anchor cover (A).
|
|
4.
|
The driver's seat is shown; repeat on the passenger's seat.
|
|
| 17. |
Battery Terminal (SRS) - Reconnection |
|
 (o.2ao.sam. (o.2ao.sam.
|
|
NOTE: If the battery performs abnormally, test the battery.
|
|
1.
|
Clean the battery terminals.
|
|
2.
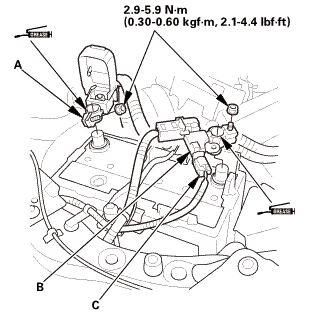
|
Connect the positive cable (A) to the battery.
|
|
NOTE: Always connect the positive side first.
|
|
3.
|
Connect the negative cable and the battery sensor (B) to the
battery.
|
|
NOTE: To protect the battery sensor connector (C) from damage,
do not hold it when installing the negative terminal.
|
|
4.
|
Apply multipurpose grease to the terminals to prevent corrosion.
|
|
847100
SRS components are located in this area. Review the SRS component locations
and the precautions and procedures before doing repairs or service.
1.
Bat ...
1.
Front Inner Fender
1.
Remove the front inner fender (A).
2.
Front Fender Fairing
...
See also:
Honda Civic Owners Manual. To Set Up to Connect HondaLink’ Service
Use the following procedure to connect to HondaLink’ service.
To enable the HondaLink’ service
1. Select .
2. Select Settings.
3. Select Info.
4. Select the HondaLink tab.
5. Select Diagnostics & Location Data.
6. Select On.
1. Select .
2. Select Settings.
3 ...
 Carpet Removal and Installation (2-door A/T)
 Door Position Adjustment (2-door)