Honda Civic Service Manual: Quarter Pillar Trim Removal and Installation (2-door)

Removal
|
SRS components are located in this area. Review the SRS component locations and the precautions and procedures before doing repairs or service. |
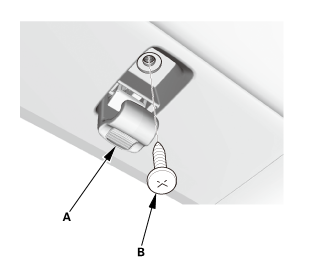
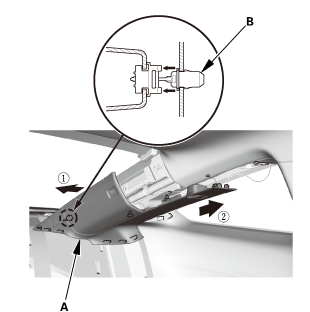
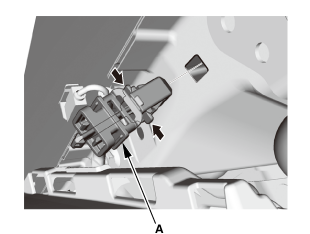
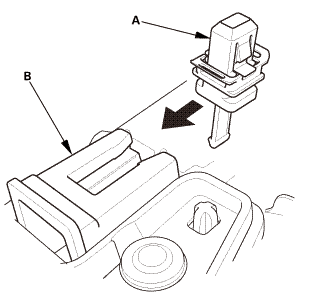
| 1. | Quarter Pillar Trim |
|
|
|

|
|
|
|
|
|
|||||||||
|
|
|

Installation
|
SRS components are located in this area. Review the SRS component locations and the precautions and procedures before doing repairs or service. |
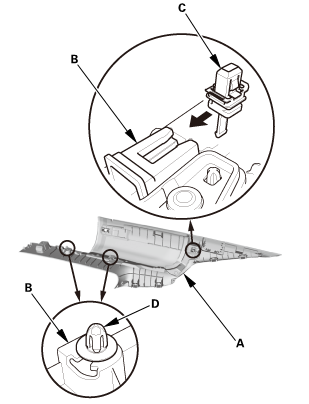
| 1. | Quarter Pillar Trim - Check |
|
|
|
||||||||||||||||||||||||||||||

| 2. | Headliner/Pillar Trim Overlap - Check |
|
|
|
 tms
tms|
|
|
|
|
|
||||||||||||||||
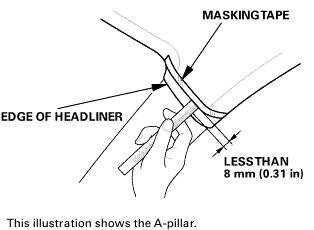 sun:orlessthan
|
|
|
 slmws
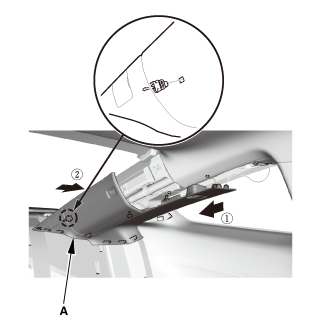
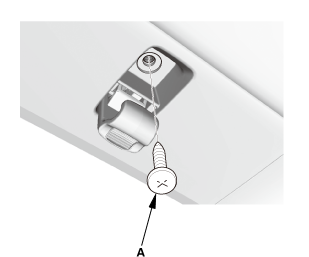
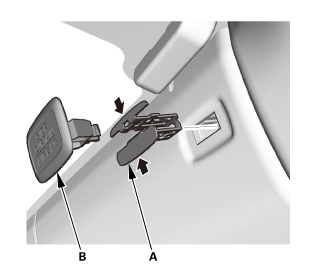
slmws| 3. | Quarter Pillar Trim |
|
|
|
|
|
|
|||||||||||||||||||||
|
|
|
|
|
|
 Passenger's Kick Panel Removal and Installation
8571G4 PASSENGER SIDE
Removal
1.
Front Door Sill Trim - 4-Door
1.
Remove the front door sill trim (A). ...
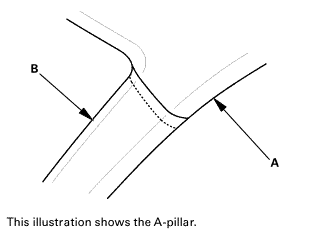
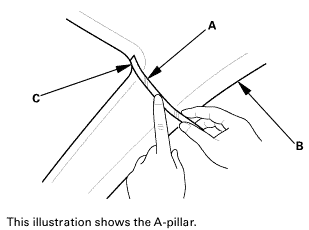
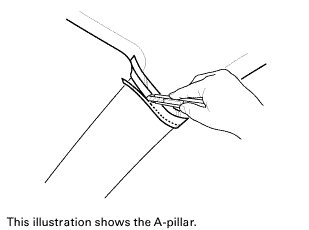
 A-Pillar Trim Removal and Installation
Removal
SRS components are located in this area. Review the SRS component locations
and the precautions and procedures before doing repairs or service.
1.
Fro ...
See also:
Honda Civic Owners Manual. Automatic Import of Cellular Phonebook and Call History
When Automatic Phone Sync is set to On
When your phone is paired, the contents of its
phonebook and call history are automatically
imported to the system.
Automatic Import of Cellular Phonebook and Call
History
When you select a name from the list in the cellular
phonebo ...
