Honda Civic manuals

Honda Civic Service Manual: Airbag and Tensioner Disposal - in the Vehicle ('13-'14)

Honda Civic Service Manual / Body / Restraints / Secondary / Airbag and Tensioner Disposal - in the Vehicle ('13-'14)

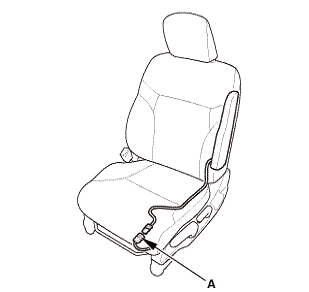
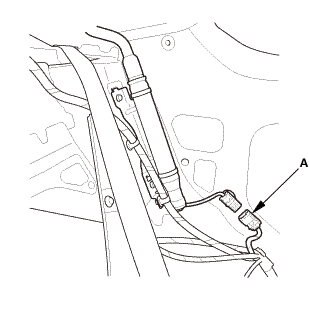
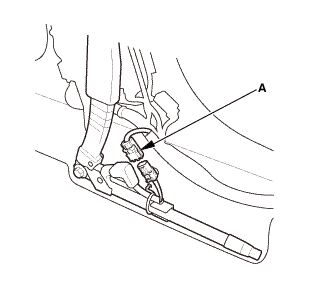
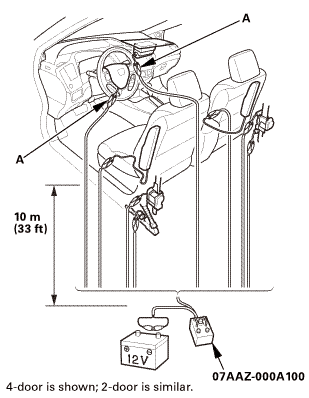
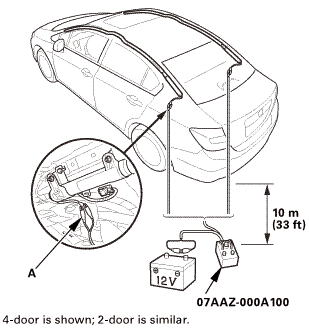
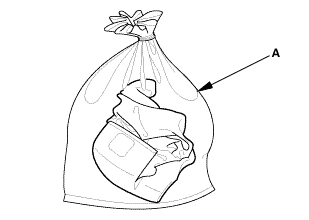
Before scrapping any front airbags, side airbags, side curtain airbags, driver's seat belt outer lap tensioner, or front seat belt tensioners (including those in a whole vehicle to be scrapped), the part(s) must be deployed. If the vehicle is still within the warranty period, the Honda District Parts and Service Manager must give approval and/or special instruction before deploying the part(s). Only after the part(s) have been deployed (as the result of vehicle collision, for example), can they be scrapped. If the parts appear intact (not deployed), treat them with extreme caution. Follow this procedure.

1. Airbag and Tensioner - Dispose

If an SRS equipped vehicle is to be entirely scrapped, its front airbags, side airbags, side curtain airbags, driver's seat belt outer lap tensioner, and front seat belt tensioners should be deployed while still in the vehicle. These parts should not be considered as salvageable parts and should never be installed in another vehicle.

Deploying Airbags in the Vehicle

1.

Turn the ignition switch to LOCK (0). Do the battery terminal disconnection procedure, then wait at least 3 minutes before starting work.

2.

Confirm that each front airbag, side airbag, side curtain airbag, driver's seat belt outer lap tensioner, or front seat belt tensioner is securely mounted.

3.

Confirm that the deployment tool is functioning properly by following the check procedure on the tool label.

Driver's Airbag

4.

Remove the access panel (A).

5.

Disconnect the driver's airbag inflator connector (B) on the cable reel harness.

Front Passenger's Airbag

6.

Lower the glove box.

7.

Disconnect the front passenger's airbag inflator connector (A) on the dashboard wire harness.

Side Airbag

8.

Disconnect the driver's and front passenger's side airbag inflator connectors (A) on the floor wire harness.

2-door

4-door

Side Curtain Airbag

9.

2-door: Remove the rear side trim panel.

10.

4-door: Remove the C-pillar trim.

11.

Disconnect the left and right side curtain airbag inflator connectors (A) on the floor wire harness.

Driver's Side

Front Passenger's Side

Front Seat Belt Tensioner (2-door USA and Canada models)

12.

Remove the rear side trim panel.

13.

Driver's side: Locate the driver's seat belt tensioner connector (A) on the floor wire harness. Do not disconnect the seat belt tensioner connector.

14.

Front passenger's side: Disconnect the front passenger's seat belt tensioner connector (B) on the floor wire harness. Pull the front seat belt out all the way and cut it.

Driver's Side

Front Passenger's Side

Front Seat Belt Tensioner (4-door USA and Canada models)

15.

Remove the B-pillar lower trim.

16.

Locate the driver's and front passenger's seat belt tensioner connectors (A) on the floor wire harness. Do not disconnect the seat belt tensioner connectors.

17.

Front passenger's side: Locate the selectable energy absorption device connector (B) on the floor wire harness. Do not disconnect the seat belt tensioner connectors.

2-door

4-door

Front Seat Belt Tensioner (Mexico models)

18.

2-door: Remove the rear side trim panel.

19.

4-door: Remove the B-pillar lower trim.

20.

Locate the driver's and front passenger's seat belt tensioner connectors (A) on the floor wire harness. Do not disconnect the seat belt tensioner connectors.

Driver's Seat Belt Outer Lap Tensioner (4-door USA and Canada models)

21.

Remove the B-pillar lower trim.

22.

Disconnect the driver's seat belt outer lap tensioner connector (A) on the floor wire harness.

23.

Cut off each connector and strip the ends of the wires. To prevent inflators from being deployed unexpectedly, twist each pair of wires coming from each inflator to have each inflator short-circuited.

24.

Select one pair of wires and untwist the wires. Clip an alligator clip (A) to each end of the wires, so that the inflator is ready to be deployed.

NOTE:

Place the deployment tool at least 10 m (33 ft) away from the vehicle.

Since the driver’s and front passenger’s airbags have dual inflators, make sure to twist the correct pair of wires to have each inflator short-circuited.

2-door USA and Canada models: The front passenger seat belt has two inflators. The one is in the tensioner and the other one is in the built-in selectable energy absorption device. Make sure to deploy both inflators before disposing the front passenger seat belt.

25.

Connect a 12 volt battery to the tool.

If the green light on the tool comes on, the igniter circuit is defective and cannot deploy the component. Go to Disposal of Damaged Components.

If the red light on the tool comes on, the component is ready to be deployed.

26.

Push the tool's deployment switch. The airbags and tensioners should deploy (deployment is both highly audible and visible: A loud noise and rapid inflation of the bag, followed by slow deflation).

If the components deploy and the green light on the tool comes on, continue with this procedure.

If a component does not deploy, and the green light comes on, its igniter is defective. Go to Disposal of Damaged Components.

During deployment, the airbags can become hot enough to burn you. Wait for 30 minutes after deployment before touching the airbags.

27.

Dispose of the complete airbag or tensioner. No part of it can be reused. Place it in a sturdy plastic bag (A), and seal it securely. Dispose of the deployed airbag according to your local regulations.

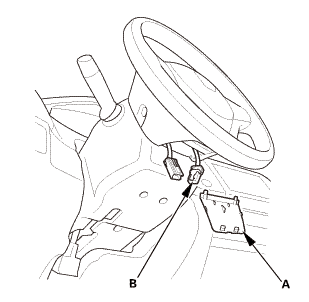
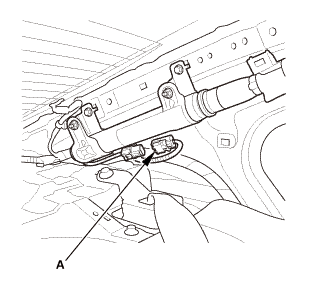
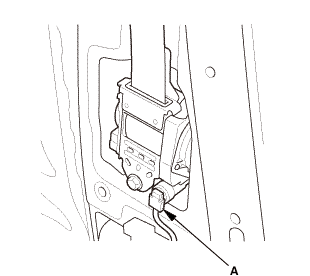
SRS Unit Removal and Installation
751100 Removal NOTE: SRS components are located in this area. Review the SRS component locations and the precautions and procedures before doing repairs or service. ...

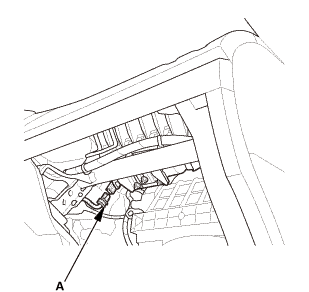
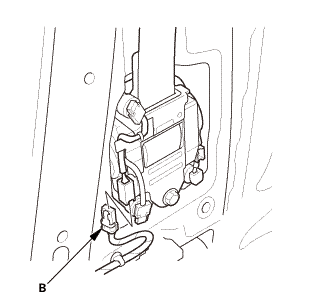
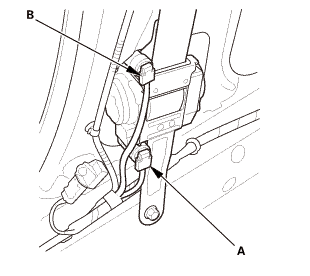
Driver's Side Airbag Removal and Installation
751107 LEFT Removal NOTE: SRS components are located in this area. Review the SRS component locations and t ...

See also:

Honda Civic Owners Manual. Playing Bluetooth’ Audio
Your audio system allows you to listen to music from your Bluetooth-compatible phone. This function is available when the phone is paired and connected to the vehicle’s Bluetooth’ HandsFreeLink’ (HFL) system. Phone Setup Playing Bluetooth’ Audio Not all Bluetooth-enabled phones ...

© 2016-2024 Copyright www.hocivic.com

0.0082