Honda Civic manuals

Honda Civic Service Manual: Transmission End Cover Air Check Valve Removal and Installation (A/T)

Honda Civic Service Manual / Powertrain / Transmission/Transaxle / Automatic / Transmission Unit / Transmission End Cover Air Check Valve Removal and Installation (A/T)

Removal

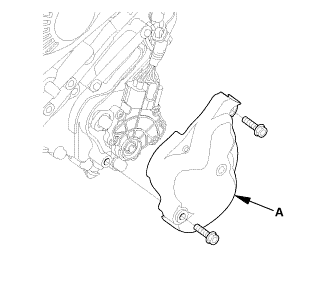
1. Transmission Range Switch Cover

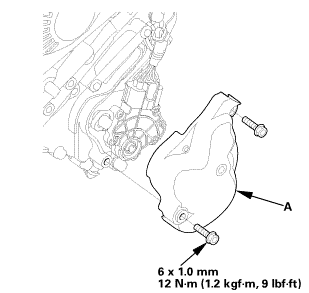
1.

Remove the transmission range switch cover (A).


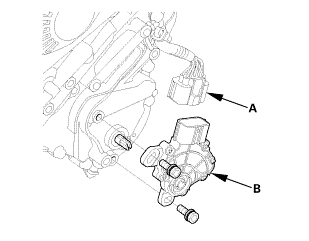
2. Transmission Range Switch


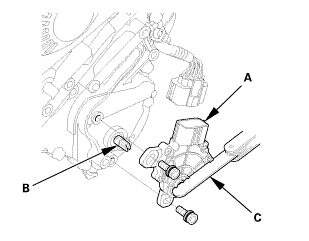
1.

Disconnect the connector (A).


2.

Remove the transmission range switch (B).


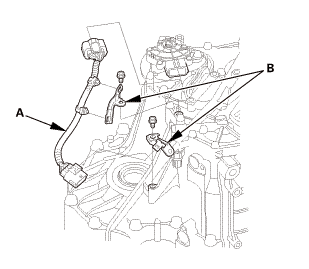
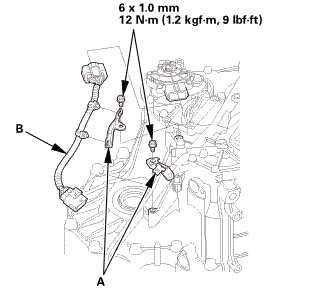
3. Transmission Range Switch Subharness


1.

Remove the transmission range switch subharness (A).


2.

Remove the clamp brackets (B).


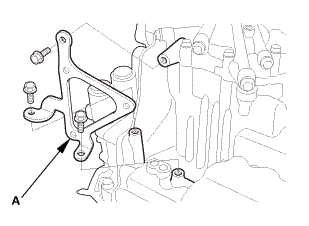
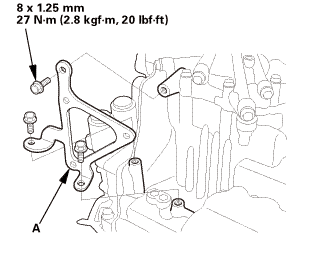
4. ATF Warmer Bracket

1.

Remove the ATF warmer bracket (A).


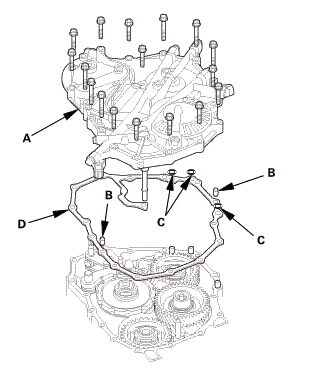
5. Transmission End Cover

1.

Remove the end cover (A), the dowel pins (B), the O-rings (C), and the end cover gasket (D).


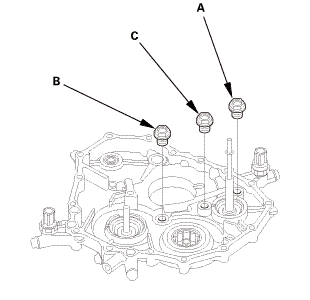
6. Air Check Valve


NOTE: Do not blow out the filter part of the air check valve with compressed air. Replace the air check valve, if the filter or the check valve is clogged or damaged.


1.

Remove the 2nd air check valve (A).


2.

Remove the 3rd air check valve (B).


3.

Remove the 5th air check valve (C).


Installation

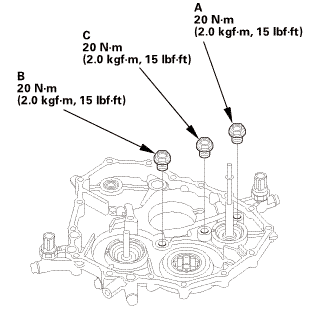
NOTE: Apply a light coat of clean ATF on all moving parts before installation.


1. Air Check Valve


NOTE: Do not blow out the filter part of the air check valve with compressed air. Replace the air check valve, if the filter or the check valve is clogged or damaged.


1.

Install the 2nd air check valve (A).


2.

Install the 3rd air check valve (B).


3.

Install the 5th air check valve (C).


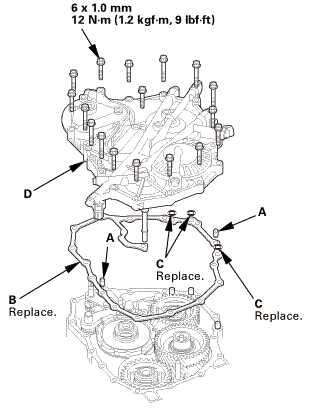
2. Transmission End Cover

mm12u....um,!mk)


1.

Install the dowel pins (A) and a new gasket (B).


2.

Install new O-rings (C) over the ATF pipes.


3.

Install the end cover (D).


3. ATF Warmer Bracket

mm27lhf!

1.

Install the ATF warmer bracket (A).


4. Transmission Range Switch Subharness


1.

Install the clamp brackets (A).


2.

Install the transmission range switch subharness (B).


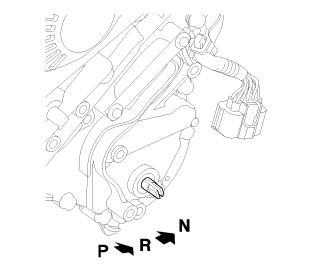
5. Transmission Range Switch

1.

Make sure the selector control shaft is in the N position. If necessary, move the selector control shaft to the N position.


NOTE: Do not use the selector control shaft to adjust the shift position. If the selector control shaft tips are squeezed together it will cause a faulty signal or position due to play between the selector control shaft and switch.


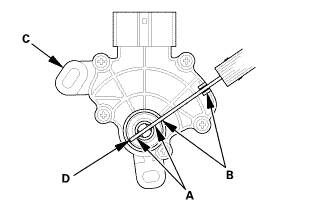
2.

Align the cutouts (A) on the rotary-frame with the neutral positioning cutouts (B) on the transmission range switch (C), then put a 2.0 mm (0.079 in) feeler gauge blade (D) in the cutouts to hold the switch in the N position.


NOTE: Be sure to use a 2.0 mm (0.079 in) blade or equivalent to hold the switch in the N position.


3.

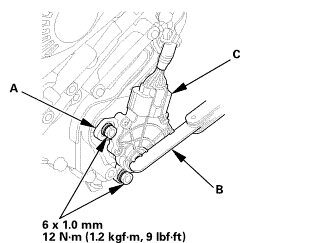
Install the transmission range switch (A) gently on the selector control shaft (B) while holding it in the N position with the 2.0 mm (0.079 in) blade (C).


4.

Tighten the bolts on the transmission range switch (A) while you continue holding the N position.


NOTE: Do not move the transmission range switch when tightening the bolts.


5.

Remove the feeler gauge (B).


6.

Check the connector (C) for corrosion, dirt, or oil, and clean or repair if necessary, then connect the connector securely.


6. Transmission Range Switch Cover

mmnm

1.

Install the transmission range switch cover (A).


Shift Solenoid Wire Harness Removal and Installation (A/T)
7371J4 1. Vehicle Lift 1. Raise the vehicle on a lift, and make sure it is securely supported. ...

Manual
...

See also:

Honda Civic Owners Manual. Rear Seat Heaters
The power mode must be in ON to use the seat heaters. There is no heater in the rear center seating position. The indicator for your setting comes on while the seat heater is in use. Press the button on the opposite side to turn the heater off. The indicator goes off. While in HI, ...

Nissan Kicks - OM - Seats - Wheels and tires - Audio system -
© 2016-2026 Copyright www.hocivic.com

0.0123