Honda Civic Service Manual: Side Curtain Airbag Removal and Installation (2-door)
7521A5 LEFT
7521C2 RIGHT
7521C9 BOTH

Removal
|
NOTE: |
|
|||
|
|||
|

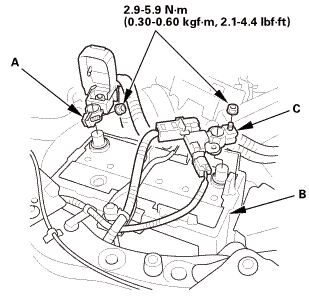
| 1. | Battery Terminal (SRS) - Disconnection |
|
|
|
|||||||||||||||
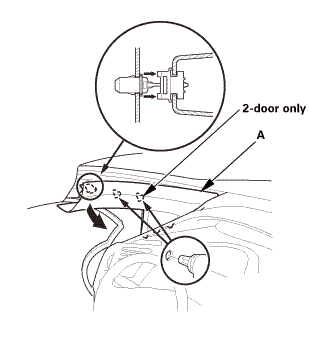
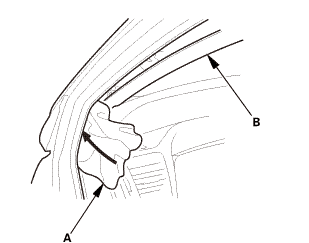
| 2. | A-Pillar Trim Both |
|
|
|
|
|
|
|
|
|
||||||
|
|
|
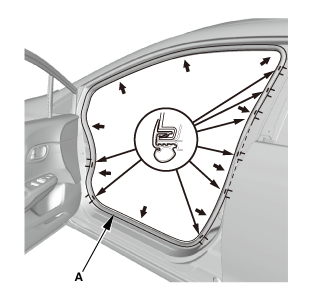
| 3. | Front Door Opening Seal As Needed Both |
|
|
|

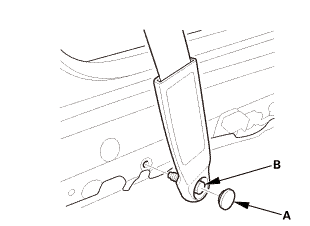
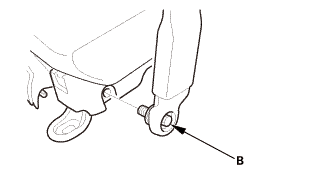
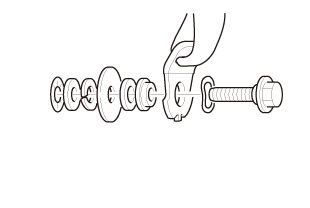
| 4. | Both Front Seat Belt Lower Anchor Bolts |
|
Driver's side
Passenger's side
|
|
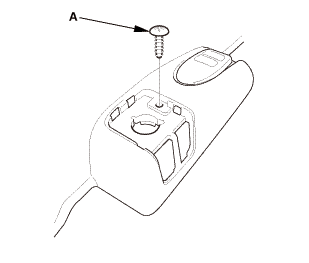
| 5. | Front Door Sill Trim - 2-Door |
|
|
|
|
|
|
|
|
|
| 6. | Front Door Sill Trim - 2-Door |
|
|
|
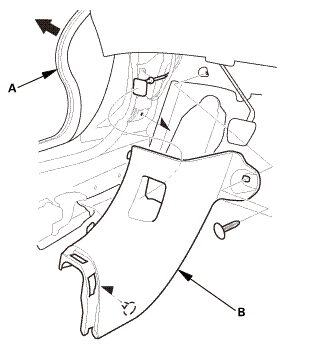
| 7. | Both Kick Panels |
|
Driver's side
Passenger's side
|
|
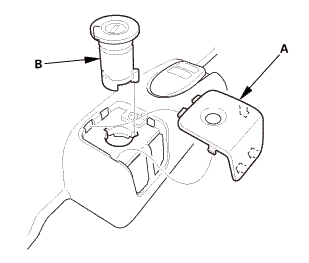
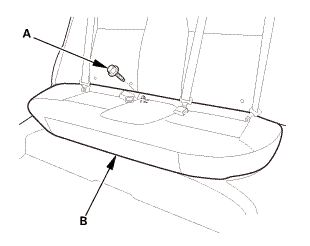
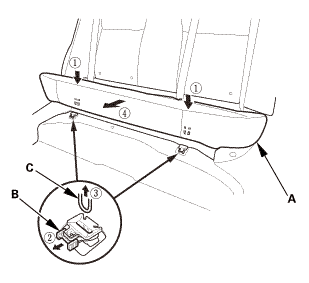
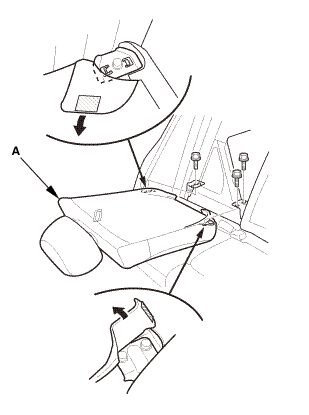
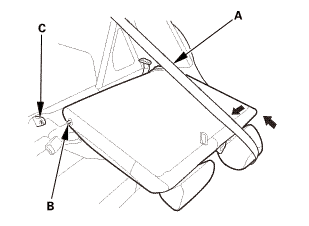
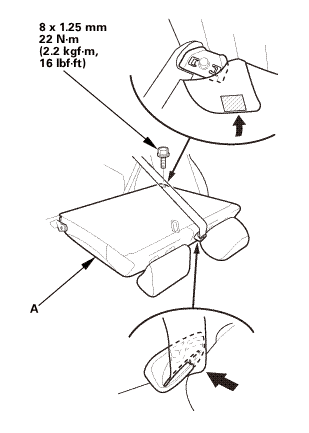
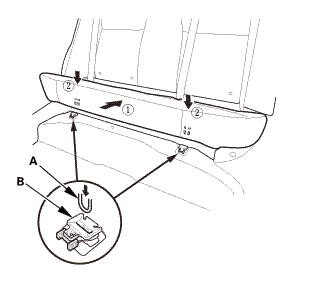
| 8. | Rear Seat Cushion |
|
|
|
|
|
|
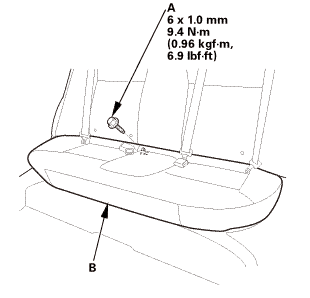
| 9. | Rear Seat-Back - Fold Down |
|
|
|
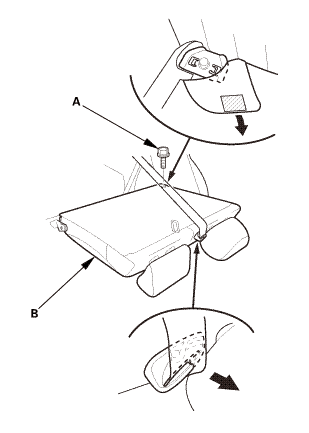
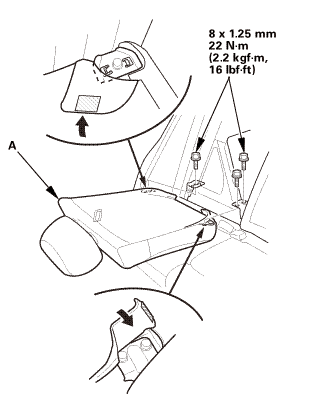
| 10. | Right Rear Seat-Back - Split Fold Down |
|
|
|
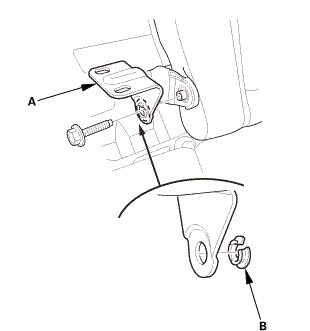
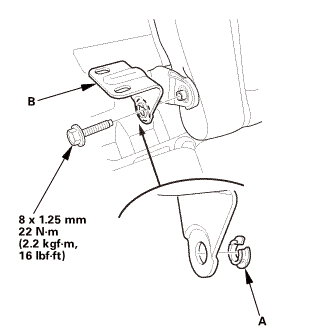
| 11. | Center Pivot Bracket - Split Fold Down |
|
|
|
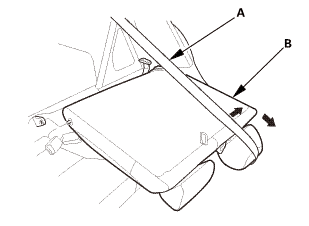
| 12. | Left Rear Seat-Back - Split Fold Down |
|
|
|
|
|
|
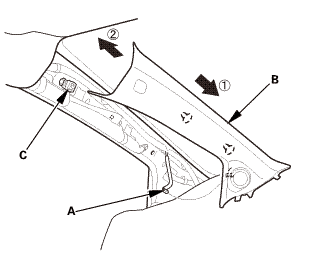
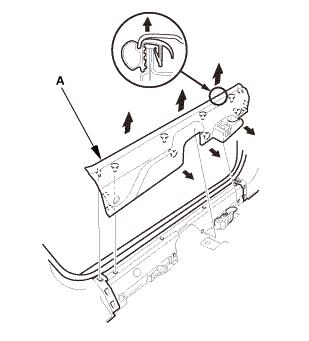
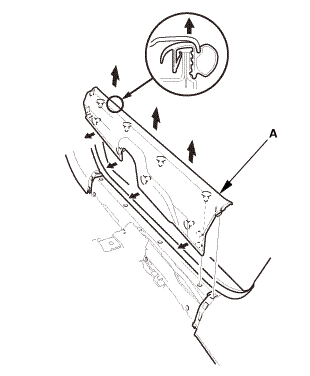
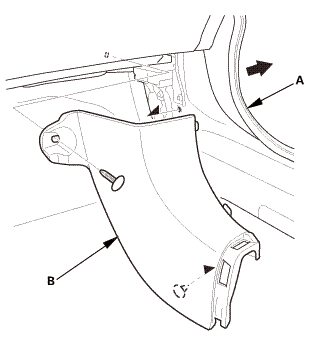
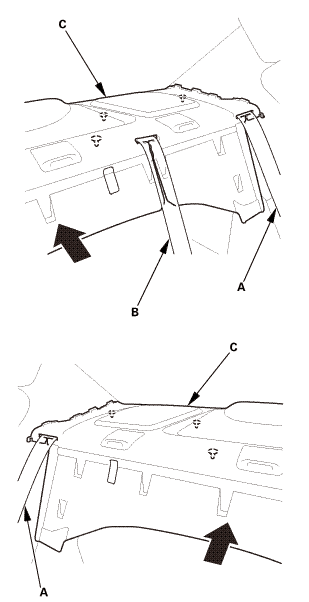
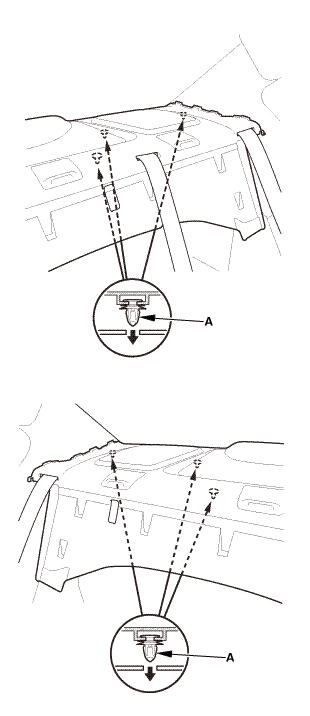
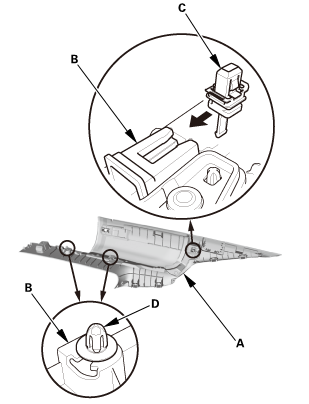
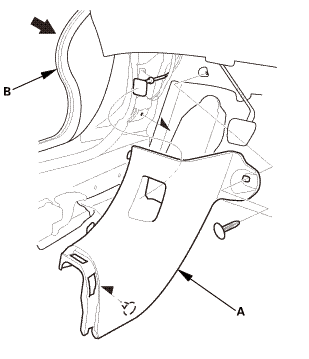
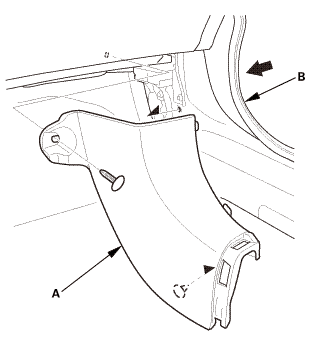
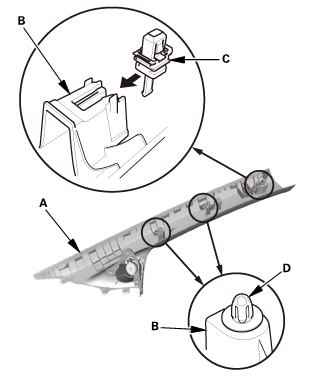
| 13. | Both Quarter Pillar Trims |
|
|
|

|
|
|
|
|
|
||||||||||||
|
|
|
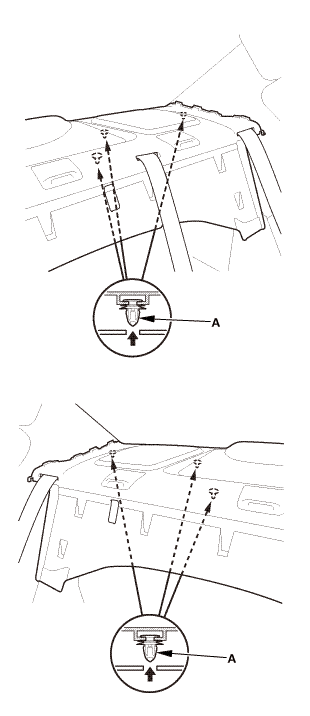
| 14. | Rear Shelf Trim |
|
|
|
|
|
|
|
|
|
|
|
|
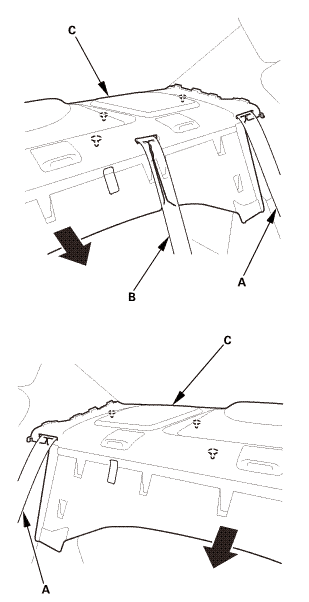
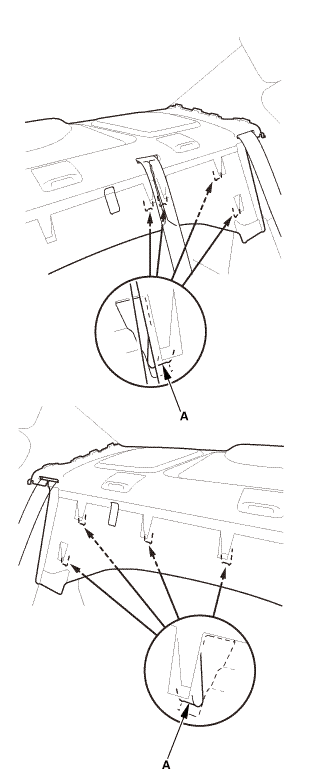
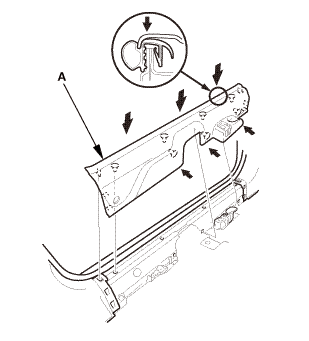
| 15. | Both Rear Side Trim Panels |
|
|
|
| 16. | Both B-Pillar Upper Trims |
|
|
|
|
|
|
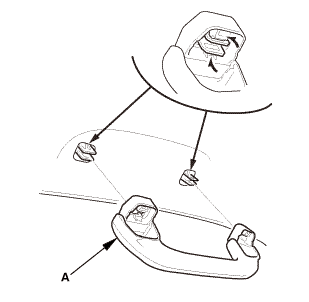
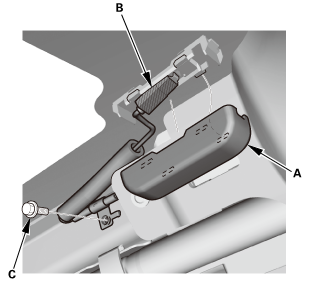
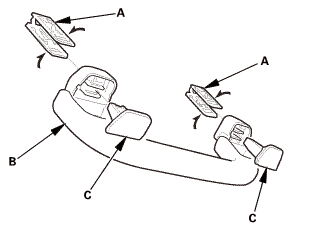
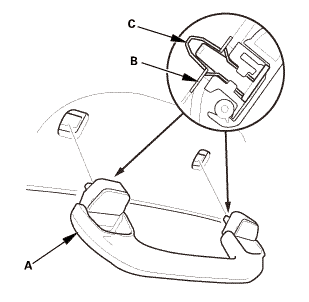
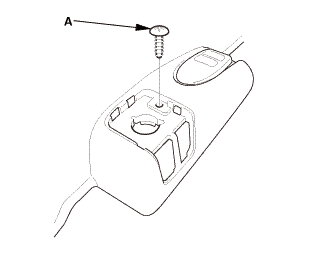
| 17. | Grab Handles for One Vehicle |
|
|
|
|
|
|
|
|
|
|
|
|
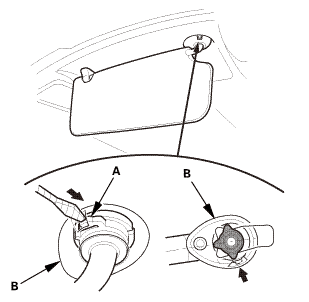
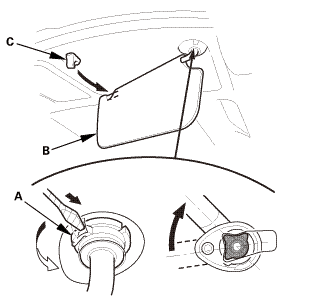
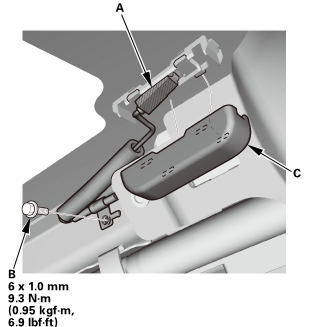
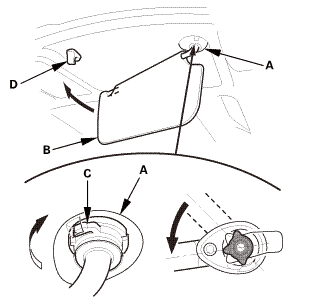
| 18. | Both Sunvisors |
|
|
|
||||||
|
|
|
||||||
|
|
|
||||||
|
|
|
|
|
|

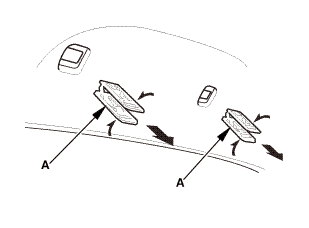
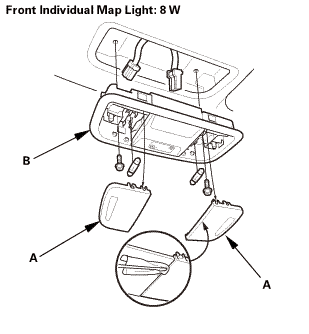
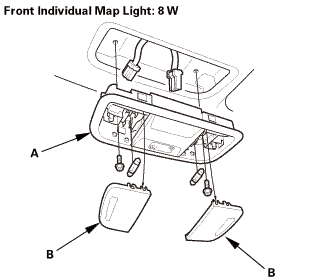
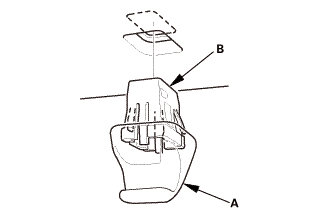
| 19. | Front Individual Map Light (without moonroof) |
|
|
|
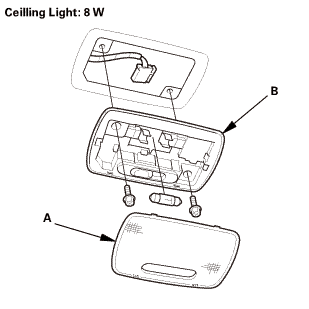
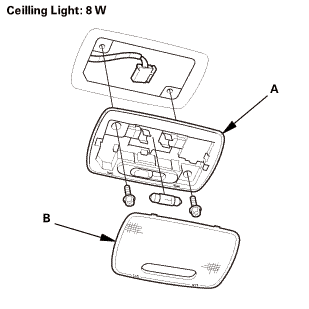
| 20. | Ceiling Light |
|
|
|
 llghr
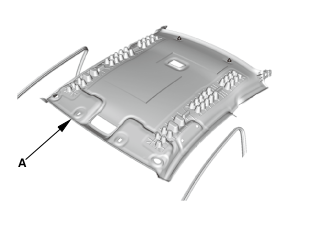
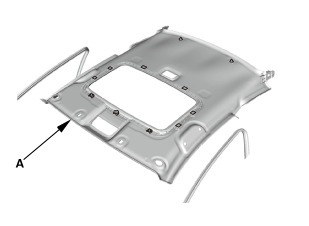
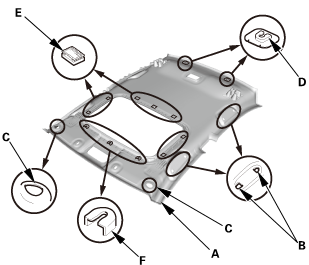
llghr| 21. | Headliner - 2-Door |
|
|
|
|
|
|
|
|
|
|
|
|
|
|
|
|
|
|
|
|
|
|
Without moonroof
With moonroof
|
|
|
|
|
||||||

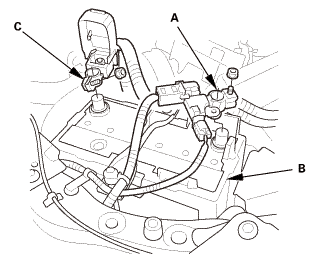
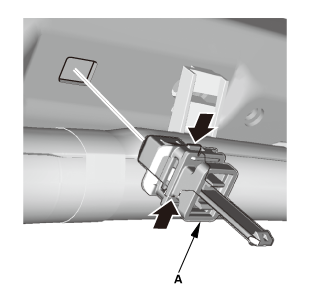
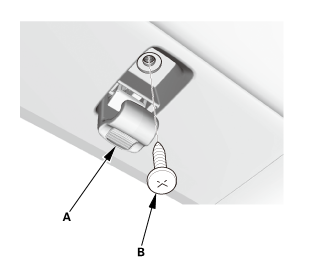
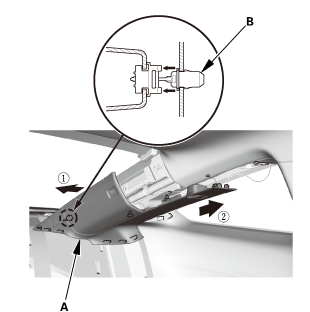
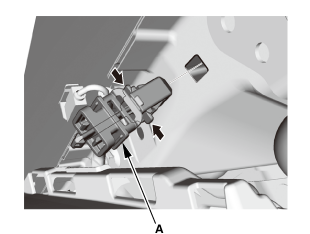
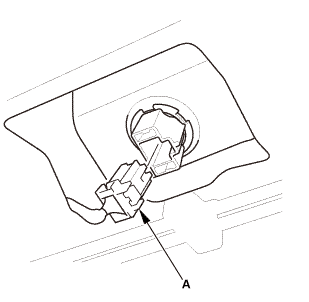
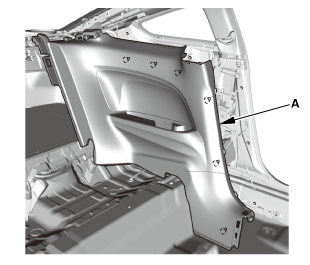
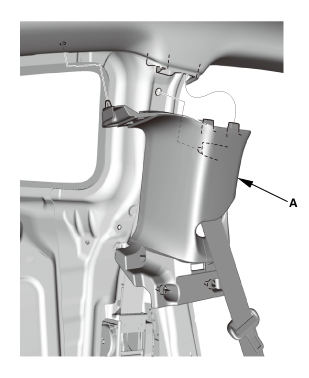
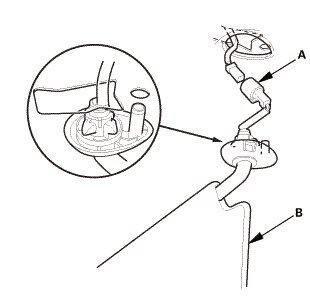
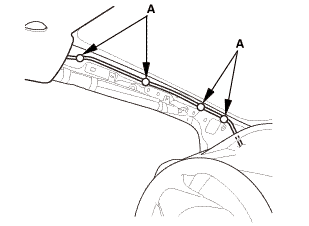
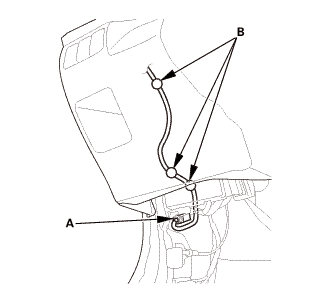
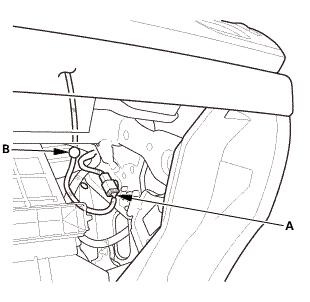
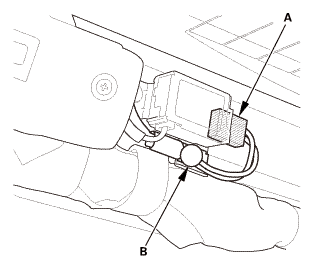
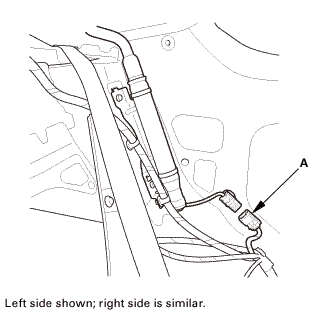
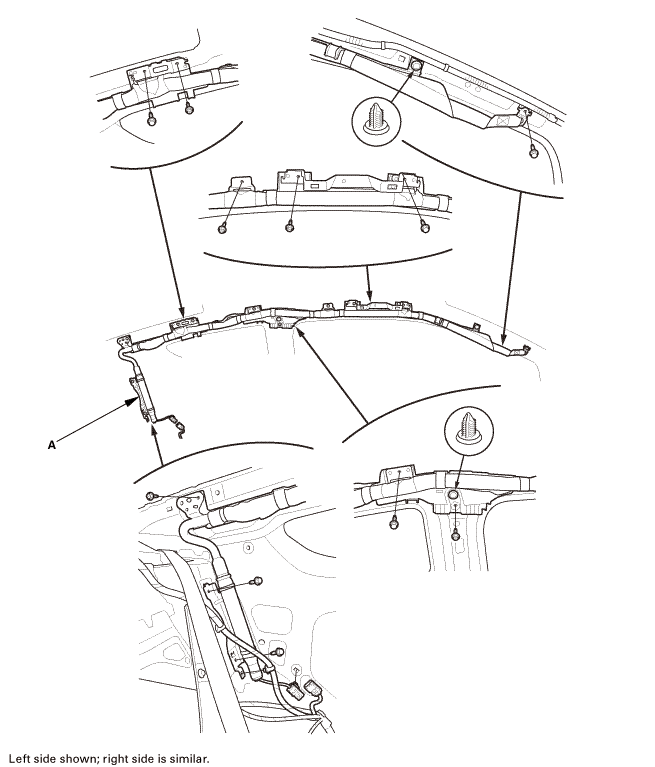
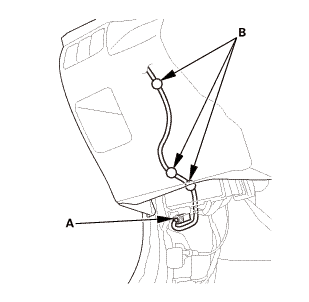
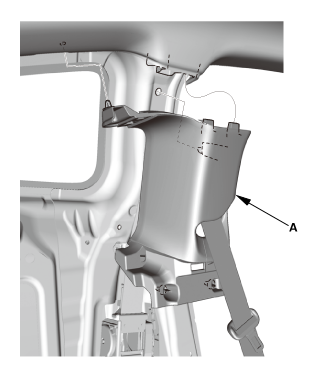
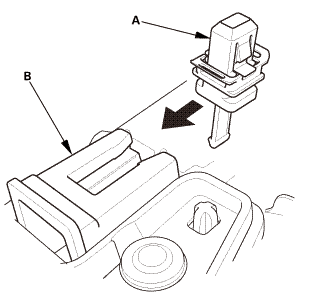
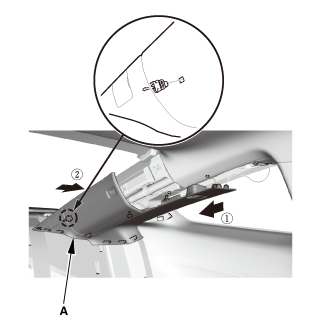
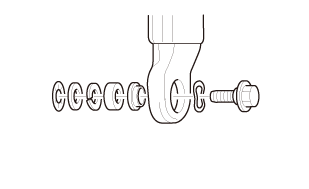
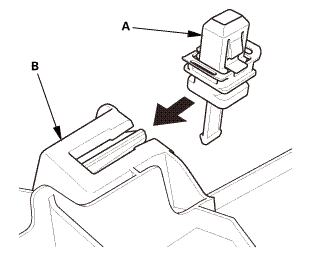
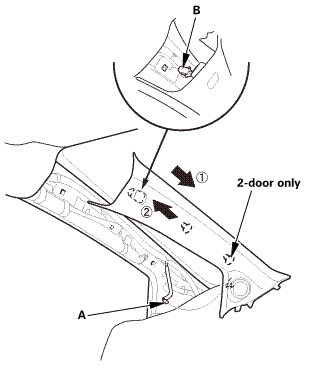
| 22. | Side Curtain Airbag |
|
|
|
|
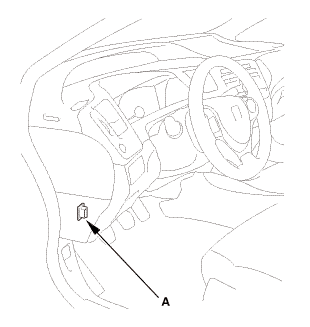
2. |
Remove the side curtain airbag (A). |

Installation
|
NOTE: SRS components are located in this area. Review the SRS component locations and the precautions and procedures before doing repairs or service. |
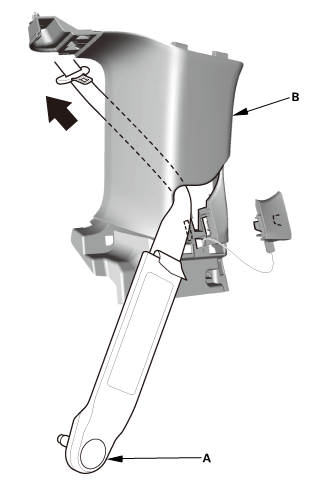
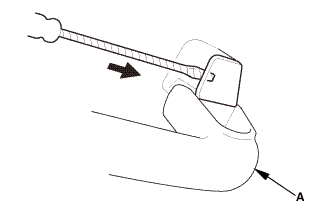
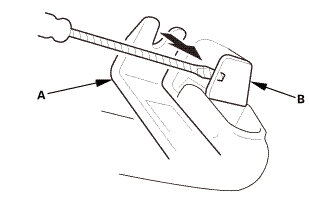
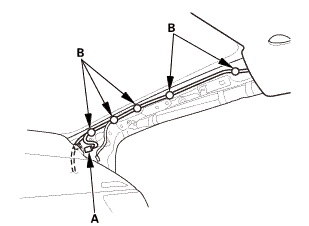
| 1. | Side Curtain Airbag |
|
NOTE: |
|
|||
|
|||
|
|||
|
|||
|
|||
|
|
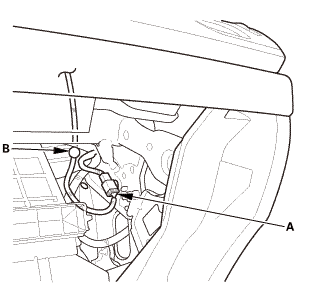
1. |
Install the side curtain airbag (A). |
 11mm11.111....(n1111sideis
|
|
|
| 2. | Battery Terminal (SRS) - Reconnection |
|
|
|
||||||||||||||||
 (o.2ao.sam.
| 3. | HDS DLC - Connection |
|
|
|
| 4. | DTC - Clear |
|
| 5. | Confirm Proper SRS Operation |
|
| 6. | Headliner - Check |
|
|
|
|||||||||||||||||||||||||
| 7. | Headliner - 2-Door |
|
|
|
||||||
|
Without moonroof
With moonroof
|
|
|
|
|
 asnwu
asnwu
|
|
|
|
|
|
|
|
|

|
|
|
|
|
|
|
|
|

| 8. | Ceiling Light |
|
|
|
 cullingllghr
| 9. | Front Individual Map Light (without moonroof) |
|
|
|
| 10. | Sunvisor - Check |
|
|
|
||||||||||||||||||||||||||||||||
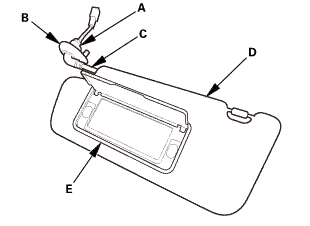
| 11. | Both Sunvisors |
|
|
|
|
|
|
|
|
|
| 12. | Grab Handle - Check |
|
|
|
||||||||||||||

| 13. | Grab Handles for One Vehicle |
|
|
|
|
|
|
| 14. | Both B-Pillar Upper Trims |
|
|
|

|
|
|
| 15. | Both Rear Side Trim Panels |
|
|
|
| 16. | Rear Shelf Trim |
|
|
|
|
|
|
|
|
|
|
|
|
| 17. | Quarter Pillar Trim - Check |
|
|
|
||||||||||||||||||||||||||||||
| 18. | Both Quarter Pillar Trims |
|
|
|
|
|
|
||||||||||||||||||||||||
|
|
|
|
|
|
| 19. | Left Rear Seat-Back - Split Fold Down |
|
|
|
|
|
|
| 20. | Center Pivot Bracket - Split Fold Down |
|
|
|
| 21. | Right Rear Seat-Back - Split Fold Down |
|
|
|
| 22. | Rear Seat-Back - Fold Down |
|
|
|
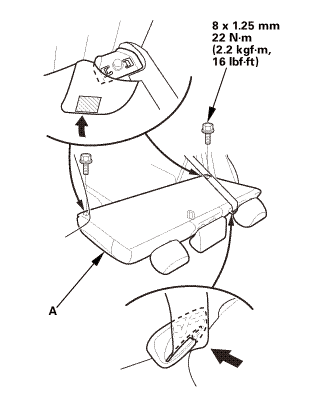
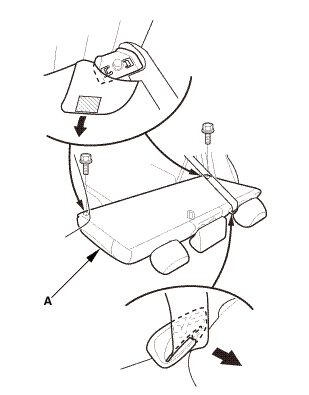
| 23. | Rear Seat Cushion |
|
|
|
|
|
|
| 24. | Both Kick Panels |
|
Driver's side
Passenger's side
|
|
| 25. | Front Door Sill Trim - 2-Door |
|
|
|

| 26. | Front Door Sill Trim - 2-Door |
|
|
|
|
|
|
|
|
|

| 27. | Both Front Seat Belt Lower Anchor Bolts |
|
Driver's side
Passenger's side
|
|
||||||
 @@@
@@@
|
Driver's side
Passenger's side
|
|
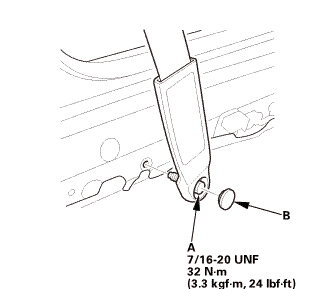 7m2nmn:mm
 unr:2inm,
| 28. | Front Door Opening Seal as Needed Both |
|
|
|
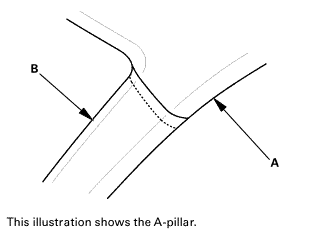
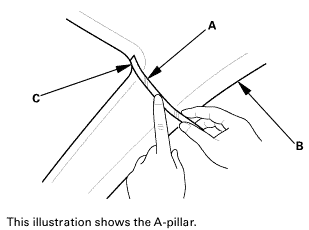
| 29. | A-Pillar Trim - Check |
|
|
|
||||||||||||||||||||||||||||||
| 30. | Headliner/Pillar Trim Overlap - Check |
|
|
|
 tms
tms
|
|
|
|
|
|
||||||||||||||||
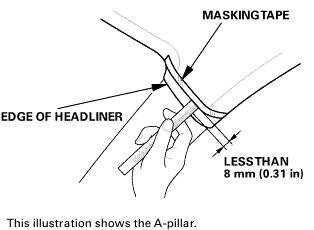 sun:orlessthan
|
|
|
 slmws
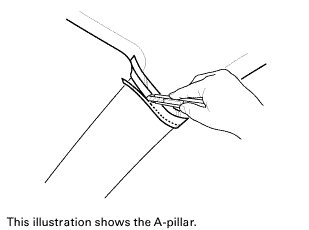
slmws| 31. | A-Pillar Trim Both |
|
|
|
|
|
|
||||||||||||||||||||||||||||||
 Rear Window Removal and Installation (4-door except Natural Gas models)
832120
Removal
1.
Rear Seat Cushion
1.
Remove the bolt (A) ...
 Side Impact Sensor (First) Removal and Installation (2-door)
7521B6 LEFT FRONT
7521B7 RIGHT FRONT
Removal
NOTE: SRS components are located in this area. Review the SRS
component locations and the precautions and pr ...
See also:
Honda Civic Service Manual. Navigation System Symptom Troubleshooting Rearview camera image does not change
when selecting different views ('13)
Rearview camera image does not change
NOTE:
You can select three different rearview camera angles for backing up.
If there is no camera image on the display, go to Rearview camera image
does not come on or work properly troubleshooting.
...
