Honda Civic Service Manual: Gauge Control Module (Speedo) Removal and Installation ('13)

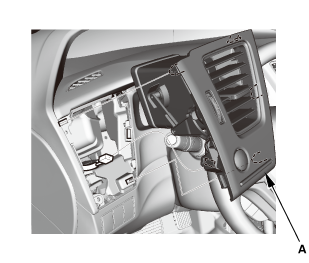
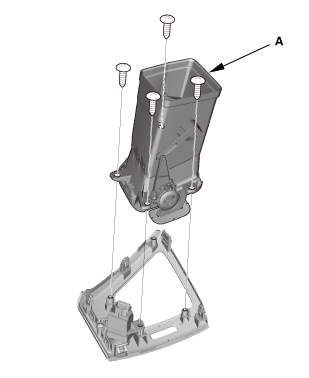
| 1. | Driver's Outer Vent |
|
|
|
|
|
|
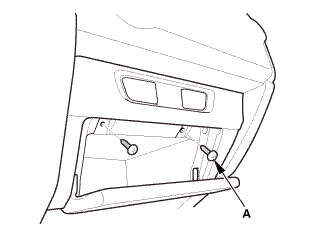
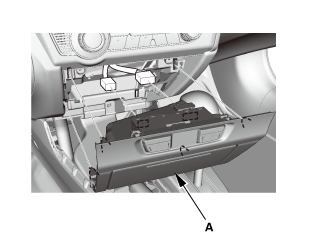
| 2. | Dashboard Center Pocket |
|
|
|
|
|
|
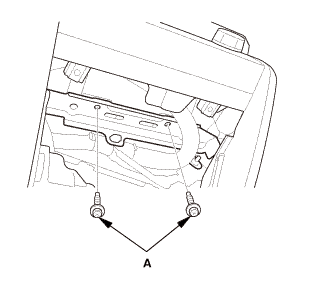
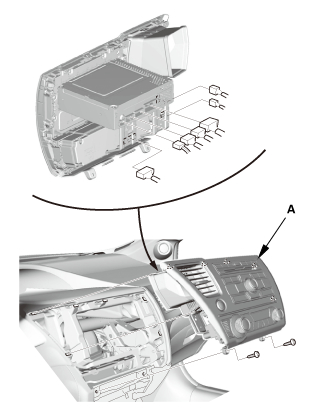
| 3. | Audio Unit Assembly (Without audio panel pocket) |
|
|
|

|
|
|
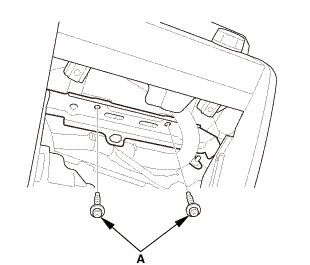
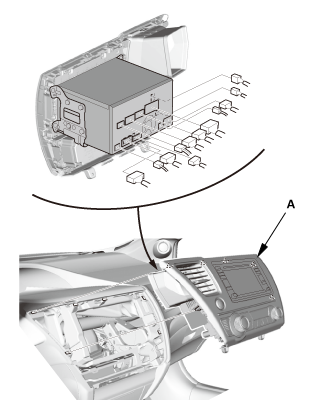
| 4. | Audio Unit Assembly (With audio panel pocket) |
|
|
|
|
|
|

| 5. | Audio-Navigation Unit Assembly |
|
|
|
|
|
|
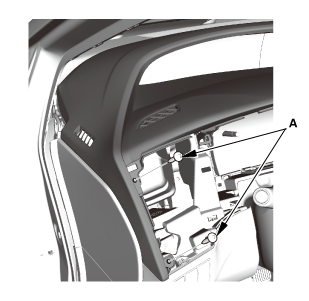
| 6. | Driver's Dashboard Lower Cover |
|
|
|

| 7. | Dashboard Subdisplay Visor |
|
|
|

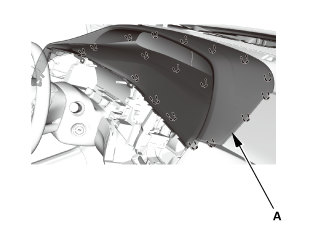
| 8. | Dashboard Meter Visor |
|
|
|
|
|
|
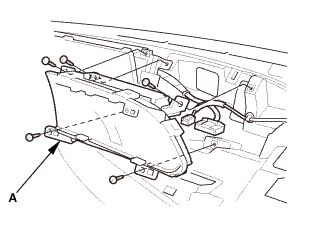
| 9. | Information Display Unit |
|
|
|
| 10. | Multi-Information Display Unit |
|
|
|
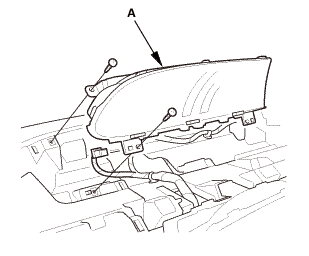
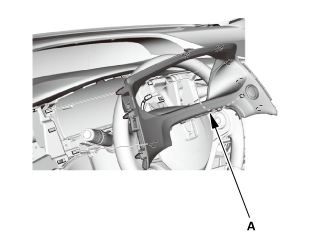
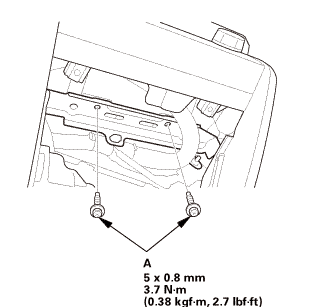
| 11. | Gauge Control Module - Speedo |
|
|
|


| 1. | Gauge Control Module - Speedo |
|
|
|
| 2. | Multi-Information Display Unit |
|
|
|
| 3. | Information Display Unit |
|
|
|
| 4. | Dashboard Meter Visor |
|
|
|
|
|
|
| 5. | Dashboard Subdisplay Visor |
|
|
|
| 6. | Driver's Dashboard Lower Cover |
|
|
|
| 7. | Audio-Navigation Unit Assembly |
|
|
|
||||||
|
|
|
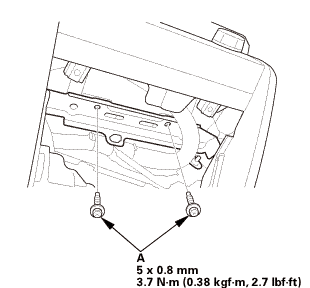 mm3.72.7
| 8. | Audio Unit Assembly (With audio panel pocket) |
|
|
|
||||||
|
|
|
| 9. | Audio Unit Assembly (Without audio panel pocket) |
|
|
|
||||||
|
|
|
| 10. | Dashboard Center Pocket |
|
|
|
|
|
|
| 11. | Driver's Outer Vent |
|
|
|
|
|
|

 Rewriting the ODO Data and Transferring the Maintenance Minder™ Data to a New
Gauge Control Module ('13)
Rewriting the ODO Data and Transferring the Maintenance Minder™ Data to a New
Gauge Control Module ('13)
1.
HDS DLC - Connection
NOTE: For specific operations, refer to the user's manual that
came with the Honda Diagnostic Sy ...
See also:
Honda Civic Owners Manual. Maintaining the Bumpers and Other Resin Coated Parts
If you get gasoline, oil, engine coolant, or battery fluid on resin coated
parts, they
may be stained or the coating may peel. Promptly wipe it away using a soft cloth
and
clean water.
Maintaining the Bumpers and Other Resin Coated
Parts
Ask a dealer about the correct coatin ...
