Honda Civic Service Manual: Dashboard/Steering Hanger Beam Disassembly and Reassembly (Without Navigation)

|
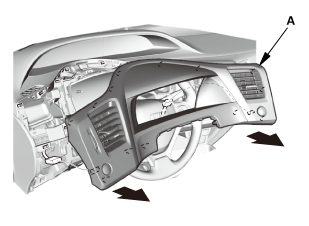
SRS components are located in this area. Review the SRS component locations and the precautions and procedures before doing repairs or service. |
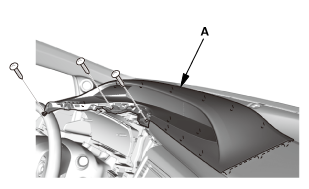
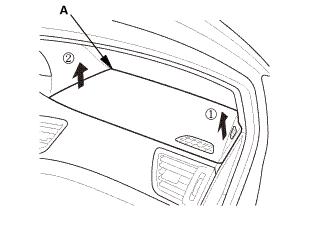
| 1. | Dashboard Subdisplay Visor |
|
|
|
| 2. | Dashboard Meter Visor |
|
|
|
| 3. | Gauge Control Module - Tach |
|
|
|

| 4. | Information Display Unit |
|
|
|
| 5. | Multi-Information Display Unit |
|
|
|
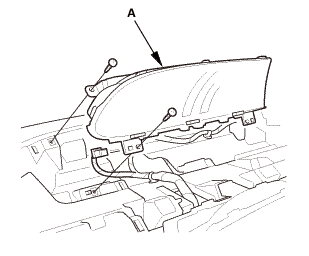
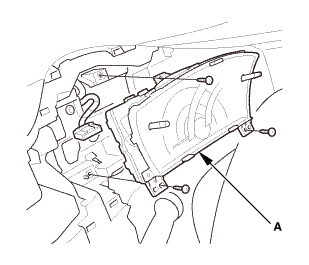
| 6. | Gauge Control Module - Speedo |
|
|
|

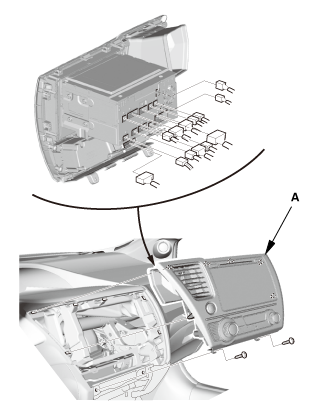
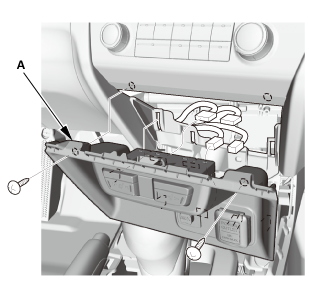
| 7. | Center Lower Panel |
|
|
|
||||||

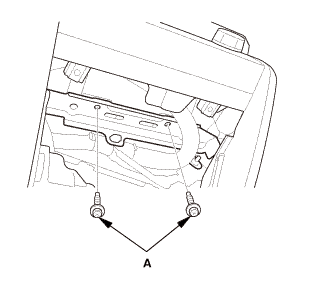
| 8. | Audio Unit Assembly |
|
|
|

|
|
|
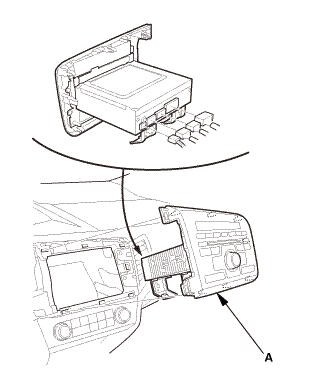
| 9. | Audio Unit Assembly (With display audio) |
|
|
|
|
|
|
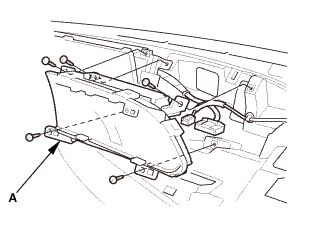
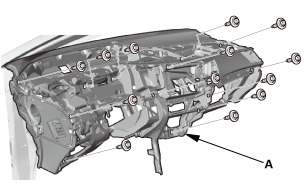
| 10. | Front Passenger's Airbag Assembly |
|
|
|
|
|
|
||||||
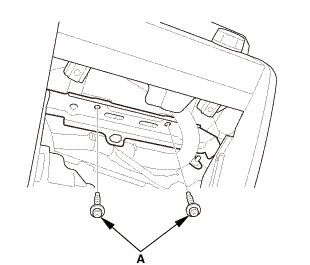
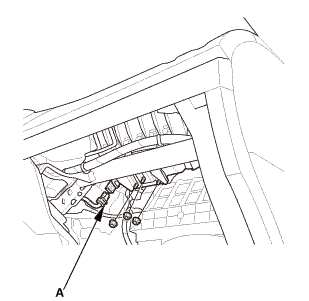
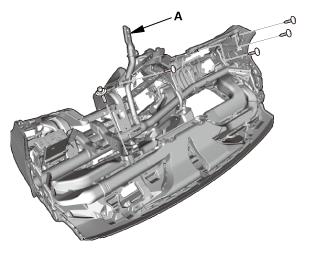
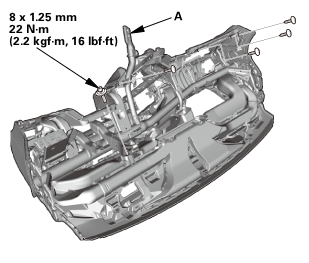
| 11. | Center Joint Duct |
|
|
|
|
|
|
|
|
|
|
|
|
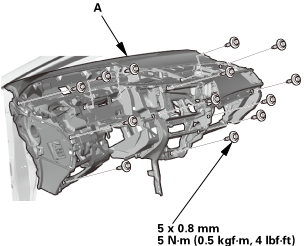
| 12. | Steering Hanger Beam |
|
|
|

|
SRS components are located in this area. Review the SRS component locations and the precautions and procedures before doing repairs or service. |
| 1. | Steering Hanger Beam |
|
|
|
 mm22u....z1
| 2. | Center Joint Duct |
|
|
|
|
|
|
 mmto
mmto|
|
|
|
|
|
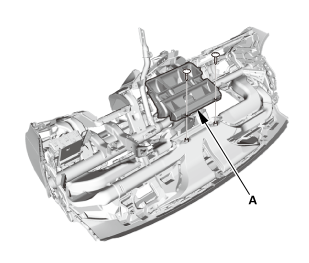
| 3. | Front Passenger's Airbag Assembly |
|
|
|
|
|
|
| 4. | Audio Unit Assembly (With display audio) |
|
|
|
||||||
|
|
|
| 5. | Audio Unit Assembly |
|
|
|
||||||
|
|
|
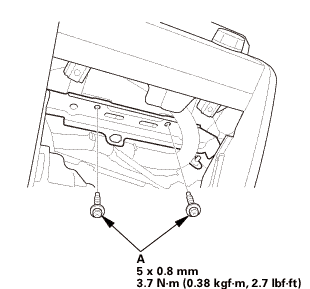 n.amm2.72.7
| 6. | Center Lower Panel |
|
|
|
||||||
| 7. | Gauge Control Module - Speedo |
|
|
|
| 8. | Multi-Information Display Unit |
|
|
|
| 9. | Information Display Unit |
|
|
|
| 10. | Gauge Control Module - Tach |
|
|
|
| 11. | Dashboard Meter Visor |
|
|
|

| 12. | Dashboard Subdisplay Visor |
|
|
|

| 13. | Battery Terminal (SRS) - Reconnection |
|
|
|
|||||||||||||||||||
 (o.2ao.sam.
 Dashboard/Steering Hanger Beam Disassembly and Reassembly (With Navigation)
SRS components are located in this area. Review the SRS component locations
and the precautions and procedures before doing repairs or service.
1.
Dashboard Su ...
 Dashboard/Steering Hanger Beam Removal and Installation (Natural Gas models)
8411J6
1.
Battery Terminal (SRS) - Disconnection
1.
Make sure the ignition switch is in LOCK (0).
...
See also:
Honda Civic Owners Manual. Switching the Display
Audio
Shows the current audio information.
Clock/Wallpaper
Shows a clock screen or an image you import.
Change display
1. Press the MENU/CLOCK button.
2. Rotate to select Settings,
then press .
3. Rotate to select Display Change,
then press .
4. Rotate to select ...
