Honda Civic Service Manual: Alternator Overhaul (K24Z7)
 View
View
| 1. |
Alternator Exploded View |
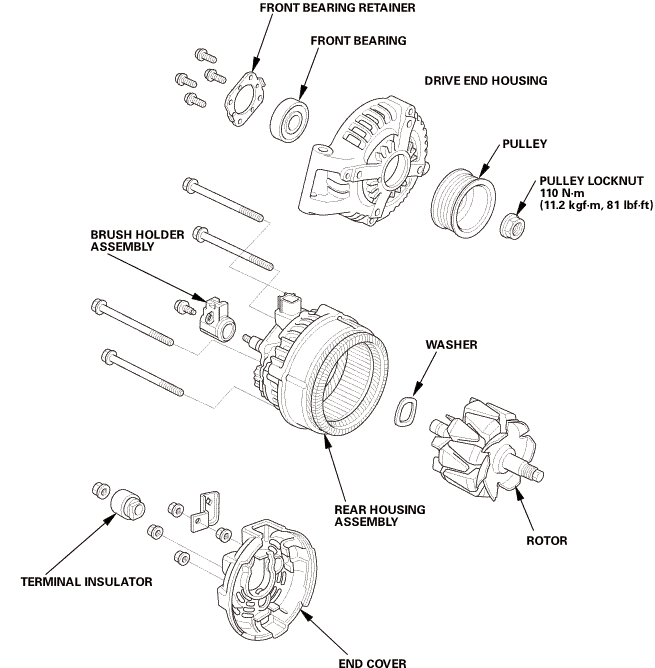 frontsunhousinglocknuy.-nummholderassemblvrotorsun
 Disassembly
|
NOTE: Refer to the Exploded View if needed during this procedure.
|
|

|
|
1.
|
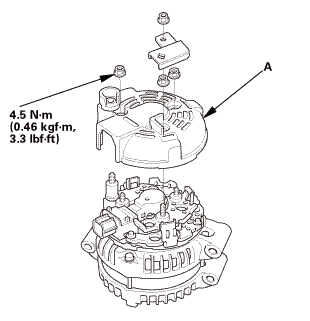
Remove the end cover (A).
|
|
| 2. |
Alternator Brush Holder |
|

|
|
1.
|
Remove the brush holder assembly.
|
|
| 3. |
Alternator Brush - Inspection |
|
1.
|
Measure the length of both brushes (A) with a vernier caliper (B).
|
|
If either brush is shorter than the service limit, replace the brush
holder assembly.
|
|
|
Alternator Brush Length
|
|
Standard (New):
|
10.5 mm (0.41 in)
|
|
Service Limit:
|
1.5 mm (0.06 in)
|
|
|
|

| 4. |
Alternator Rear Housing Assembly |
|
|
|
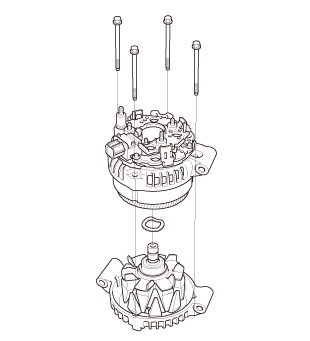
1.
|
Remove the rear housing assembly.
|
|
|
|
|
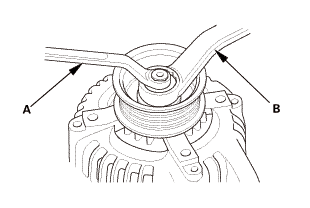
1.
|
If the front bearing needs replacing, remove the pulley locknut
with a 10 mm wrench (A) and a 22 mm wrench (B). If necessary, use
an impact wrench.
|
|
|
|
|
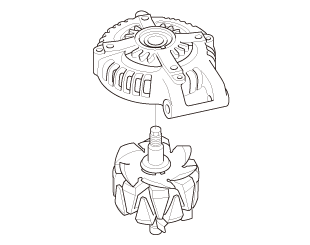
1.
|
Remove the drive-end housing.
|
|
| 7. |
Alternator Rotor Slip Ring - Test |
|
|
|
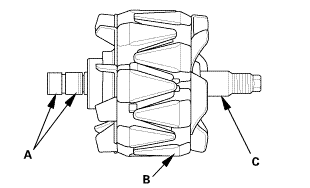
1.
|
Measure the resistance between the slip rings (A).
|
|
If the resistance is not within the standard, replace the rotor
assembly.
|
|
|
Coil (rotor) resistance
|
|
Standard:
|
3.4-3.8 Ω at 68 °F (20 °C)
|
|
|
|
|
2.
|
Check for continuity between each slip ring (A) and the rotor
(B) and the rotor shaft (C).
|
|
If there is continuity, replace the rotor assembly.
|
|
| 8. |
Front Alternator Bearing |
|

|
|
1.
|
Remove the front bearing retainer.
|
|
|
|
|
2.
|
Remove the front bearing.
|
|
 Reassembly
|
NOTE: Refer to the Exploded View if needed during this procedure.
|
| 1. |
Front Alternator Bearing |
|
 o7nnnmo3on o7nnnmo3on
|
|
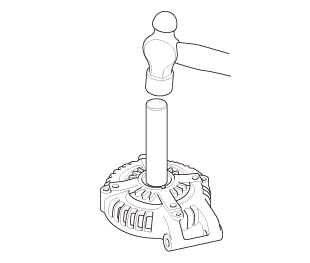
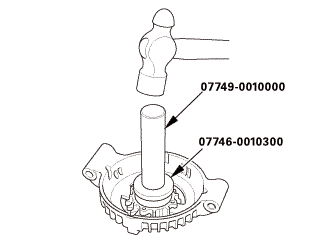
1.
|
Install a new front bearing in the driver-end housing with a
hammer, the driver handle, 15 x 135L, and the bearing driver attachment,
42 x 47 mm.
|
|
|
|
|
2.
|
Install the front bearing retainer.
|
|
|
|
|
1.
|
Install the drive-end housing.
|
|
|
 non-m(u.2lhf! non-m(u.2lhf!
|
|
1.
|
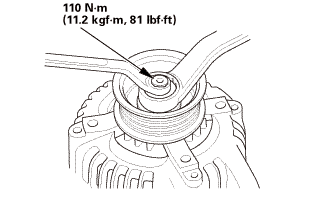
Install the pulley on the rotor and install the locknut, then
torque the locknut to 110 N·m (11.2 kgf·m, 81 lbf·ft).
|
|
| 4. |
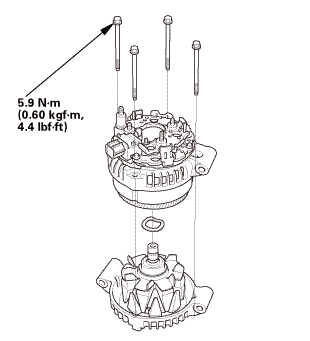
Alternator Rear Housing Assembly |
|
|
|
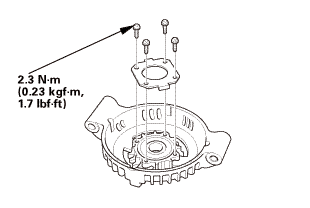
1.
|
Install the rear housing assembly.
|
|
| 5. |
Alternator Brush Holder |
|
|
|
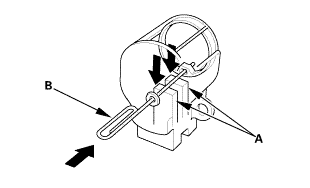
1.
|
Push the brushes (A) in, then insert a pin or drill bit (B) (about
1.6 mm (1/16 in) diameter) to hold them in place.
|
|
|
|
|
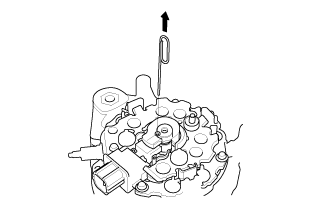
2.
|
Install the brush holder, and pull out the pin.
|
|
|
|
|
1.
|
Install the end cover (A).
|
|
| 7. |
Alternator After Install - Check |
|
|
1.
|
After assembling the alternator, turn the pulley by hand to make
sure the rotor turns smoothly and without noise.
|
|
View
1.
Alternator Exploded View
Exploded View
fnommsuuronvolrageassemelv
Disassembly
NOTE: Refer to the Exploded View if needed during ...
118100
1.
Battery Terminal - Disconnection
1.
Make sure the ignition switch is in LOCK (0), or the vehicle
...
See also:
Honda Civic Owners Manual. Fuel Information
Fuel recommendation
Unleaded gasoline, pump octane number 87 or higher
Use of a lower octane gasoline can cause a persistent, heavy metallic
knocking noise
that can lead to engine damage.
Top tier detergent gasoline
Because the level of detergency and additives in gasoline vary in the market, ...
 Alternator Overhaul (Except K24Z7)
 Alternator Removal and Installation (Except K24Z7)