Honda Civic Service Manual: Rear Seat-Back Removal and Installation - Split Fold Down type (2-door)

Removal
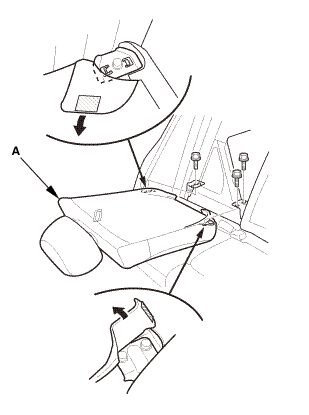
| 1. | Right Rear Seat-Back - Split Fold Down |
|
|
|
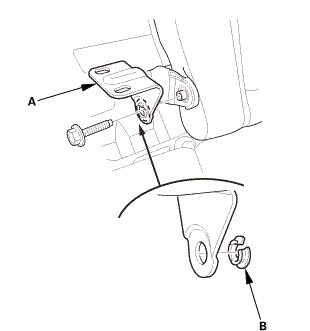
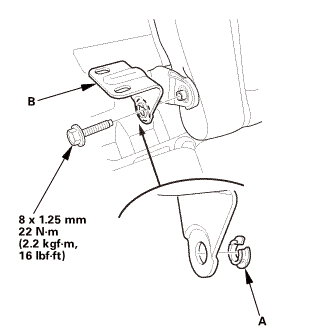
| 2. | Center Pivot Bracket - Split Fold Down |
|
|
|
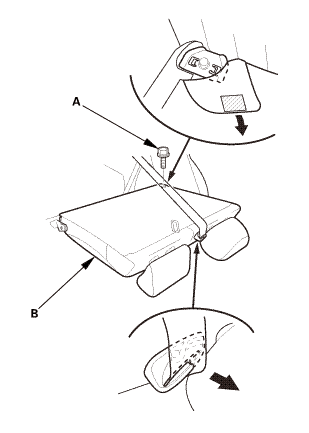
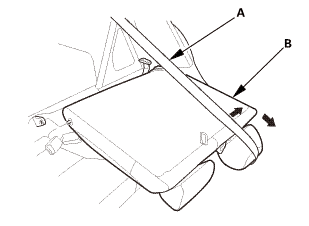
| 3. | Left Rear Seat-Back - Split Fold Down |
|
|
|
|
|
|
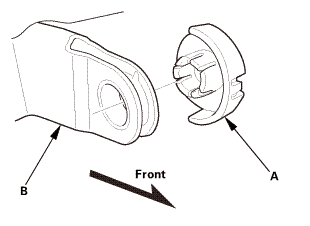
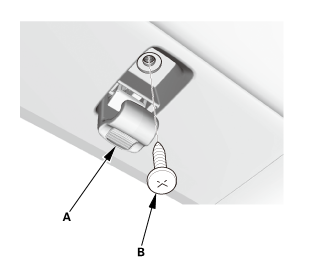
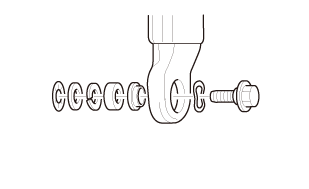
| 4. | Bushing |
|
|
|
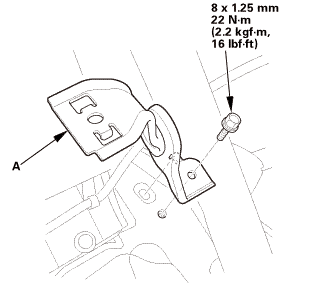
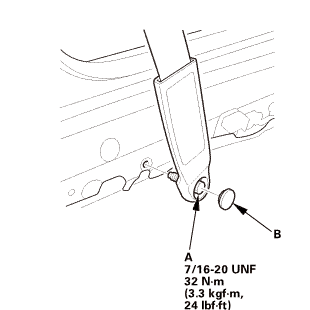
| 5. | Front Seat Belt Lower Anchor Bolt - 2-Door |
|
|
|
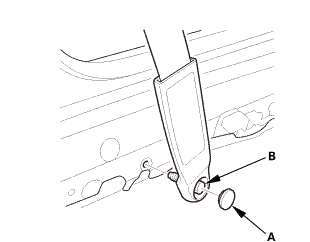
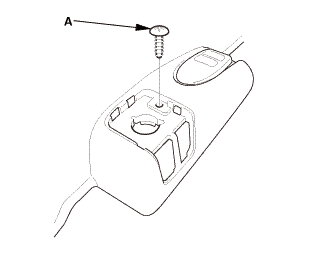
| 6. | Front Door Sill Trim - 2-Door |
|
|
|
|
|
|
|
|
|
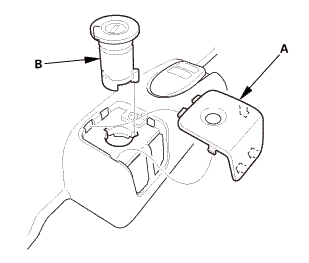
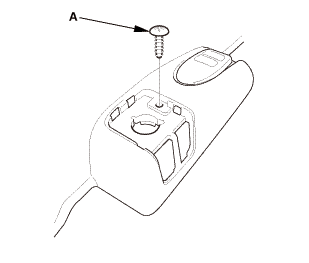
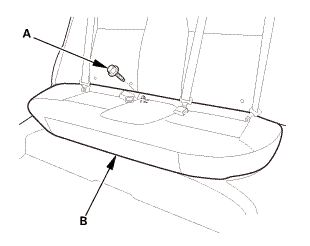
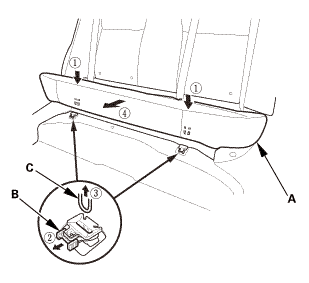
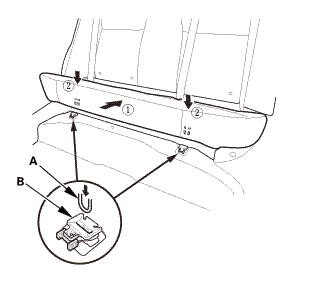
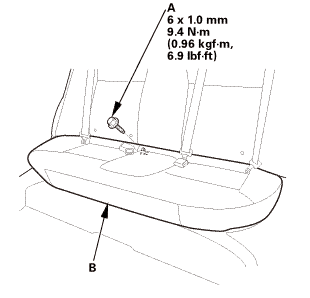
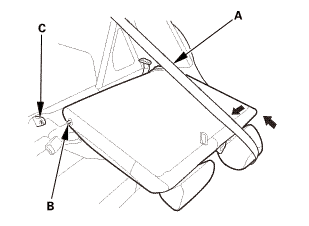
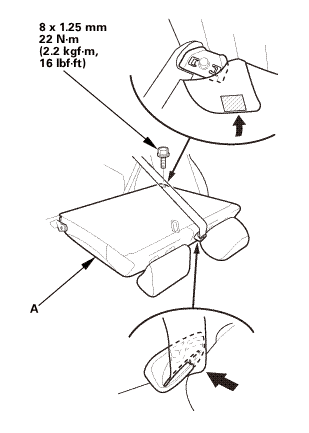
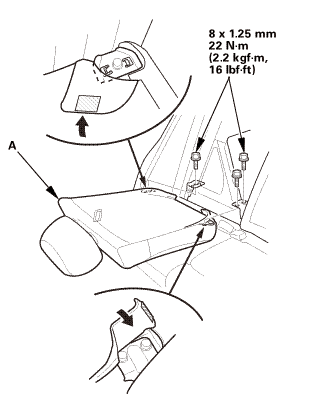
| 7. | Rear Seat Cushion |
|
|
|
|
|
|
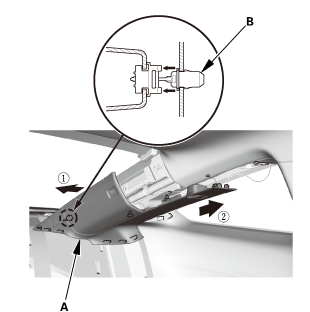
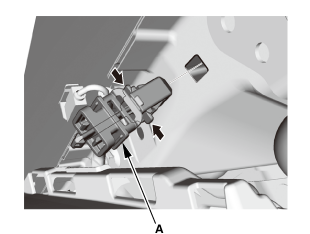
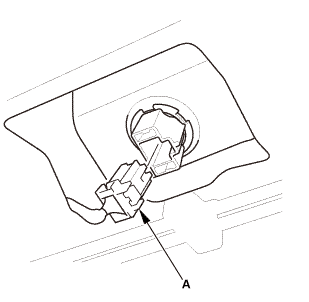
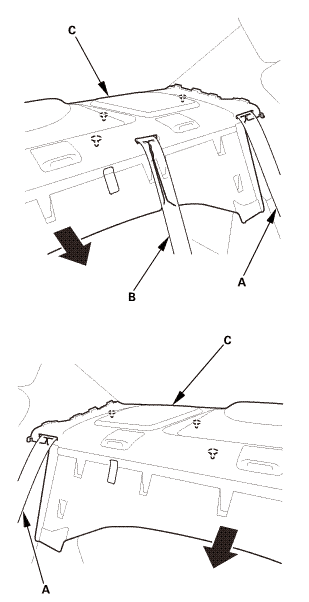
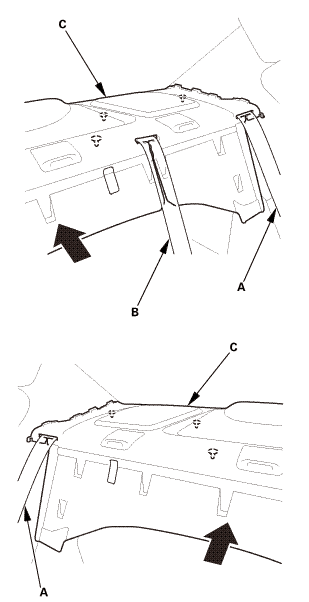
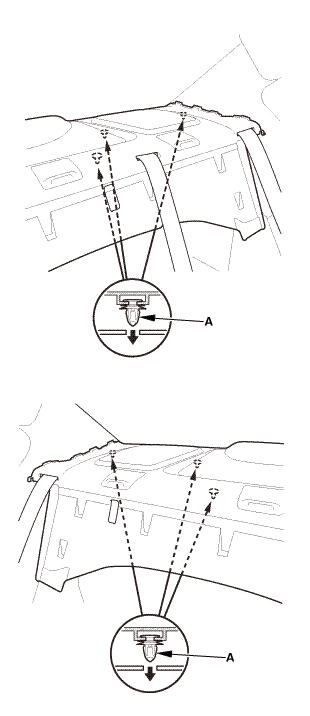
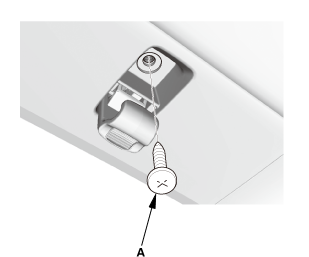
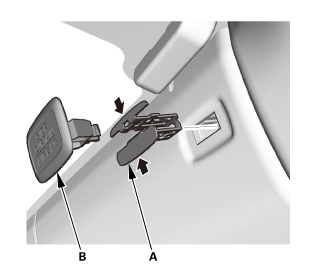
| 8. | Both Quarter Pillar Trims |
|
|
|

|
|
|
|
|
|
||||||||||||
|
|
|
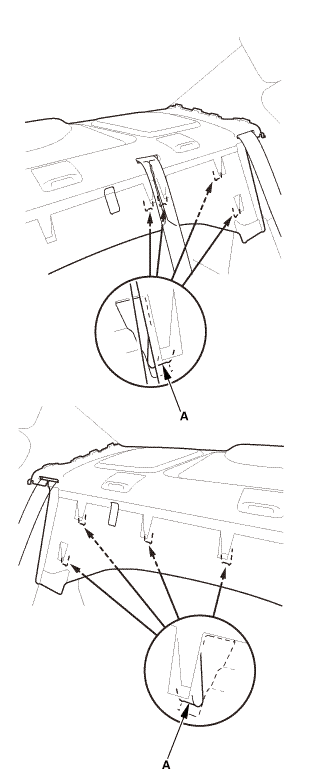
| 9. | Rear Shelf Trim |
|
|
|
|
|
|
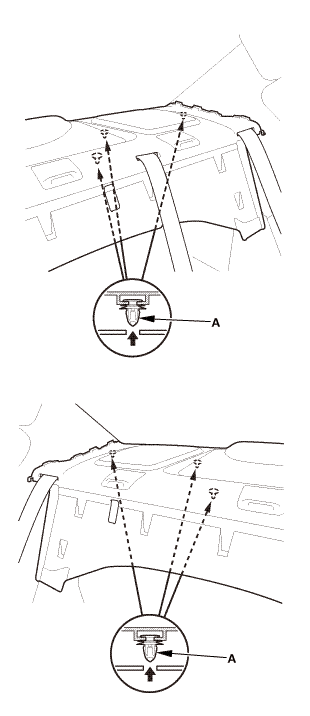
|
|
|
|
|
|
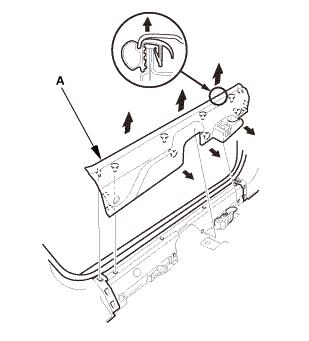
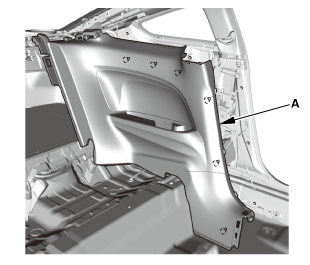
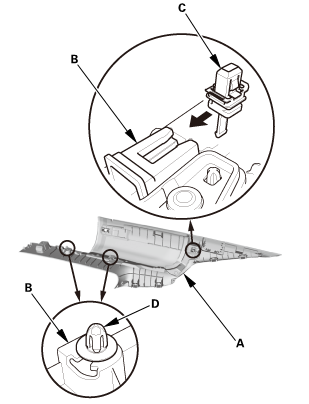
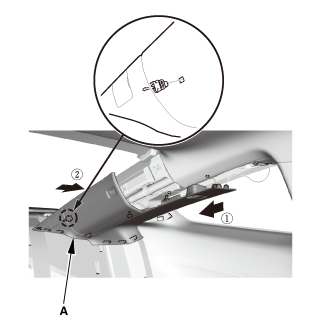
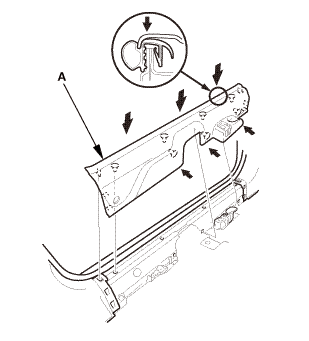
| 10. | Rear Side Trim Panel |
|
|
|
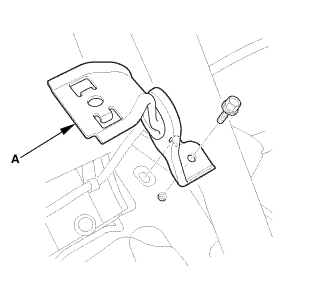
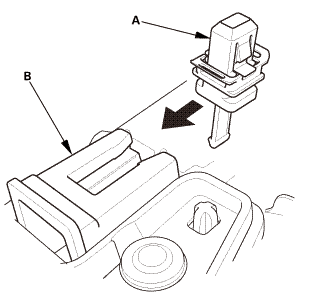
| 11. | Pivot Bracket - Split Fold Down |
|
|
|

Installation
| 1. | Pivot Bracket - Split Fold Down |
|
|
|
| 2. | Rear Side Trim Panel |
|
|
|
| 3. | Rear Shelf Trim |
|
|
|
|
|
|
|
|
|
|
|
|
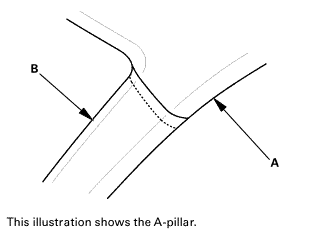
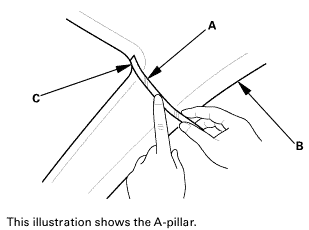
| 4. | Quarter Pillar Trim - Check |
|
|
|
||||||||||||||||||||||||||||||

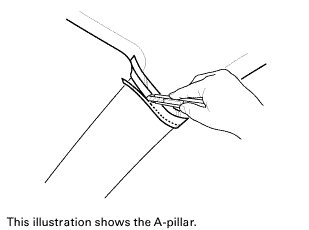
| 5. | Headliner/Pillar Trim Overlap - Check |
|
|
|
 tms
tms|
|
|
|
|
|
||||||||||||||||
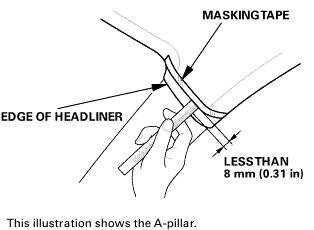 sun:orlessthan
|
|
|
 slmws
slmws| 6. | Both Quarter Pillar Trims |
|
|
|
|
|
|
||||||||||||||||||||||||
|
|
|
|
|
|
| 7. | Rear Seat Cushion |
|
|
|
|
|
|
| 8. | Front Door Sill Trim - 2-Door |
|
|
|
|
|
|
|
|
|

| 9. | Front Seat Belt Lower Anchor Bolt - 2-Door |
|
|
|
||||||
 @@@
@@@|
|
|
 7/1s-2om-min
| 10. | Bushing |
|
|
|
| 11. | Left Rear Seat-Back - Split Fold Down |
|
|
|
|
|
|
| 12. | Center Pivot Bracket - Split Fold Down |
|
|
|
| 13. | Right Rear Seat-Back - Split Fold Down |
|
|
|
 Rear Seat-Back Release Lever/Cable Removal and Installation
8531X9 LEFT
8531Y0 RIGHT
Removal
1.
Rear Seat-Back Release Cable - Disconnection/Reconnection
1.
Op ...
 Rear Seat-Back Removal and Installation - Split Fold Down type (4-door)
Removal
1.
Right Rear Seat-Back - Split Fold Down
1.
Remove the right rear seat-back (A).
...
See also:
Honda Civic Owners Manual. Shift Lever Does Not Move
Continuously variable transmission models
Follow the procedure below if you cannot move the shift lever out of the (P
position.
Releasing the Lock
Set the parking brake.
Models without smart entry system
Remove the key from the ignition switch.
Models with smart entry system
...
