Honda Civic Service Manual: Front Seat Frame Removal and Installation - Driver's Seat
8511C9 DRIVER SIDE

Removal
|
SRS components are located in this area. Review the SRS component locations and the precautions and procedures before doing repairs or service. |
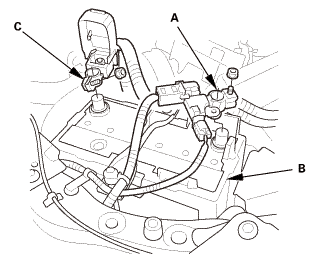
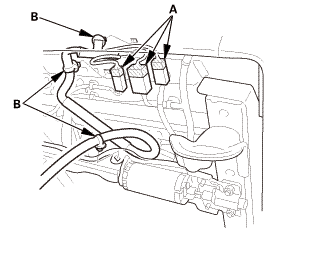
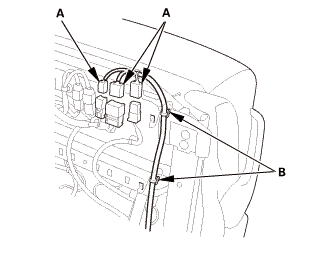
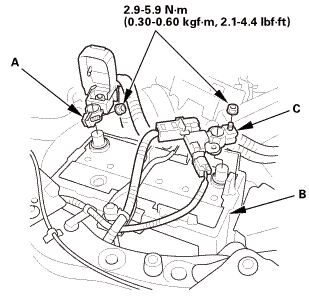
| 1. | Battery Terminal (SRS) - Disconnection |
|
|
|
|||||||||||||||
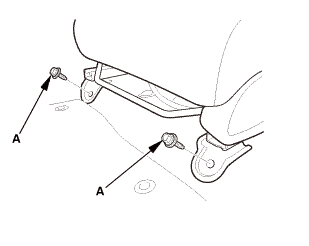
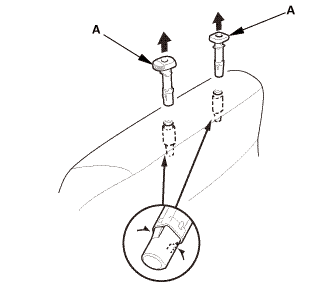
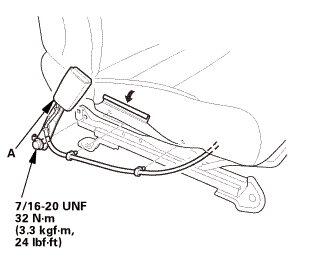
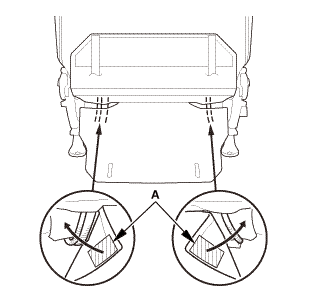
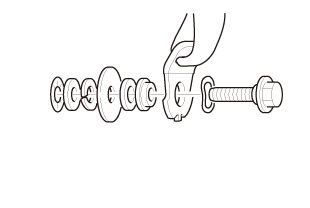
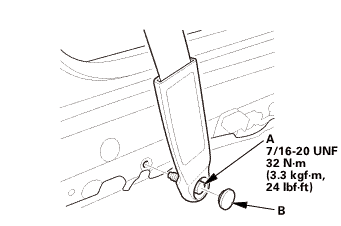
| 2. | Front Seat Belt Lower Anchor Bolt - Driver's Side |
|
|
|
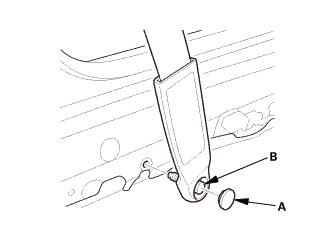
|
|
|
|
|
|
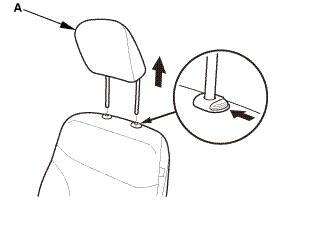
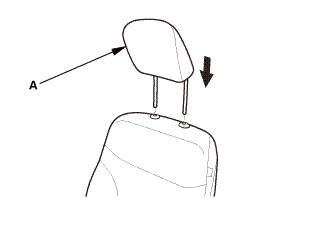
| 3. | Head Restraint |
|
|
|
| 4. | Front Seat - Driver's Side |
|
|
|
|
Front side
Rear side
|
|
|
Power seat
Manual seat
|
|
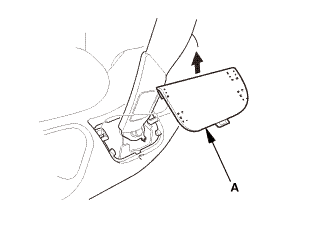
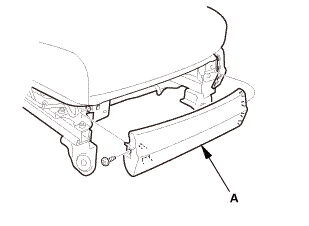
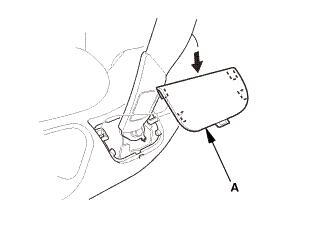
| 5. | Front Cover - Driver's Side |
|
|
|
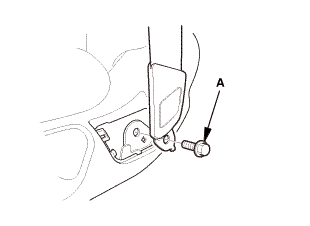
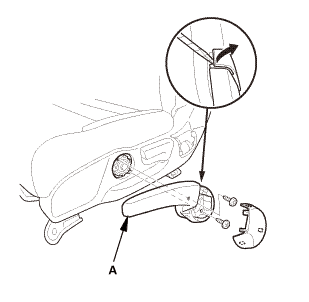
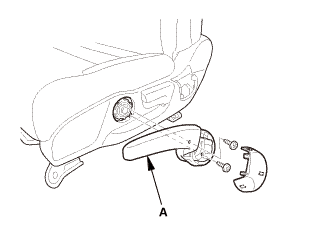
| 6. | Front Seat Height Adjuster Handle - Driver's Side |
|
|
|
| 7. | Front Seat Recline Cover - Driver's Side |
|
Power seat
Manual seat
|
|
| 8. | Front Seat Center Cover - Driver's Side |
|
Power seat
Manual seat
|
|

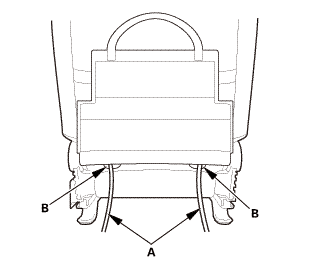
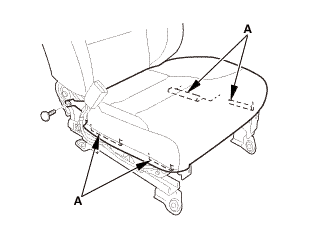
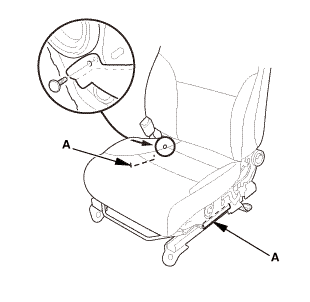
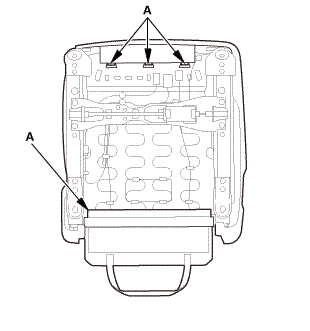
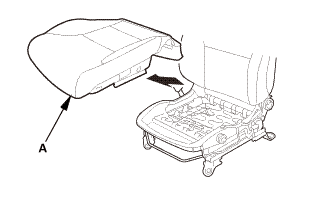
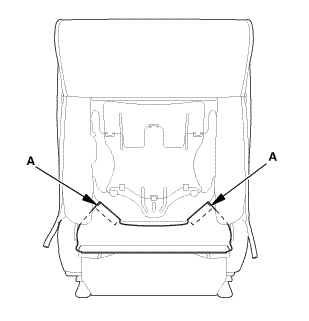
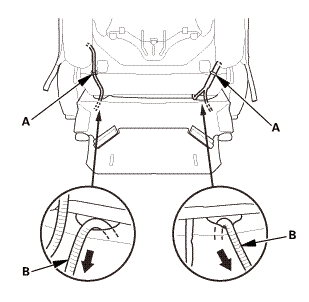
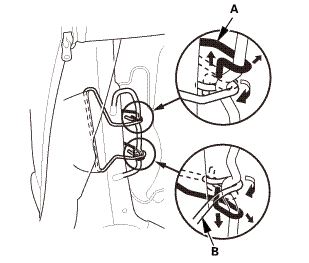
| 9. | Front Seat Cushion - Driver's Side |
|
2-door, 4-door (power seat)
4-door (manual seat)
|
|


|
Power seat
Manual seat with seat heater
|
|

|
|
|
|
|
|

|
Power seat
Manual seat
|
|
|
Power seat
Manual seat
|
|
|
|
|
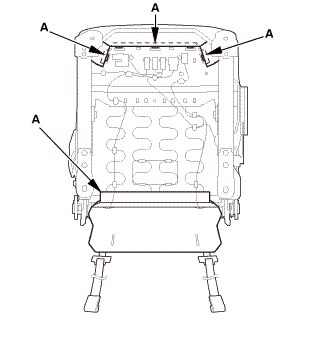
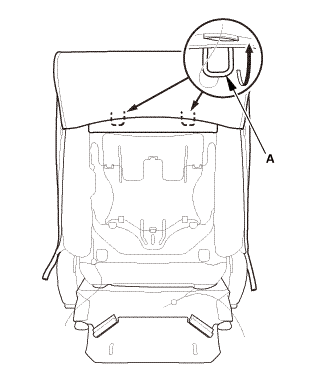
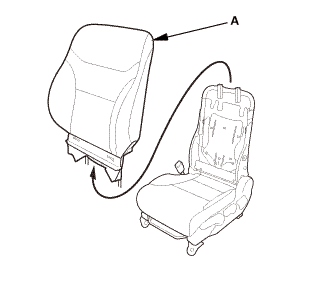
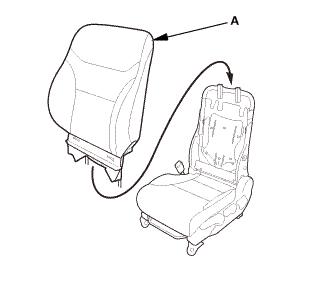
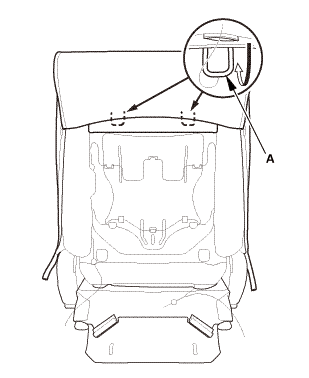
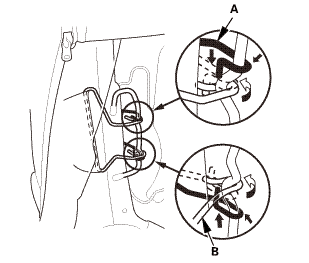
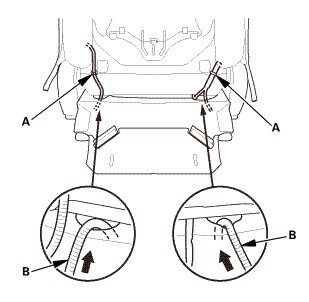
| 10. | Front Seat-Back As Needed - Driver's Side |
|
2-door, 4-door (power seat)
4-door (manual seat)
|
|
|
2-door, 4-door (manual seat)
4-door (power seat)
|
|

|
|
|
|
|
|
|
|
|
|
|
|
|
|
|
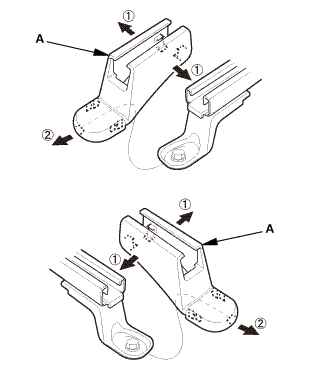
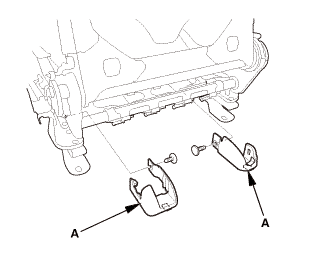
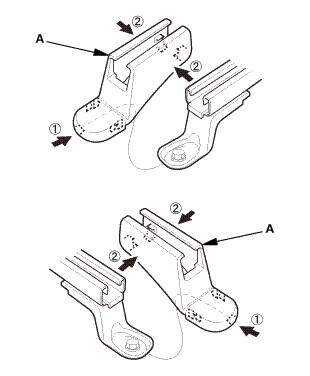
| 11. | Headrest Guides |
|
|
|
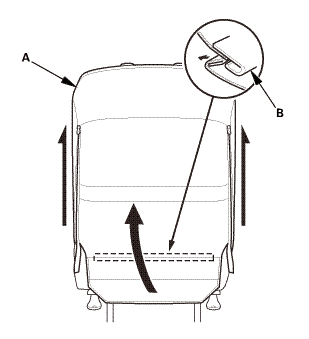
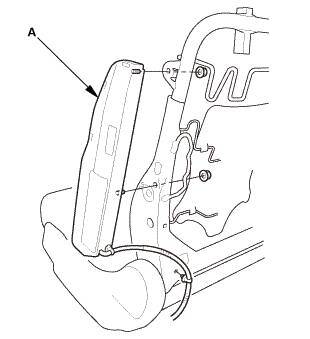
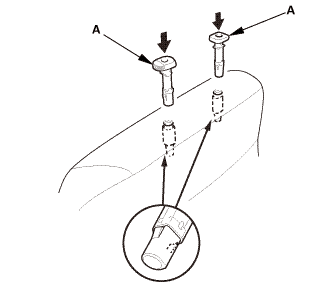
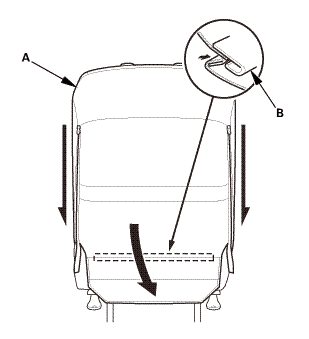
| 12. | Front Seat-Back Cover/Pad - Driver's Side |
|
|
|
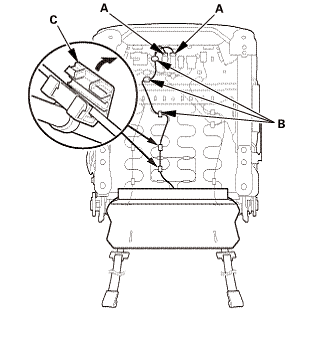
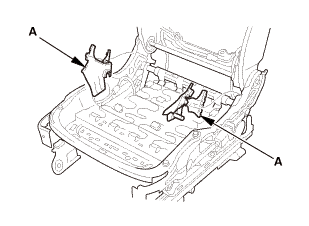
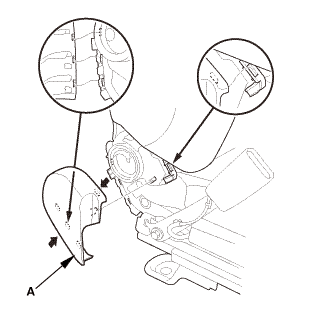
| 13. | Side Airbag |
|
|
|
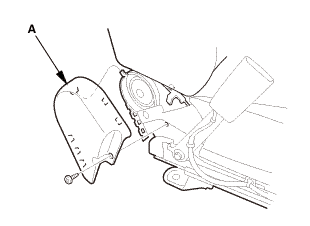
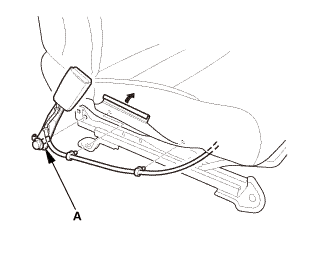
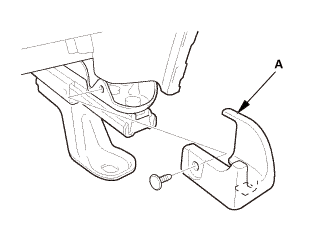
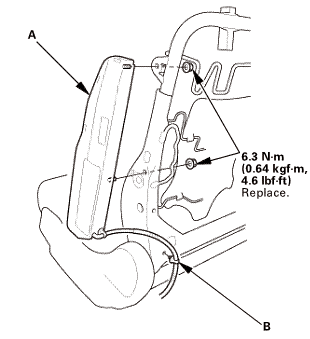
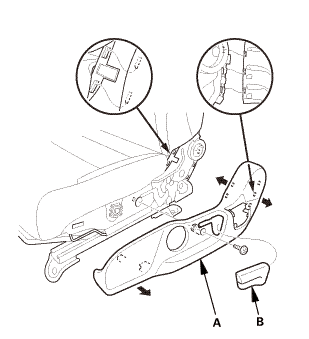
| 14. | Front Seat Belt Buckle - Driver's Side |
|
|
|
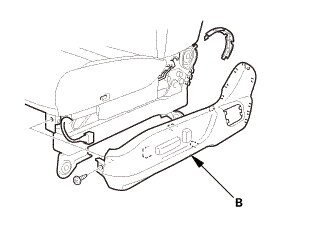
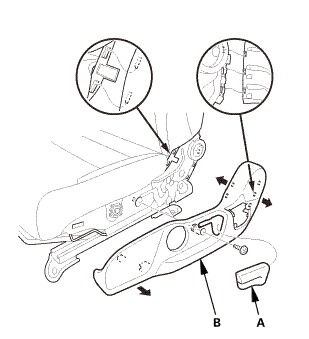
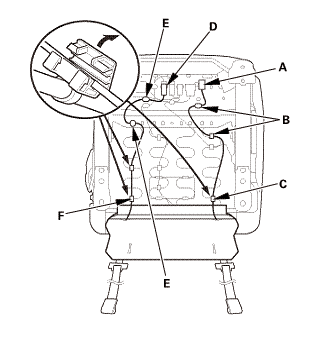
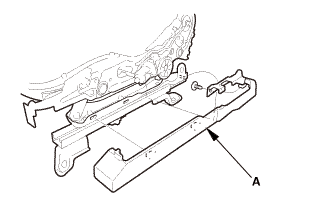
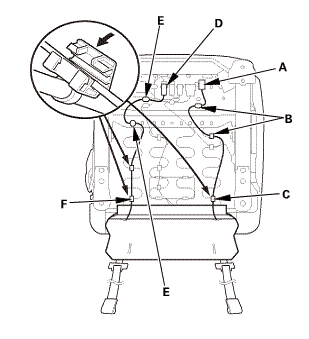
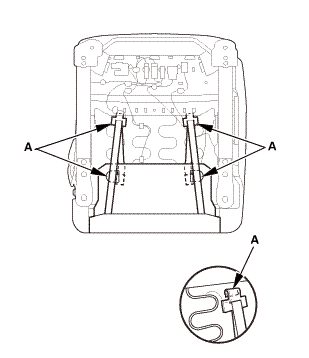
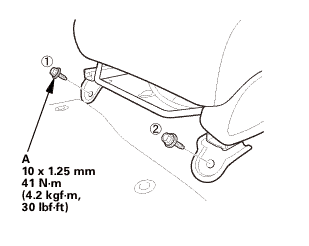
| 15. | Front Seat Frame - Driver's Side |
|
Power seat (side)
Power seat (rear)
Manual seat
|
|
|
Power seat
Manual seat
|
|


Installation
|
SRS components are located in this area. Review the SRS component locations and the precautions and procedures before doing repairs or service. |
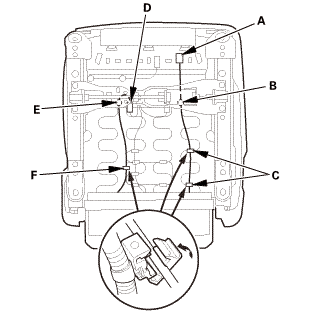
| 1. | Front Seat Frame - Driver's Side |
|
Power seat
Manual seat
|
|
|
Power seat (side)
Power seat (rear)
Manual seat
|
|
| 2. | Front Seat Belt Buckle - Driver's Side |
|
|
|
 mm
mm| 3. | Side Airbag |
|
|
|

| 4. | Front Seat-Back Cover/Pad - Driver's Side |
|
|
|
| 5. | Headrest Guides |
|
|
|
| 6. | Front Seat-Back As Needed - Driver's Side |
|
|
|
|
|
|
|
|
|
|
|
|
|
|
|
|
2-door, 4-door (manual seat)
4-door (power seat)
|
|
|
2-door, 4-door (power seat)
4-door (manual seat)
|
|
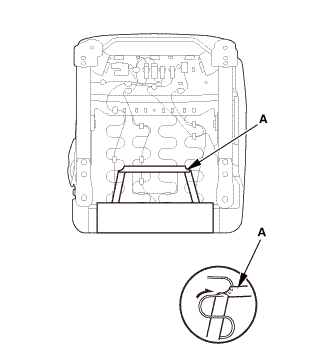
| 7. | Front Seat Cushion - Driver's Side |
|
|
|
|
Power seat
Manual seat
|
|
|
Power seat
Manual seat
|
|
|
|
|
|
|
|
|
Power seat
Manual seat with seat heater
|
|
|
2-door, 4-door (power seat)
4-door (manual seat)
|
|
| 8. | Front Seat Center Cover - Driver's Side |
|
Power seat
Manual seat
|
|
| 9. | Front Seat Recline Cover - Driver's Side |
|
Power seat
Manual seat
|
|

| 10. | Front Seat Height Adjuster Handle - Driver's Side |
|
|
|
| 11. | Front Cover - Driver's Side |
|
|
|
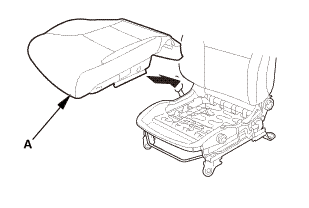
| 12. | Front Seat - Driver's Side |
|
Power seat
Manual seat
|
|
|
Front side
Rear side
|
|
|||||||||||||||||
 mmu....in
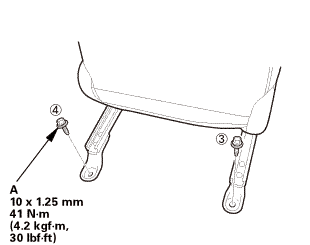
|
|
|
| 13. | Head Restraint |
|
|
|
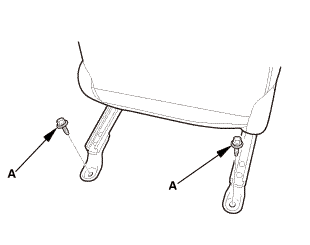
| 14. | Front Seat Belt Lower Anchor Bolt - Driver's Side |
|
|
|
|||||||
|
|
|
|
|
|
 nmimm
nmimm|
|
|
| 15. | Battery Terminal (SRS) - Reconnection |
|
|
|
||||||||||||||||
 (o.2ao.sam.
 Front Seat Cushion Cover Removal and Installation - Driver's Seat
8591A0 LEFT
Removal
SRS components are located in this area. Review the SRS component locations
and the precautions and procedures before doing repairs or service.
...
 Front Seat Frame Removal and Installation - Passenger's Seat ('12, '13-'14:
except KA KC models)
Front Seat Frame Removal and Installation - Passenger's Seat ('12, '13-'14:
except KA KC models)
8521B9 PASSENGER SIDE
SRS components are located in this area. Review the SRS component locations
and the precautions and procedures before doing repairs or service.
...
See also:
Honda Civic Owners Manual. Automatic Power Off
If you leave the vehicle for 30 to 60 minutes with the shift lever in P*1 and
the
power mode in ACCESSORY, the vehicle automatically goes into the mode similar to
VEHICLE OFF (LOCK) to avoid draining the battery.
When in this mode:
Except U.S. continuously variable transmission models
The s ...
