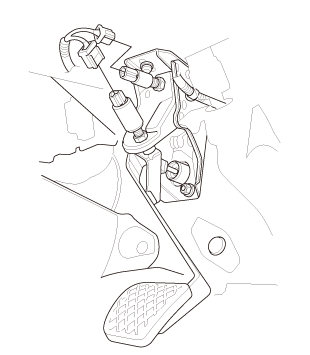
Honda Civic Service Manual: Clutch Pedal Assembly Removal and Installation (M/T)
2111A0

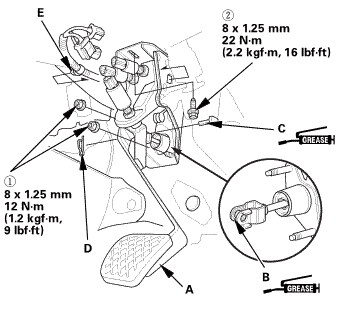
| 1. | Clutch Pedal Position Switch Connector |
|
|
|
| 2. | Clutch Pedal |
|
|
|
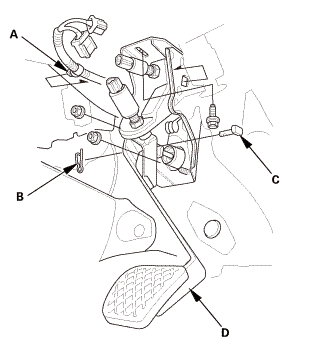
| 3. | Clutch Pedal Position Switch |
|
|
|
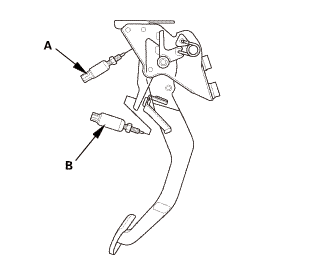

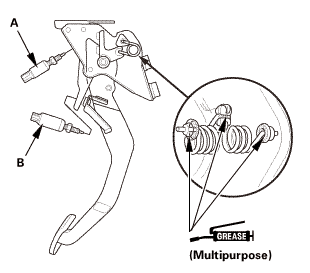
| 1. | Clutch Pedal Position Switch |
|
|
|
||||||||||||||||||||||||||||||||||

| 2. | Clutch Pedal |
|
|
|
||||||||||||||||||||||||
| 3. | Clutch Pedal Position Switch Connector |
|
|
|
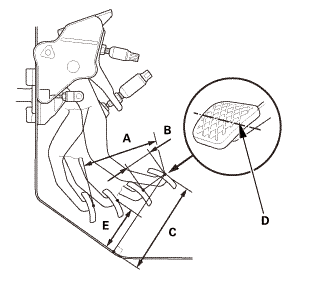
| 4. | Clutch Pedal Stroke Check |
|
|
|

|
|
|
||||||||||||||||||||||||||||||||||||
| 5. | Clutch Master Cylinder Push Rod Inspection |
|
|
|
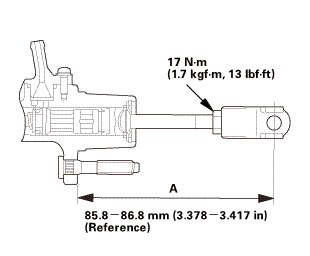 17inasmm
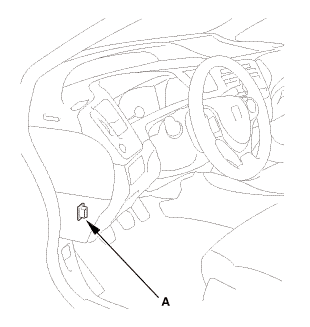
| 6. | HDS DLC - Connection |
|
|
|
| 7. | Clutch Pedal Position Switch A Adjustment |
|
|
|
||||||||||||||||||||||||
| 8. | Check Operation Check |
|
 Clutch Master Cylinder Removal and Installation (R18Z1 M/T)
211101
NOTE:
Use fender covers to avoid damaging painted surfaces.
...
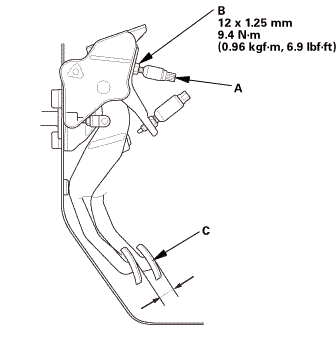
 Clutch Pedal Position Switch B Removal and Installation
726121
1.
Clutch Pedal Position Switch B
1.
Remove clutch pedal position switch B.
...
See also:
Honda Civic Service Manual. XM Antenna Removal and Installation (2-door)
015116
Removal
NOTE: SRS components are located in this area. Review the SRS component
locations and the precautions and procedures before doing repairs or service.
1.
Battery Terminal (SRS) - Disconnection
...
