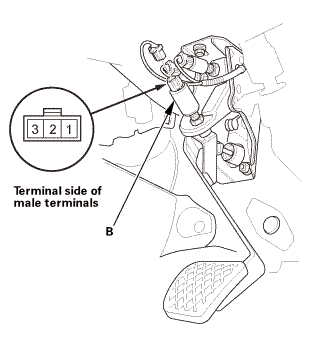
|
9.
|
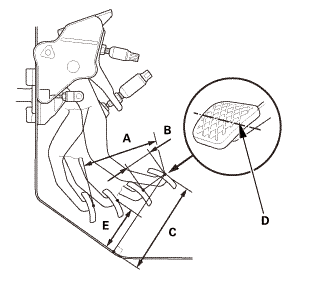
Measure the clutch pedal stroke (A).
|
|
|
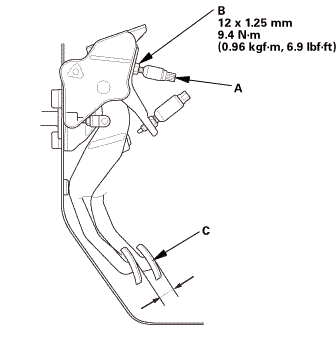
(A) Clutch Pedal Stroke:
|
|
125-135 mm (4.92-5.31 in)
|
|
(B) Clutch Pedal Free Play (Reference):
|
|
7-18 mm (0.28-0.71 in)
|
|
|
|
|
(C) Clutch Pedal Height (Reference)*:
|
Without clutch pedal pad cover
|
151.8 mm
(5.976 in)
|
|
With clutch pedal pad cover
|
156 mm
(6.14 in)
|
|
|
|
|
*: Measure the clutch pedal height from right side middle of
the clutch pedal cover or the clutch pedal pad cover (D) to the
floor without the insulation.
|
|
(E) Clutch Pedal Disengagement Height (Reference)*:
|
Without clutch pedal pad cover
|
66.7-75.0 mm
(2.626-2.953 in)
|
|
With clutch pedal pad cover
|
69.7-78.1 mm
(2.744-3.075 in)
|
|
|
|
|
*: Measure the clutch pedal disengagement height from right side
middle of the clutch pedal cover or the clutch pedal pad cover (D)
to the floor without the insulation.
|


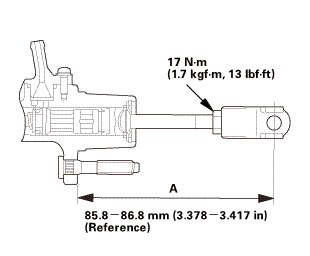 17inasmm
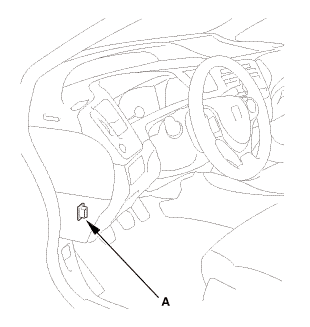
 Clutch Pedal Assembly Removal and Installation (M/T)
 Clutch Slave Cylinder Removal and Installation (K24Z7)