Honda Civic Service Manual: Alternator Removal and Installation (K24Z7)
1181F1

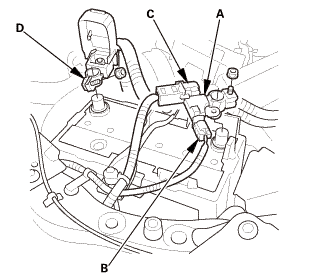
| 1. | Battery Terminal - Disconnection |
|
|
|
|||||||||||||||||||||||||||

| 2. | Vehicle Lift |
|
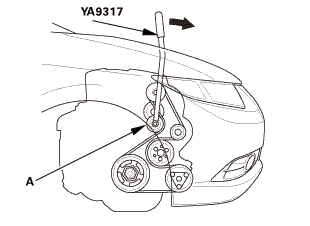
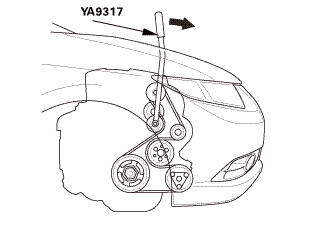
| 3. | Drive Belt |
|
|
|
 vnm
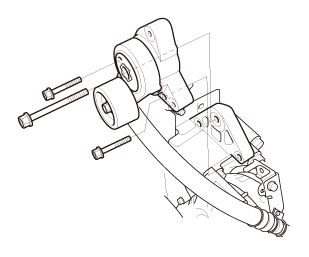
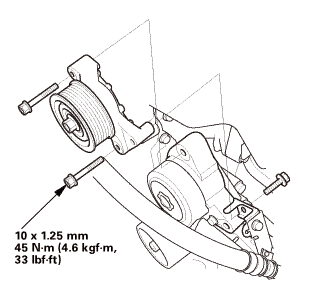
vnm| 4. | Idler Pulley Base Assembly |
|
|
|
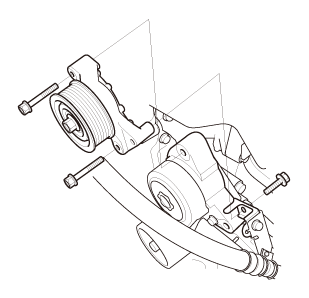
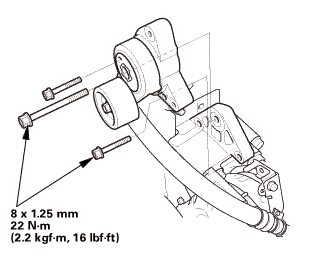
| 5. | Auto-Tensioner Assembly |
|
|
|
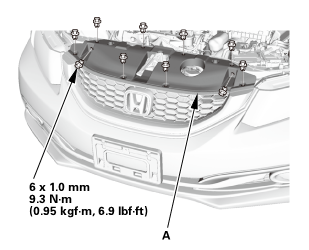
| 6. | Front Grille Cover |
|
|
|
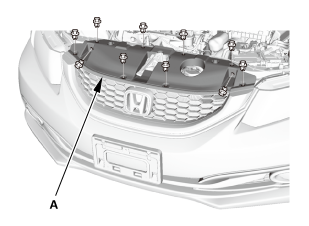
|
|
|
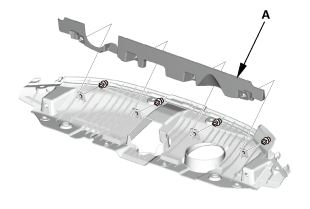
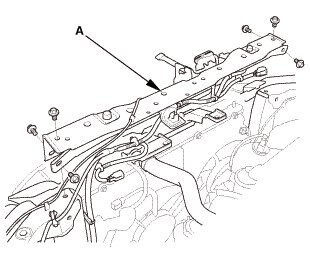
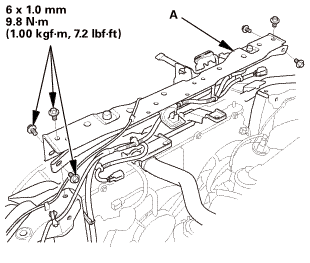
| 7. | Bulkhead - Removal |
|
|
|

|
|
|
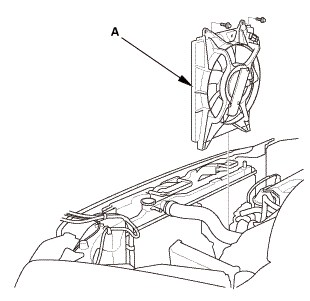
| 8. | A/C Condenser Fan Shroud Assembly |
|
|
|
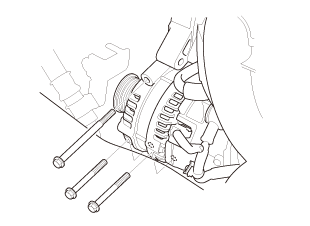
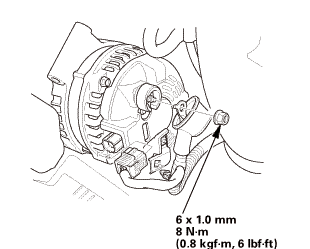
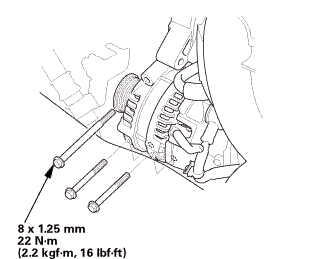
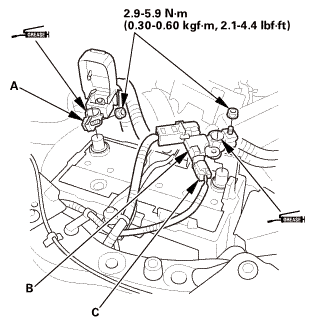
| 9. | Alternator |
|
|
|
|
|
|
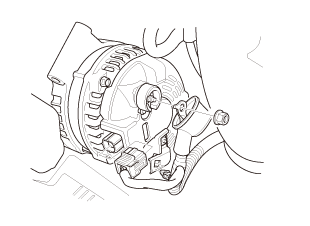

| 1. | Alternator |
|
|
|
|
|
|
| 2. | A/C Condenser Fan Shroud Assembly |
|
|
|

| 3. | Bulkhead - Installation |
|
|
|
|
|
|

| 4. | Front Grille Cover |
|
|
|
|
|
|
| 5. | Auto-Tensioner Assembly |
|
|
|
| 6. | Idler Pulley Base Assembly |
|
|
|
| 7. | Drive Belt |
|
|
|
 vnm
vnm| 8. | Battery Terminal - Reconnection |
|
|
|
|||||||||||||||||||
 Alternator Removal and Installation (Except K24Z7)
118100
1.
Battery Terminal - Disconnection
1.
Make sure the ignition switch is in LOCK (0), or the vehicle
...

See also:
Honda Civic Owners Manual. Inspection and Maintenance
For your safety, perform all listed inspections and maintenance to keep your
vehicle
in good condition. If you become aware of any abnormality (noise, smell,
insufficient
brake fluid, oil residue on the ground, etc.), have your vehicle inspected by a
dealer.
(Note, however, that service a ...
