Honda Civic Service Manual: Trunk Lid Opener Cable/Fuel Fill Door Opener Cable Removal and Installation
(4-door except Natural Gas models)
823160
SRS components are located in this area. Review the SRS component
locations and the precautions and procedures before doing repairs
or service.
|
1. |
Front Door Sill Trim - 4-Door |
|
|
1.
|
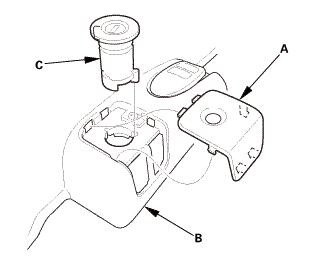
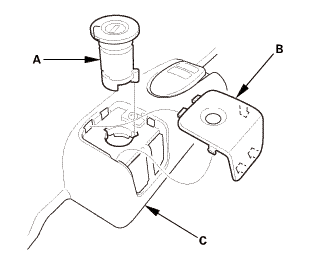
Remove the cap (A) from the front door sill trim (B).
|
|
2.
|
Remove the opener lock cylinder (C).
|
|
|
|
4.
|
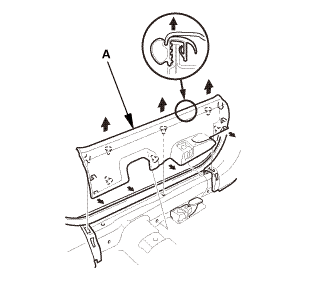
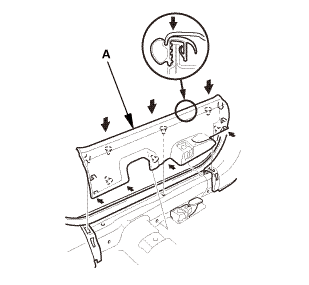
Remove the front door sill trim (A).
|
|
2. |
Trunk Lid Opener/Fuel Fill Door Opener |
|
|
1.
|
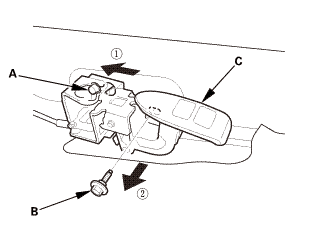
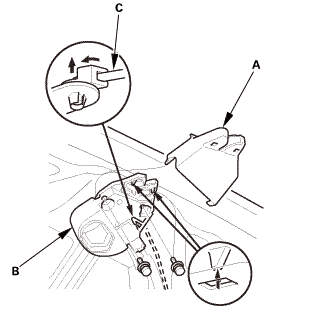
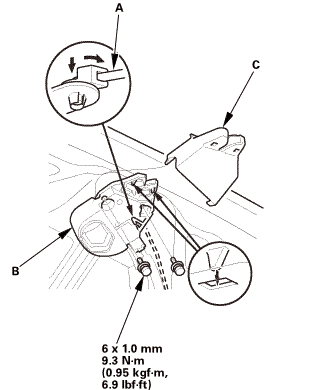
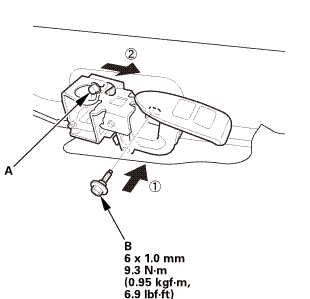
Loosen the opener mounting rear bolt (A).
|
|
2.
|
Remove the opener mounting front bolt (B), then remove
the trunk lid opener/fuel fill door opener (C).
|
|
|
|
3.
|
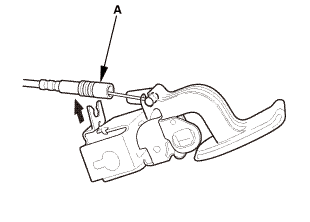
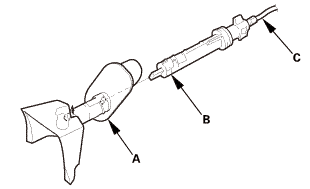
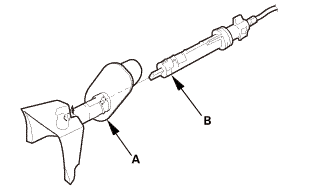
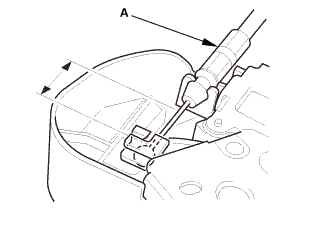
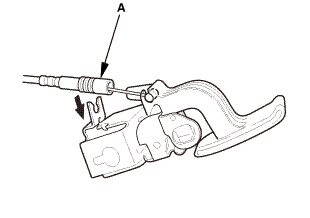
Disconnect the trunk lid opener cable/fuel fill door
opener cable (A) from the opener.
|
|
|
|
1.
|
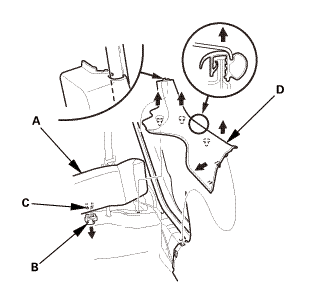
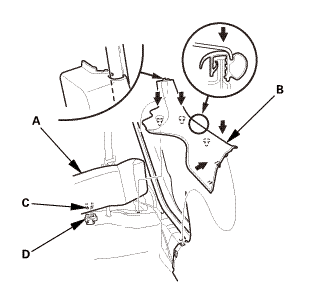
While pushing down on the rear seat cushion (A), pull
the seat hook handle (B) to release the hook (C).
|
|
2.
|
While pulling up the seat cushion, remove the rear door
sill trim (D).
|
|
4. |
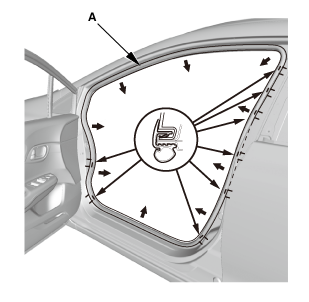
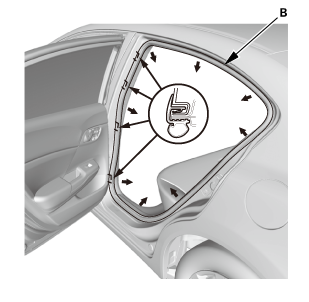
Front and Rear Door Opening Seals as Needed |
Front
Rear
|
|
1.
|
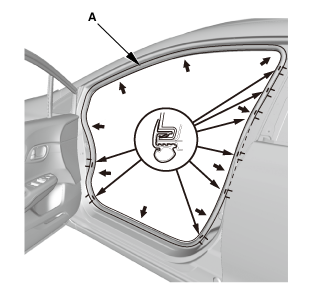
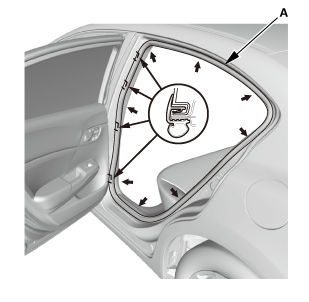
Remove the front door opening seal (A) and the rear door
opening seal (B) as needed.
|
|
|
|
1.
|
Slide the front seat forward fully.
|
|
2.
|
13-14 Models (driver's side): Remove the B-pillar lower
cover (A).
|
|
12 Model
13-14 Models
|
|
3.
|
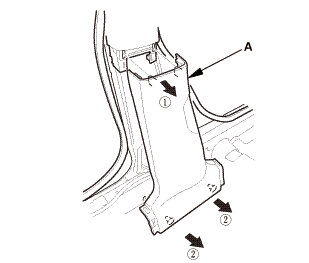
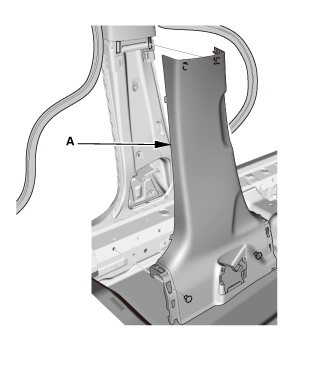
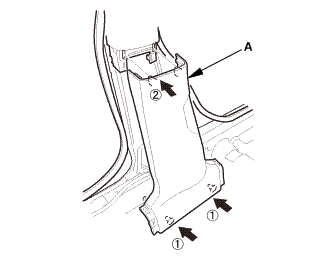
Remove the B-pillar lower trim (A).
|
|
|
|
1.
|
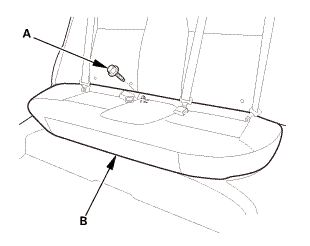
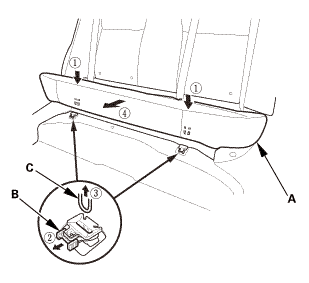
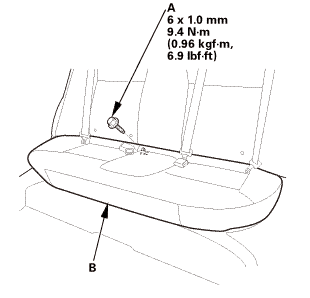
Remove the bolt (A) securing the rear seat cushion (B).
|
|
|
|
2.
|
While pushing down the rear seat cushion (A), pull the
seat hook handles (B) to release the hooks (C).
|
|
3.
|
Remove the rear seat cushion.
|
|
7. |
Both Rear Seat Side Bolsters |
|
|
1.
|
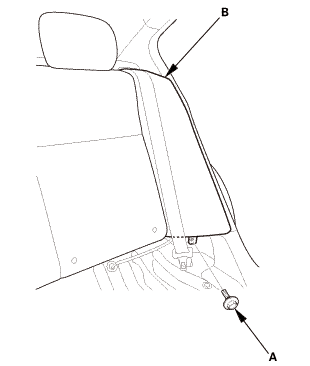
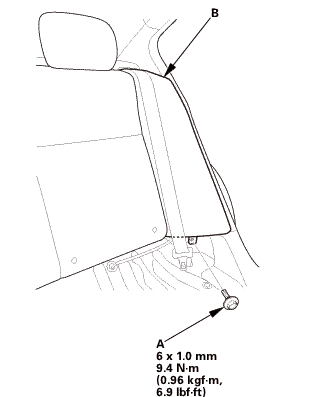
Remove the bolt (A) securing the rear seat side bolster
(B).
|
|
2.
|
The left side is shown; repeat on the right side.
|
|
|
|
3.
|
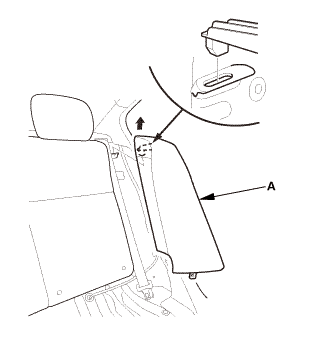
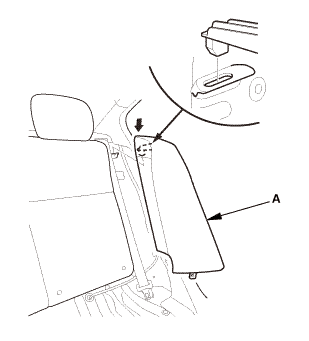
Remove the rear seat side bolster (A).
|
|
4.
|
The left side is shown; repeat on the right side.
|
|
|
|
1.
|
Fold down the seat-back(s).
|
|
2.
|
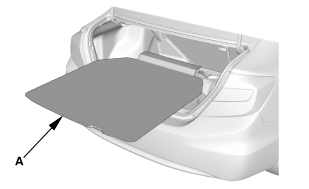
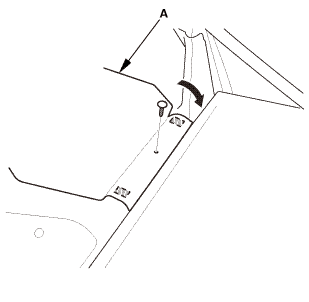
Remove the front area of the trunk floor cover (A).
|
|
|
|
3.
|
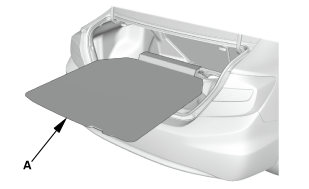
Remove the trunk floor cover (A).
|
|
9. |
Trunk Lid Weatherstrip as Needed |
|
|
1.
|
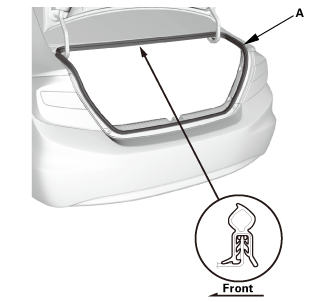
Remove the trunk lid weatherstrip (A) as needed.
|
|
10. |
Trunk Rear Trim Panel |
|
|
1.
|
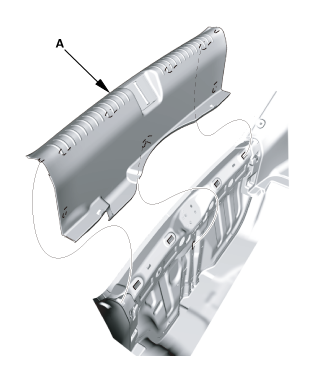
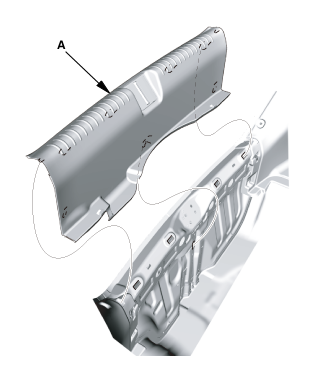
Remove the trunk rear trim panel (A).
|
|
11. |
Trunk Side Trim Panel |
|
|
1.
|
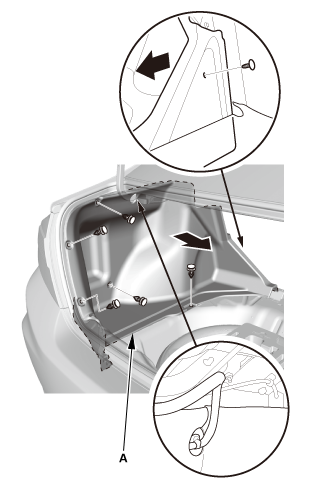
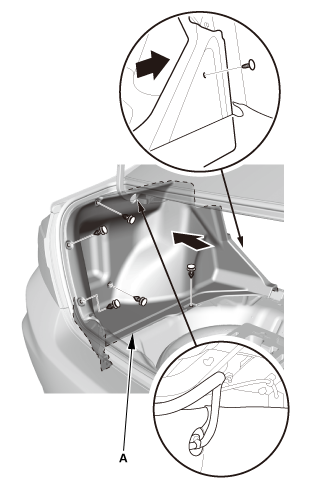
Remove the trunk side trim panel (A).
|
|
|
|
1.
|
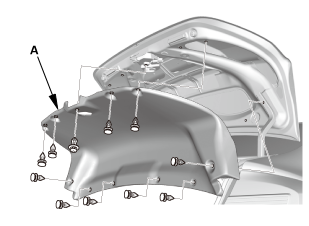
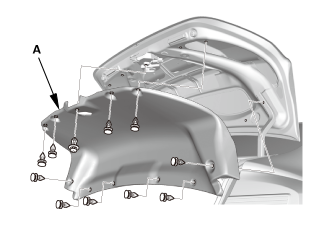
For some models: Remove the trunk lid trim panel (A).
|
|
|
|
1.
|
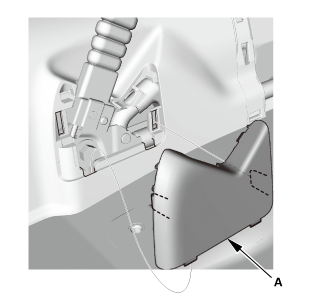
Remove the latch cover (A).
|
|
2.
|
Remove the trunk lid latch (B).
|
|
3.
|
With trunk lid lock cylinder: Disconnect the cylinder
rod (C).
|
|
|
|
4.
|
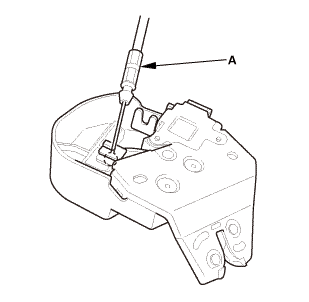
Disconnect the trunk lid opener cable (A).
|
|
|
|
1.
|
Raise the vehicle on a lift, and make sure it is securely
supported.
|
|
|
|
1.
|
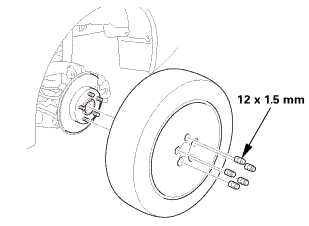
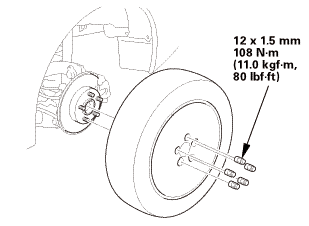
Remove the rear wheel.
|
|
|
|
1.
|
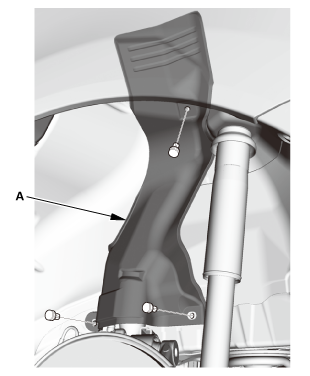
Remove the fuel pipe protector (A).
|
|
|
|
1.
|
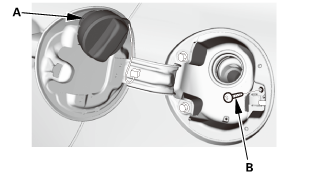
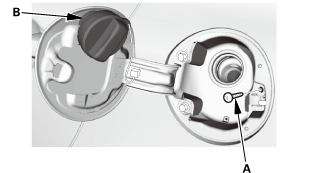
Remove the fuel cap (A).
|
|
|
|
4.
|
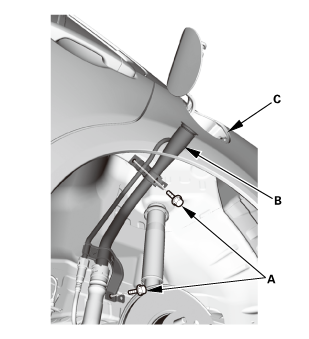
Lower the fuel filler pipe (B), then remove it from the
fuel cap adapter (C).
|
|
|
|
5.
|
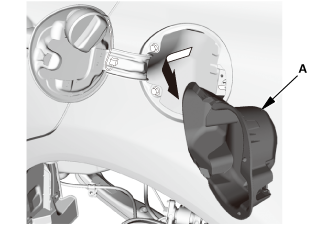
Turn the fuel cap adapter (A), then remove it.
|
|
18. |
Trunk Lid/Fuel Fill Door Opener Cable |
|
|
1.
|
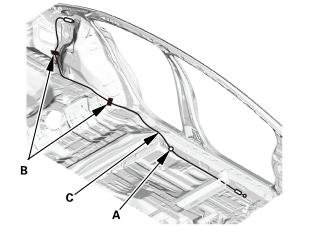
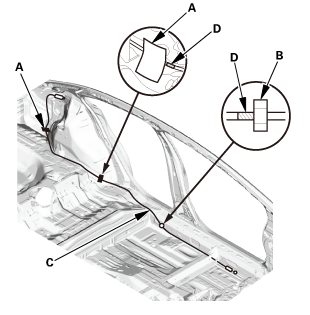
Remove the clip (A) and the cushion tapes (B) securing
the trunk lid opener cable/fuel fill door opener cable (C).
|
|
|
|
2.
|
Remove the grommet (A) from the body.
|
|
|
|
3.
|
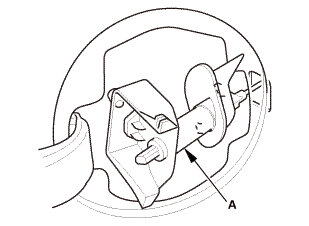
Remove the grommet (A) from the fuel fill door latch
(B).
|
|
4.
|
Remove the fuel fill door opener cable (C) from inside
the body.
|
|
|
|
5.
|
Detach the clips (A), and release the trunk lid opener
cable/fuel fill door opener cable (B) from the clips (C),
then remove the cable from the vehicle.
|
|
SRS components are located in this area. Review the SRS component
locations and the precautions and procedures before doing repairs
or service.
|
1. |
Trunk Lid/Fuel Fill Door Opener Cable |
|
|
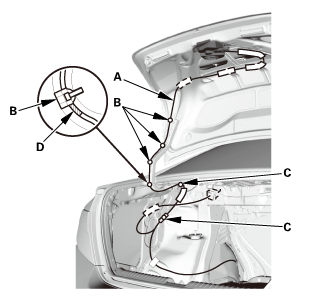
1.
|
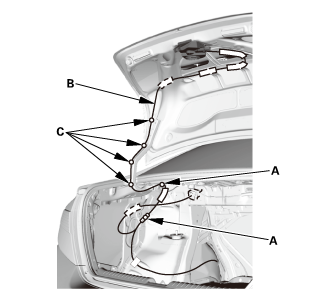
Install the trunk lid opener cable/fuel fill door opener
cable (A) to the clips (B), and install the clips (C) securing
the cable.
|
|
NOTE: Align the marks (D) with the clips as shown.
|
|
|
|
2.
|
Install the grommet (A) to the fuel fill door latch (B).
|
|
|
|
3.
|
Install the grommet (A) to the body.
|
|
|
|
4.
|
Install the cushion tapes (A) and the clip (B) securing
the trunk lid opener cable/fuel fill door opener cable (C).
|
|
NOTE: Align the marks (D) with the cushion tapes and
the clip as shown.
|
|
|
|
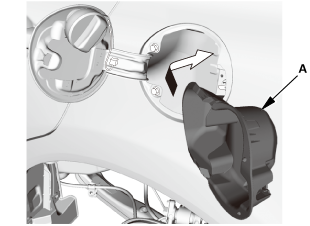
1.
|
Install the fuel cap adapter (A) into place.
|
|
|
|
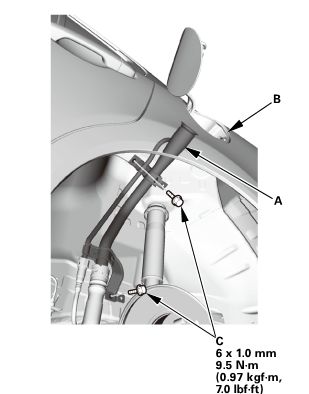
2.
|
Raise the fuel filler pipe (A), and install it to the
fuel cap adapter (B).
|
|
3.
|
Install the bolts (C).
|
|
|
|
4.
|
Install the screw (A).
|
|
5.
|
Install the fuel cap (B).
|
|
|
|
1.
|
Install the fuel pipe protector (A).
|
|
15mmumum
|
|
1.
|
Install the rear wheel.
|
|
NOTE: Before installing the wheel, clean the mating surfaces
between the brake disc or the brake drum and the inside
of the wheel.
|
|
|
NOTE: Fix the original position of the outer end of the
cable (A) on the trunk lid latch securely. And check the
trunk lid latch operation: Make sure the trunk lid latch
unlocks when pulling the trunk lid opener/fuel fill door
opener. If necessary, adjust the position of the cable end.
|
|
|
|
1.
|
Connect the trunk lid opener cable (A).
|
|
|
|
2.
|
With trunk lid lock cylinder: Connect the cylinder rod
(A).
|
|
3.
|
Install the trunk lid latch (B).
|
|
4.
|
Install the latch cover (C).
|
|
|
|
1.
|
For some models: Install the trunk lid trim panel (A).
|
|
|
|
1.
|
Install the trunk side trim panel (A).
|
|
|
|
1.
|
Install the trunk rear trim panel (A).
|
|
9. |
Trunk Lid Weatherstrip as Needed |
|
|
1.
|
Install the trunk lid weatherstrip (A).
|
|
|
|
1.
|
Install the trunk floor cover (A).
|
|
|
|
2.
|
Install the front area of the trunk floor cover (A).
|
|
3.
|
Raise the seat-back(s).
|
|
11. |
Both Rear Seat Side Bolsters |
|
|
1.
|
Install the rear seat side bolster (A).
|
|
2.
|
The left side is shown; repeat on the right side.
|
|
mmmmlnss
|
|
3.
|
Install the bolt (A) securing the rear seat side bolster
(B).
|
|
4.
|
The left side is shown; repeat on the right side.
|
|
|
|
1.
|
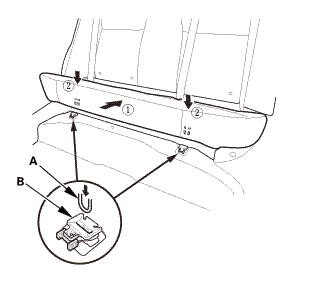
Install the hooks (A) to the rear seat cushion clips
(B).
|
|
|
|
2.
|
Install the bolt (A) securing the rear seat cushion (B).
|
|
12 Model
13-14 Models
|
|
1.
|
Install the B-pillar lower trim (A).
|
|
|
|
2.
|
13-14 Models (driver's side): Install the B-pillar lower
cover (A).
|
|
14. |
Front and Rear Door Opening Seals as Needed |
Front
Rear
|
|
1.
|
Install the front door opening seal (A) and the rear
door opening seal (B).
|
|
|
|
1.
|
While pulling up the rear seat cushion (A), install the
rear door sill trim (B).
|
|
2.
|
Push down the seat cushion, then install the hook (C)
to the rear seat cushion clip (D).
|
|
16. |
Trunk Lid Opener/Fuel Fill Door Opener |
|
|
1.
|
Connect the trunk lid opener cable/fuel fill door opener
cable (A) to the opener.
|
|
|
|
2.
|
Install the opener mounting rear bolt (A) temporarily.
|
|
3.
|
Install the opener mounting front bolt (B).
|
|
|
|
4.
|
Install the front door sill trim (A).
|
|
|
|
5.
|
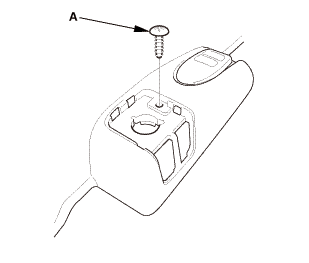
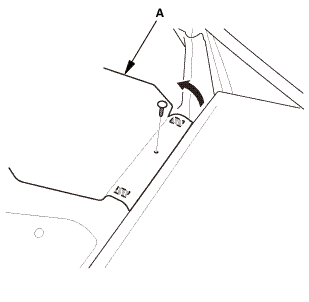
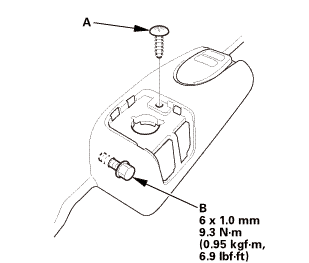
Install the screw (A).
|
|
6.
|
Tighten the opener mounting rear bolt (B).
|
|
|
|
7.
|
Install the opener lock cylinder (A).
|
|
8.
|
Install the cap (B) to the front door sill trim (C).
|
|
8171B6
Removal
1.
Trunk Lid Trim Panel
1.
For some models: ...
849110
Removal
1.
Front Door Sill Trim - 4-Door
1.
Remo ...
See also:
Honda Civic Owners Manual. Receiving a Call
When there is an incoming call, an audible
notification sounds (if activated) and the
Incoming call screen appears.
Press the button to answer the
call.
Press the button to decline or end
the
call.
Receiving a Call
Call Waiting
Press the button to put
the curr ...