Honda Civic Service Manual: M/T Reverse Shift Fork Clearance Inspection (K24Z7)

Removal
| 1. | M/T Change Lever Assembly |
|
|
|
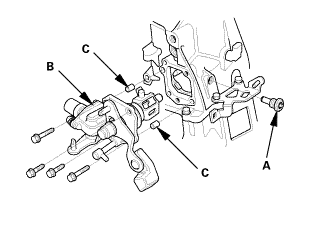
| 2. | Back-Up Light Switch |
|
|
|
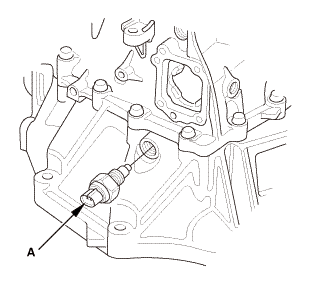
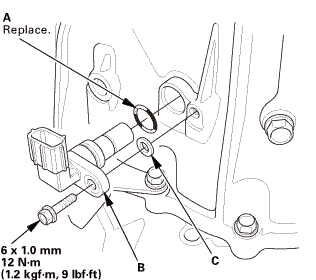
| 3. | Output Shaft (Countershaft) Speed Sensor |
|
|
|
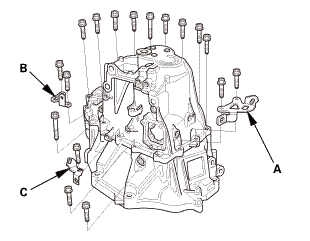
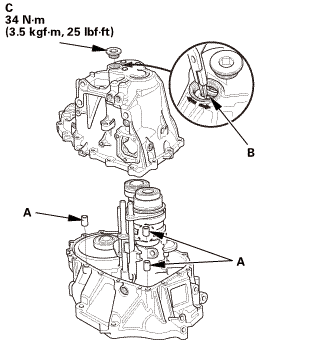
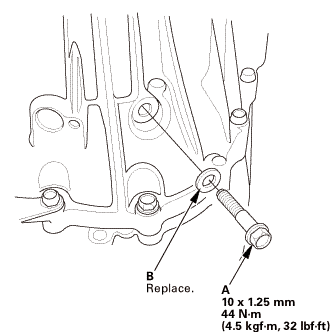
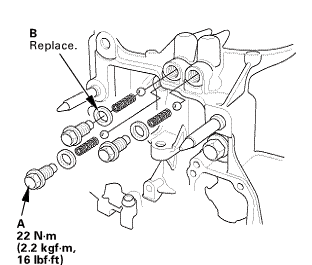
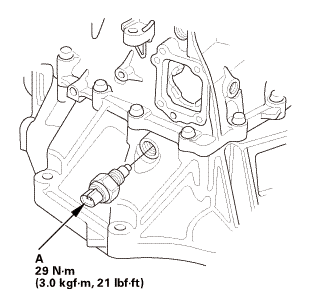
| 4. | Transmission Housing |
|
|
|
|
|
|

|
|
|
|
|
|
 Inspection
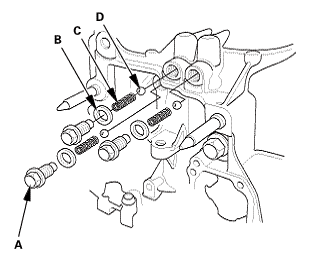
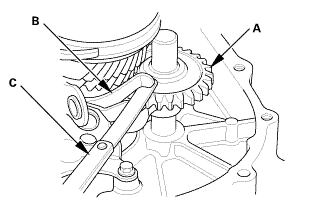
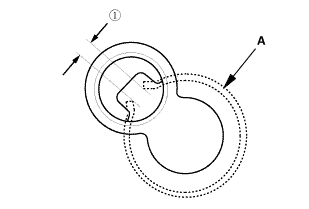
| 1. | Reverse Shift Fork Clearance Inspection |
|
|
|
||||||||||||
|
|
|
|||||||||||||||||||||


Installation
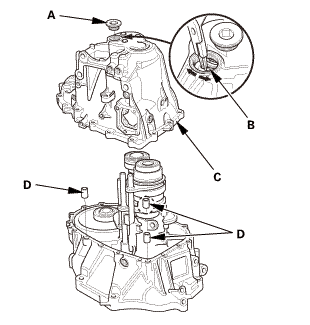
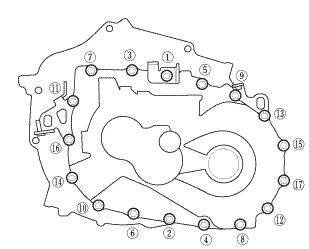
| 1. | Transmission Housing |
|
|
|
||||||||||||||||||||
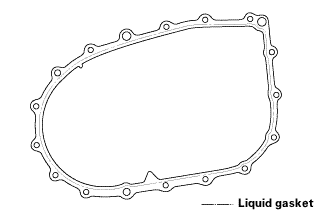
|
|
|
|||||||||||||||
|
|
|
|||||||||||||||||||||||
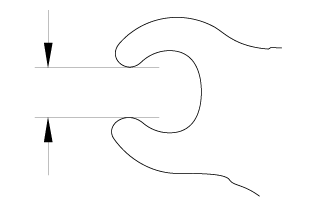
 as installed:
3.3-6.0 mm (0.130-0.236 in)
as installed:
3.3-6.0 mm (0.130-0.236 in)|
|
|
|
|
|
||||||||||
|
|
|
|
|
|
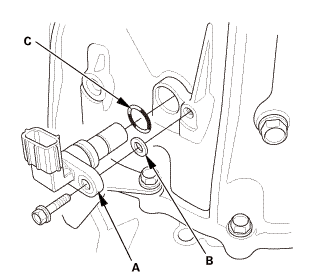
| 2. | Output Shaft (Countershaft) Speed Sensor |
|
|
|
| 3. | Back-Up Light Switch |
|
|
|
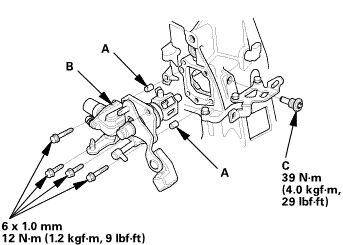
| 4. | M/T Change Lever Assembly |
|
|
|
||||||||||||||||||||
 iukn
iukn|
|
|
 M/T Mainshaft Thrust Clearance Adjustment (K24Z7)
Removal
1.
M/T Change Lever Assembly
1.
Remove the interlock bolt (A).
...
 M/T Reverse Shift Fork Clearance Inspection (R18Z1 M/T)
Removal
1.
M/T Change Lever Assembly
1.
Remove the change lever assembly (A).
...
See also:
Honda Civic Owners Manual. To cancel
To cancel the LKAS:
Press the MAIN or LKAS button.
The LKAS is turned off every time you stop the
engine, even if you turned it on the last time
you drove the vehicle.
To cancel
Pressing the MAIN button also turns ACC with LSF
on and off.
The system operation is suspe ...
