Honda Civic Service Manual: Fuel Fill Door Switch Removal and Installation (Natural Gas models)

| 1. | Vehicle Lift |
|
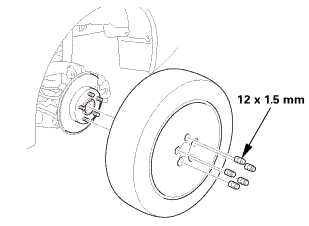
| 2. | Rear Wheel |
|
|
|
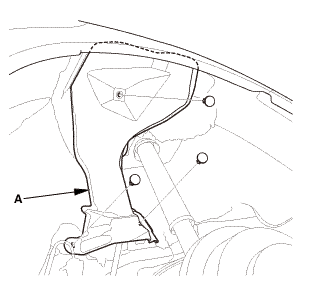
| 3. | Fuel Pipe Protector (Natural Gas Model) |
|
|
|
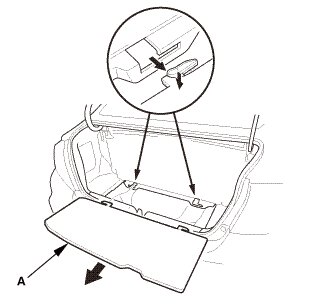
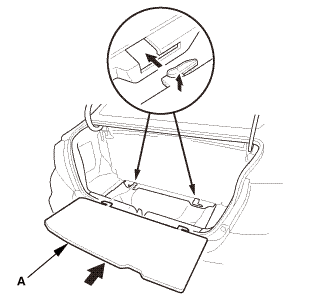
| 4. | Trunk Floor Lid (Natural Gas Model) |
|
|
|
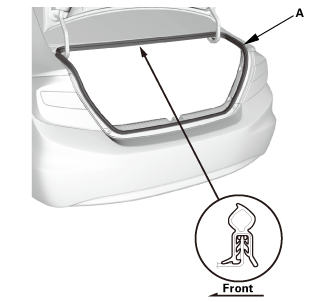
| 5. | Trunk Lid Weatherstrip as Needed |
|
|
|
| 6. | Trunk Rear Trim Panel (Natural Gas Model) |
|
|
|

| 7. | Trunk Front Trim Panel (Natural Gas Model) |
|
|
|

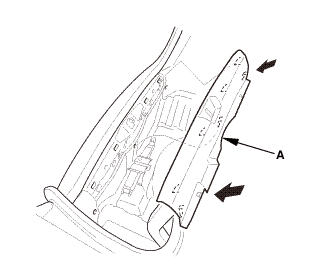
| 8. | Trunk Side Trim Panel (Natural Gas Model) |
|
|
|
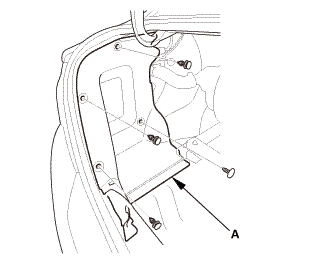
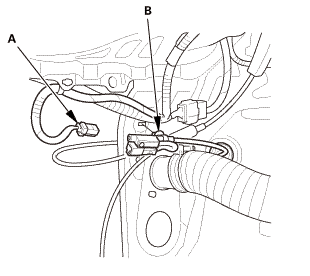
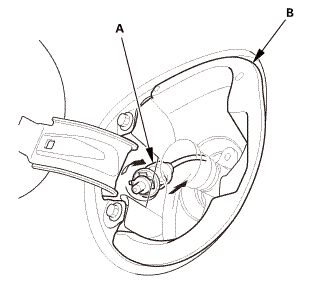
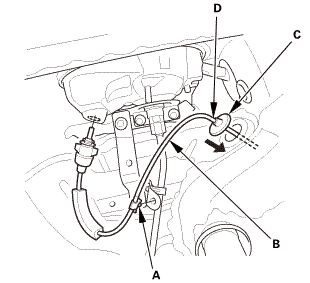
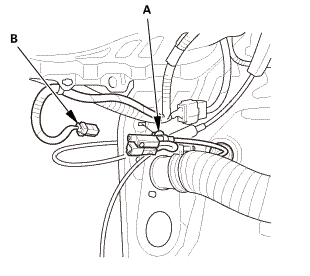
| 9. | Fuel Fill Door Switch (Natural Gas Model) |
|
|
|
|
|
|
|
|
|

| 1. | Fuel Fill Door Switch (Natural Gas Model) |
|
|
|
|||||||||
|
|
|
|
|
|
| 2. | Trunk Side Trim Panel (Natural Gas Model) |
|
|
|
| 3. | Trunk Front Trim Panel (Natural Gas Model) |
|
|
|
| 4. | Trunk Rear Trim Panel (Natural Gas Model) |
|
|
|
| 5. | Trunk Lid Weatherstrip as Needed |
|
|
|
| 6. | Trunk Floor Lid (Natural Gas Model) |
|
|
|
| 7. | Fuel Pipe Protector (Natural Gas Model) |
|
|
|
| 8. | Rear Wheel |
|
|
|
||||||
 15mmumum
 Fuel/Charge Lid
...
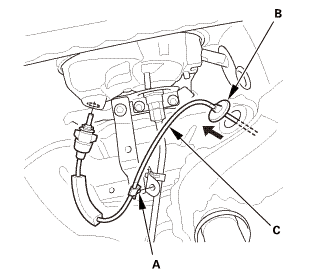
 Trunk Lid Opener Cable/Fuel Fill Door Opener Cable Removal and Installation
(4-door except Natural Gas models)
Trunk Lid Opener Cable/Fuel Fill Door Opener Cable Removal and Installation
(4-door except Natural Gas models)
823160
SRS components are located in this area. Review the SRS component
locations and the precautions and procedures before doing repairs
or service.
...
See also:
Honda Civic Owners Manual. Getting Ready to Replace the Flat Tire
Open the trunk floor lid.
Take the tool case out of the trunk. Take
the jack and wheel nut wrench out of the
tool case.
Unscrew the wing bolt, and remove the
spacer cone. Then, remove the spare tire.
Place a wheel block or rock in front and rear
of the whee ...
