Honda Civic Service Manual: Front Impact Sensor Removal and Installation ('12, '13: except KA KC models)
7521A4 LEFT FRONT
7521A8 RIGHT FRONT

Removal
|
NOTE: SRS components are located in this area. Review the SRS component locations and the precautions and procedures before doing repairs or service. |
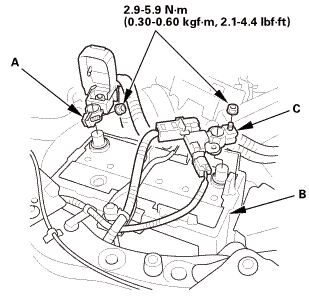
| 1. | Battery Terminal (SRS) - Disconnection |
|
|
|
|||||||||||||||
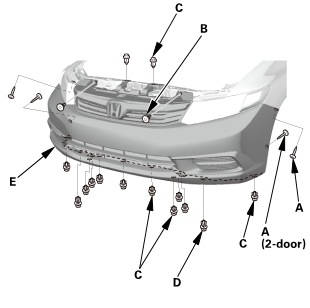
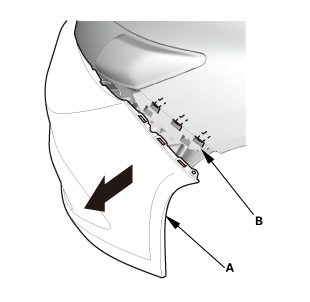
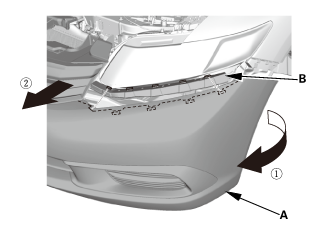
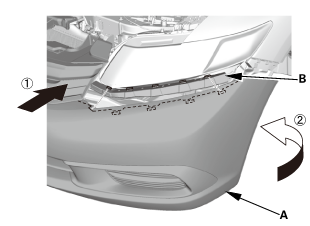
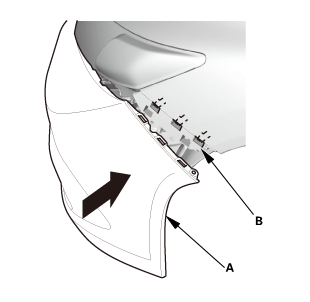
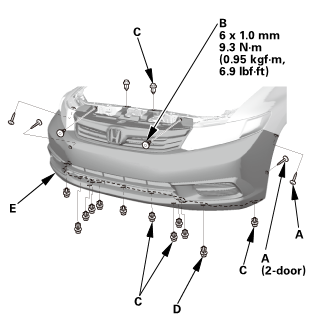
| 2. | Front Bumper |
|
|
|
|
|
|
|
|
|
|
|
|
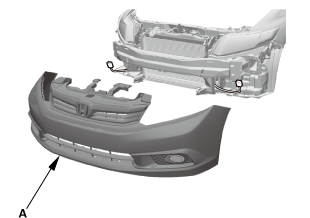
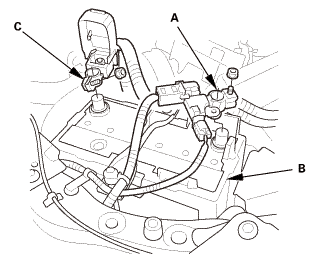
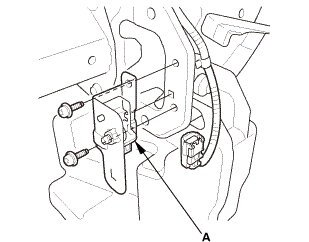
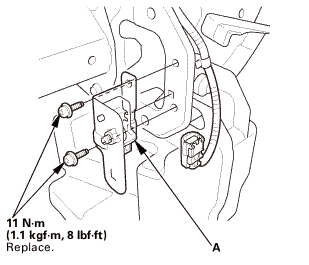
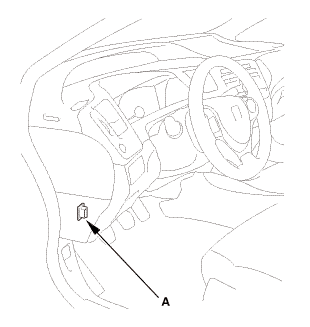
| 3. | Front Impact Sensor |
|
|
|

Installation
|
NOTE: SRS components are located in this area. Review the SRS component locations and the precautions and procedures before doing repairs or service. |
| 1. | Front Impact Sensor |
|
|
|
| 2. | Battery Terminal (SRS) - Reconnection |
|
|
|
||||||||||||||||
 (o.2ao.sam.
| 3. | HDS DLC - Connection |
|
|
|
| 4. | DTC - Clear |
|
| 5. | Confirm Proper SRS Operation |
|
| 6. | Front Bumper |
|
|
|
|
|
|
|
|
|
|
|
|
 Crash Sensors
...
 Side Impact Sensor (First) Removal and Installation (2-door)
7521B6 LEFT FRONT
7521B7 RIGHT FRONT
Removal
NOTE: SRS components are located in this area. Review the SRS component
locations and the precautions and procedures before doing re ...
See also:
Honda Civic Owners Manual. Switching the Display
Audio
Shows the current audio information.
Clock/Wallpaper
Shows a clock screen or an image you import.
Change display
1. Press the MENU/CLOCK button.
2. Rotate to select Settings,
then press .
3. Rotate to select Display Change,
then press .
4. Rotate to select ...
