Honda Civic Service Manual: Fuel Pump/Fuel Gauge Sending Unit Removal and Installation (R18Z1)

Removal
| 1. | Fuel Filler Cap |
|
| 2. | HDS DLC - Connection |
|
|
|
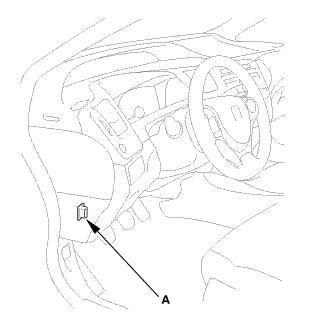
| 3. | Fuel Pump Off |
|
||||||||||||||||||||||||

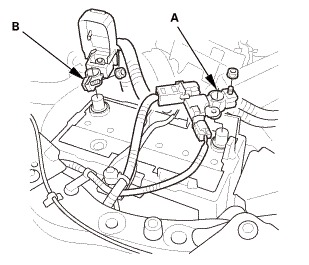
| 4. | Battery Terminal - Disconnection |
|
|
|
||||||||||||
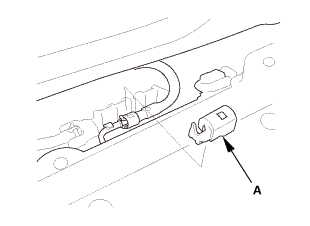
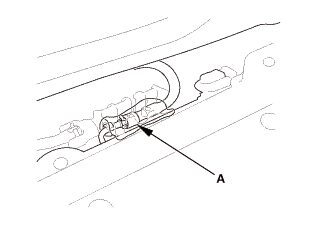
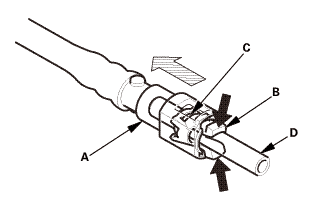
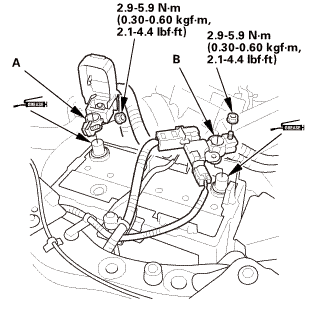
| 5. | Fuel Pressure - Relieving |
|
|
|
|
|
|
|
|
|
|||||||||||||||||||||||||
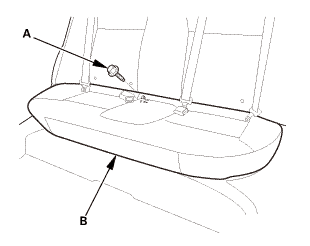
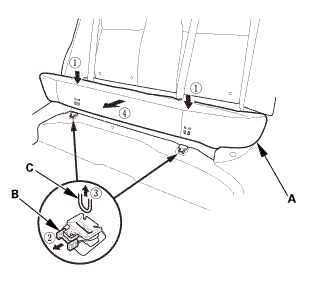
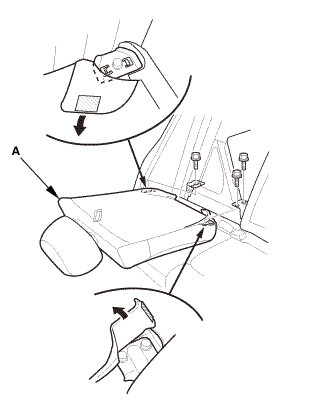
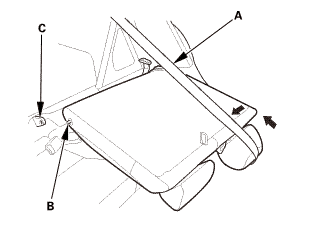
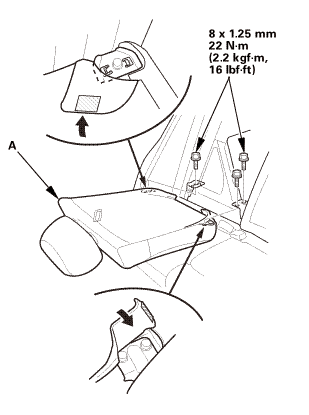
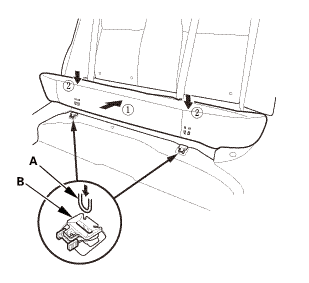
| 6. | Rear Seat Cushion |
|
|
|
|
|
|
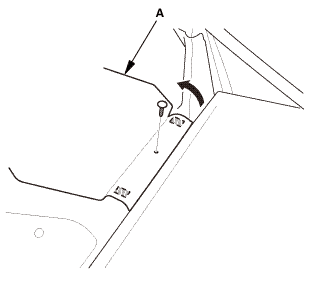
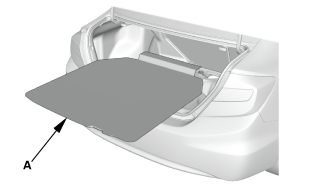
| 7. | Trunk Floor Cover |
|
|
|
|
|
|

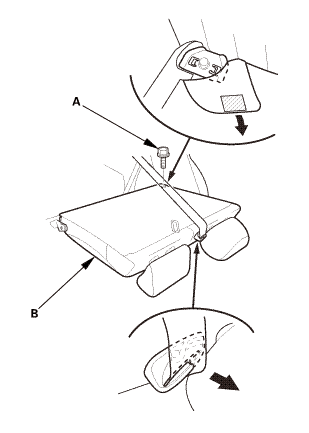
| 8. | Right Rear Seat-Back - Split Fold Down |
|
|
|
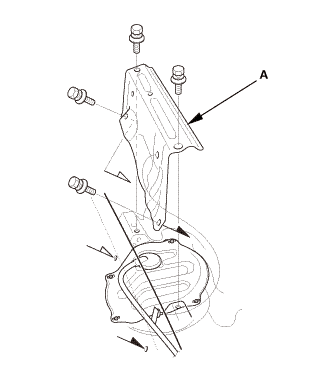
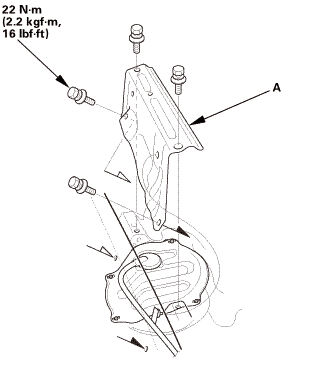
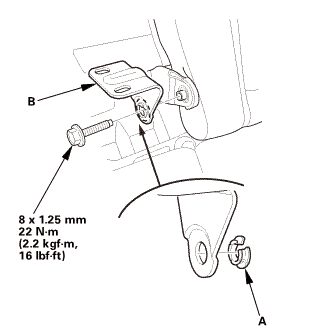
| 9. | Center Pivot Bracket - Split Fold Down |
|
|
|

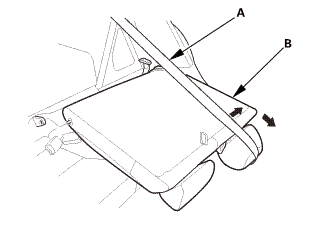
| 10. | Left Rear Seat-Back - Split Fold Down |
|
|
|
|
|
|
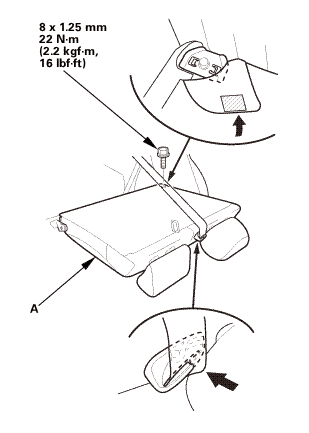
| 11. | Rear Floor Upper Cross-Member |
|
|
|
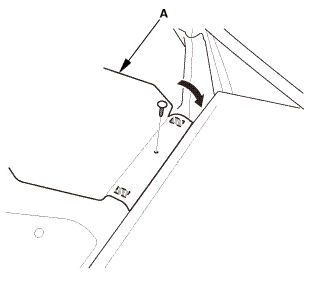
| 12. | Fuel Gauge Sending Unit Access Panel |
|
|
|
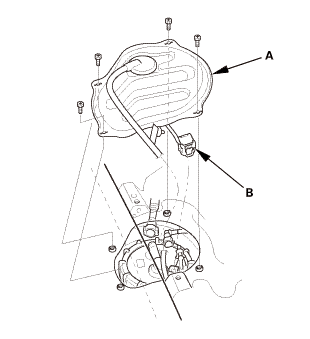
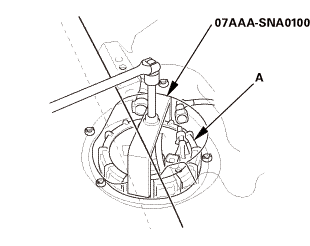
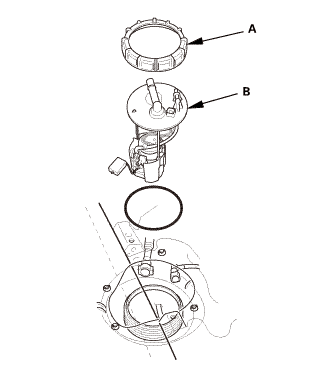
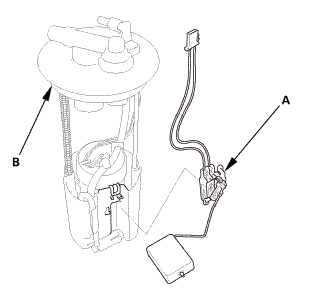
| 13. | Fuel Tank Unit |
|
|
|
|
|
|
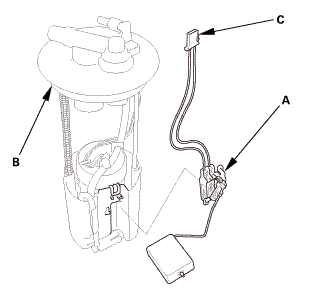
| 14. | Fuel Gauge Sending Unit |
|
|
|
|||||||||||||||||

Installation
| 1. | Fuel Gauge Sending Unit |
|
|
|
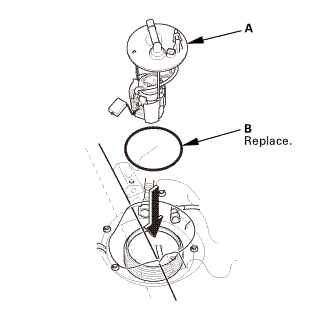
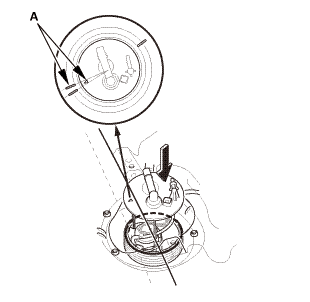
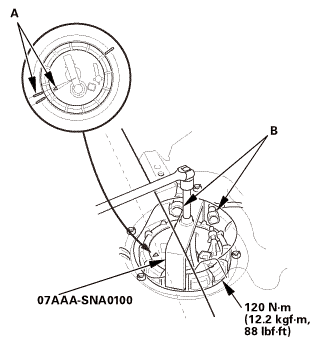
| 2. | Fuel Tank Unit |
|
|
|
|
|
|
||||||
|
|
|
||||||

|
|
|
||||||||||||||||||||
 a7aaa.suaa1aa
| 3. | Battery Terminal - Reconnection |
|
|
|
||||||||||||||||
| 4. | HDS DLC - Connection |
|
|
|

| 5. | Fuel Pump On |
|
||||||||||
| 6. | Fuel Gauge Sending Unit Access Panel |
|
|
|

| 7. | Fuel Line Leak Check |
|
| 8. | Rear Floor Upper Cross-Member |
|
|
|
 22mm
22mm| 9. | Left Rear Seat-Back - Split Fold Down |
|
|
|
|
|
|
| 10. | Center Pivot Bracket - Split Fold Down |
|
|
|
| 11. | Right Rear Seat-Back - Split Fold Down |
|
|
|
| 12. | Fuel Filler Cap |
|
| 13. | Trunk Floor Cover |
|
|
|
|
|
|
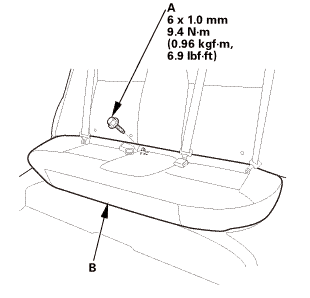
| 14. | Rear Seat Cushion |
|
|
|
|
|
|
 Fuel Pressure Regulator Removal and Installation (R18Z1)
121135
Removal
1.
Fuel Filler Cap
1.
Remove the fuel fill cap to relieve the pressure in the fuel
tank.
...
 Fuel Tank
...
See also:
Honda Civic Owners Manual. HFL Menus
The ignition switch must be in ACCESSORY (q or ON (w*1 to use HFL.
Phone settings screen
*1: Models with the smart entry system have an ENGINE START/STOP button
instead of an
ignition switch.
HFL Menus
To use HFL, you must first pair your Bluetoothcompatible
cell phon ...
