Honda Civic Service Manual: Rewriting the ODO Data and Transferring the Maintenance Minder™ Data to a New Gauge Control Module ('13)

| 1. | HDS DLC - Connection |
|
|
|

| 2. | Rewriting The ODO Data and Transferring The Maintenance MinderTM Data to a New Gauge Control Module |
|

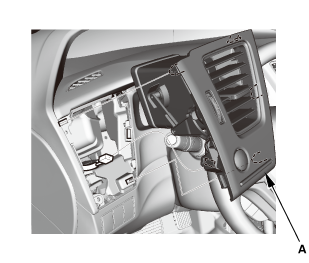
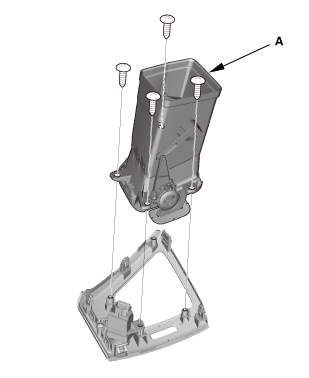
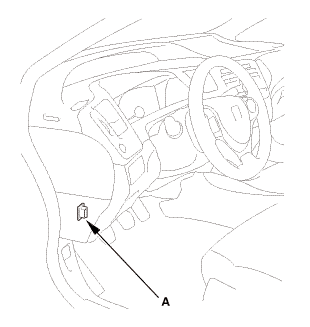
| 3. | Driver's Outer Vent |
|
|
|
|
|
|
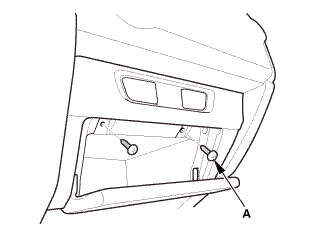
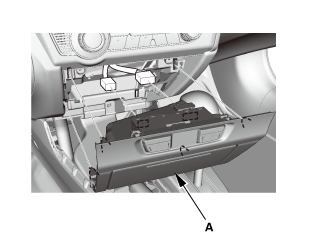
| 4. | Dashboard Center Pocket |
|
|
|
|
|
|
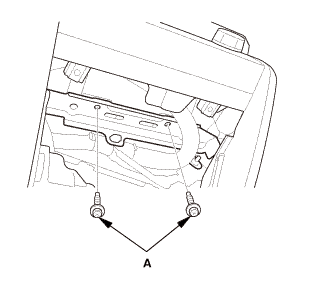
| 5. | Audio Unit Assembly (Without audio panel pocket) |
|
|
|
|
|
|
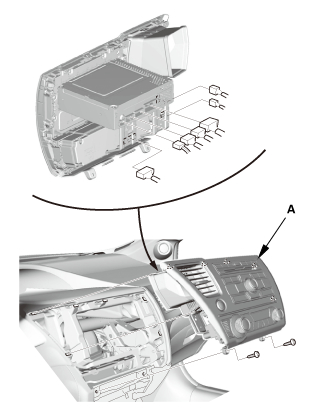
| 6. | Audio Unit Assembly (With audio panel pocket) |
|
|
|
|
|
|

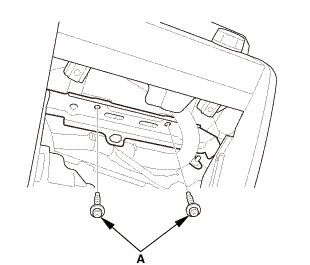
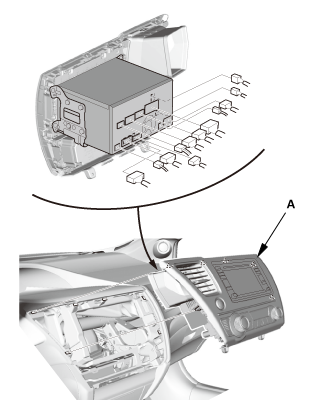
| 7. | Audio-Navigation Unit Assembly |
|
|
|
|
|
|
| 8. | Driver's Dashboard Lower Cover |
|
|
|

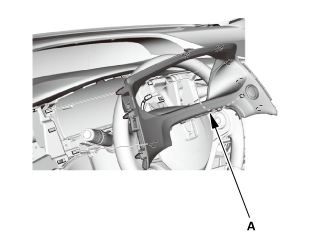
| 9. | Dashboard Subdisplay Visor |
|
|
|

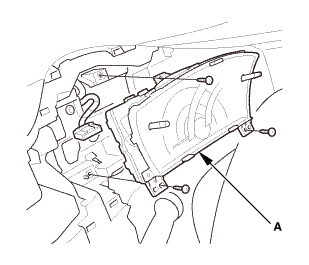
| 10. | Gauge Control Module - Tach |
|
|
|


| 1. | Gauge Control Module - Tach |
|
|
|
| 2. | HDS DLC - Connection |
|
|
|
| 3. | Rewriting The ODO Data and Transferring The Maintenance MinderTM Data to a New Gauge Control Module |
|
| 4. | How to Release Locked Odometer Mileage to the Original Gauge Control module |
|
| 5. | Dashboard Subdisplay Visor |
|
|
|
| 6. | Driver's Dashboard Lower Cover |
|
|
|
| 7. | Audio-Navigation Unit Assembly |
|
|
|
||||||
|
|
|
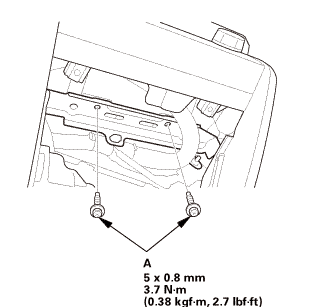
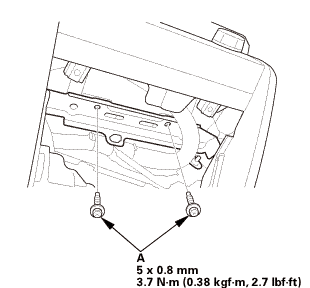 mm3.72.7
| 8. | Audio Unit Assembly (With audio panel pocket) |
|
|
|
||||||
|
|
|
| 9. | Audio Unit Assembly (Without audio panel pocket) |
|
|
|
||||||
|
|
|
| 10. | Dashboard Center Pocket |
|
|
|
|
|
|
| 11. | Driver's Outer Vent |
|
|
|
|
|
|
 Fuel Pump/Fuel Gauge Sending Unit Removal and Installation (R18Z1)
Removal
1.
Fuel Filler Cap
1.
Remove the fuel fill cap to relieve the pressure in the fuel
tank.
...
 Body Interior
...
See also:
Honda Civic Service Manual. A/T Differential Carrier Bearing Replacement (A/T)
Removal
NOTE:
The bearing and the bearing outer race should be replaced as
a set.
Inspect and adjust the carrier bearing preload whenever bearing ...
