Honda Civic Service Manual: Outside Air Temperature Indicator Calibration ('12-'13, '14: 4-door)

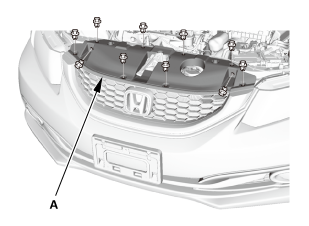
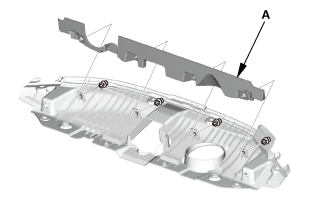
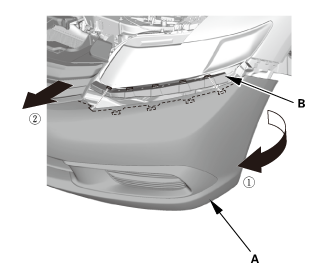
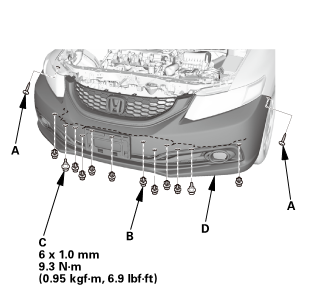
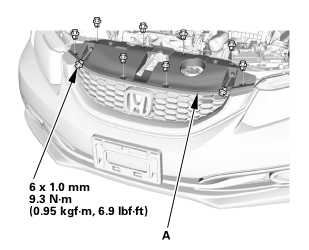
| 1. | Front Grille Cover |
|
|
|
|
|
|
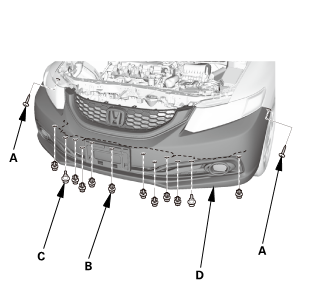
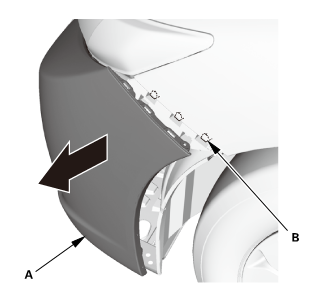
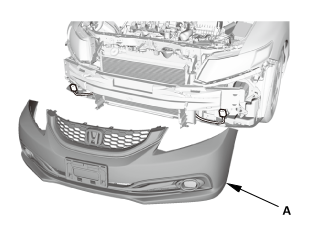
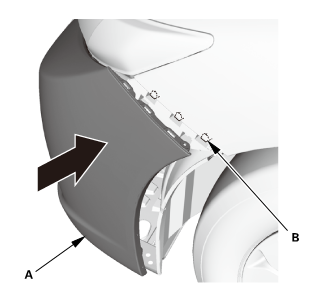
| 2. | Front Bumper |
|
|
|
|
|
|
|
|
|
|
|
|

| 1. | Outside Air Temperature Indicator - Calibration |
|

|
Centigrade:
|
|

|
Calibration |
|
NOTE: The outside air temperature indicator's displayed temperature can
be recalibrated
|
 5
°F (
5
°F (|
1. |
Turn the ignition switch to ON (II). |
|
2. |
To enter the customized setting display, select the above display with the MENU button, then press the SOURCE button customizing mode. |
|
3. |
While in the customizing mode, select the "Trip Computer Setup". Then select the "Adjust Outside Temp. Display", and calibrate the value with the MENU button and the SOURCE button. |
 name
name
|
4. |
When the desired correction value appears on the display, release the button, and the recalibrated outside air temperature will be displayed. |
|||||||||||||||||||
|
NOTE: The recalibration temperature is not the value the sensor detects.
Therefore, the temperature can only be adjusted
|
||||||||||||||||||||
|
|
||||||||||||||||||||
|
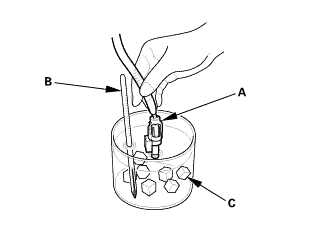
NOTE: To recalibrate the display to the true temperature, remove the outside air temperature sensor (A), but leave it connected. Submerge the sensor and a thermometer (B) in a container of ice water (C). Select the calibration mode as described above, then recalibrate the display to the true temperature. |
||||||||||||||||||||
|
|
|


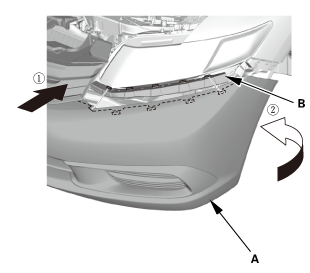
| 1. | Front Bumper |
|
|
|
|
|
|
|
|
|
|
|
|
| 2. | Front Grille Cover |
|
|
|
|
|
|
 Information Display Unit Removal and Installation ('13)
1.
Driver's Outer Vent
1.
Remove the driver's outer vent (A).
...
 Body
Body
...
See also:
Honda Civic Service Manual. Passenger's Center Vent Removal and Installation (With Navigation)
8411E6 RIGHT CENTER
1.
Driver's Dashboard Lower Cover
1.
Remove the driver's dashboard lower cover (A).
2.
Dashboard Subdisplay Visor
...
