Honda Civic Service Manual: Connecting Rod and Crankshaft End Play Inspection (K24Z7)

Removal
| 1. | Engine Wire Harness |
|
|
|
| 2. | Intermediate Shaft Assembly |
|
|
|
| 3. | Clutch Cover |
|
|
|
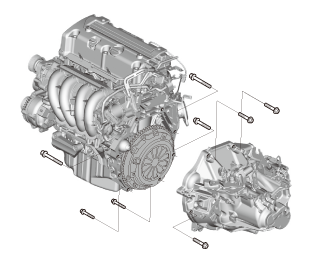
| 4. | Manual Transmission Assembly |
|
|
|
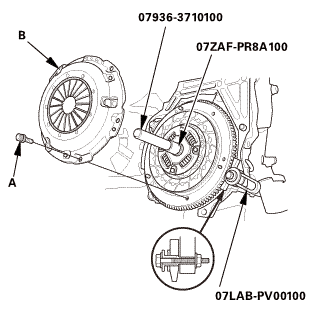
| 5. | Pressure Plate |
|
|
|
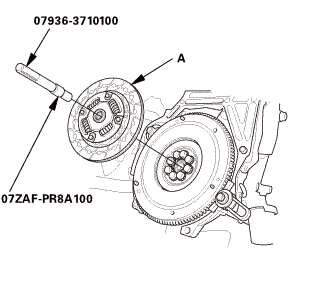
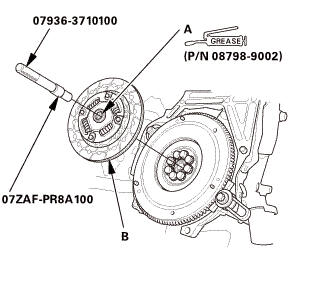
| 6. | Clutch Disc |
|
|
|
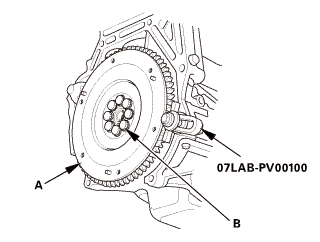
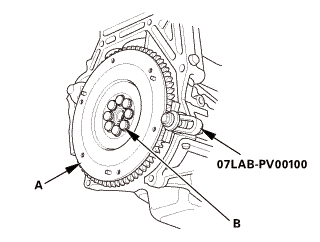
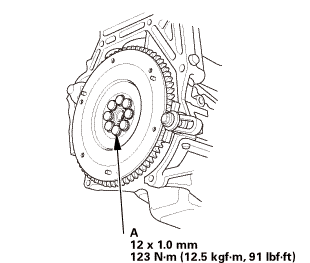
| 7. | Flywheel |
|
|
|
|||||||||
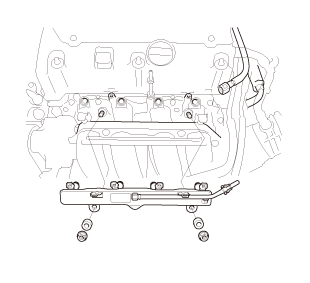
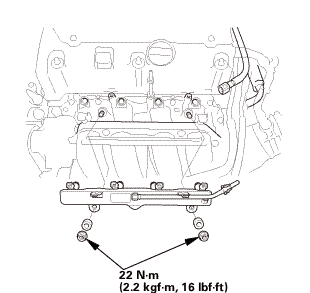
| 8. | Fuel Injector and Rail Assembly |
|
|
|
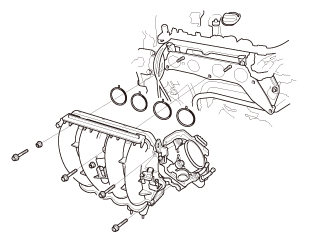
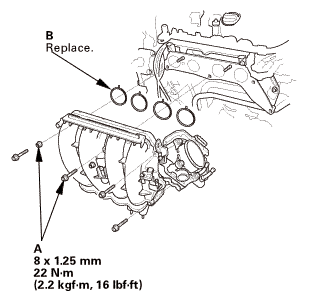
| 9. | Intake Manifold and Throttle Body Assembly |
|
|
|
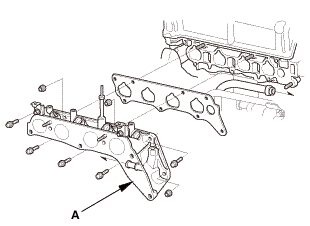
| 10. | Injector Base Assembly |
|
|
|
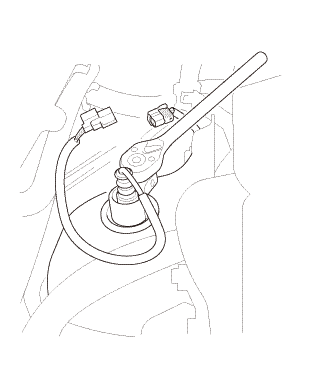
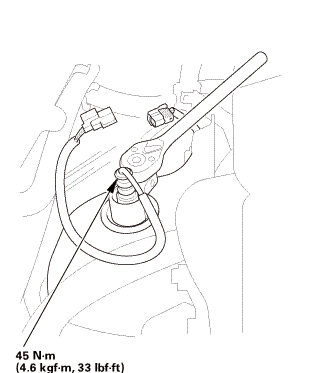
| 11. | A/F Sensor |
|
|
|
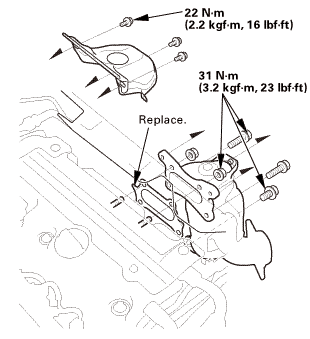
| 12. | WU-TWC |
|
|
|
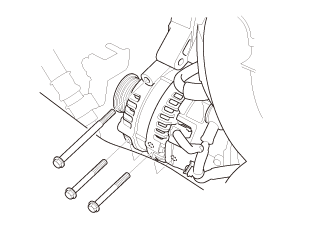
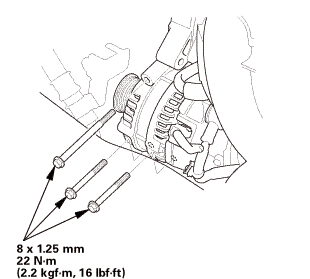
| 13. | Alternator |
|
|
|
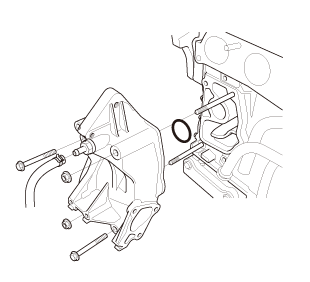
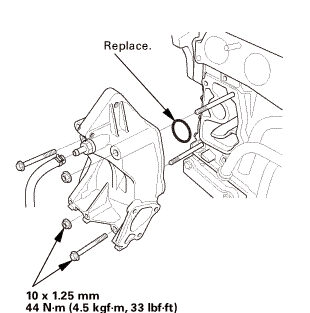
| 14. | Water Passage Assembly |
|
|
|
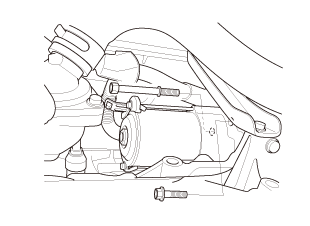
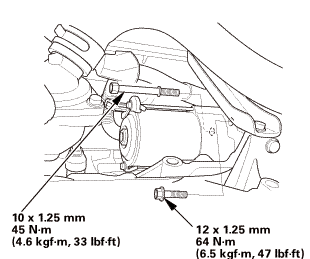
| 15. | Starter |
|
|
|
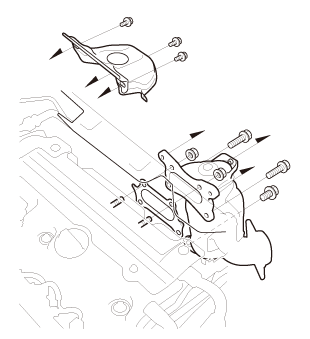
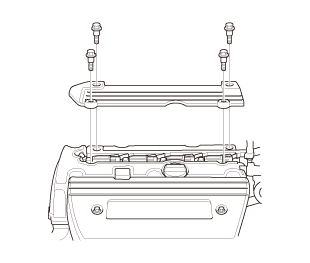
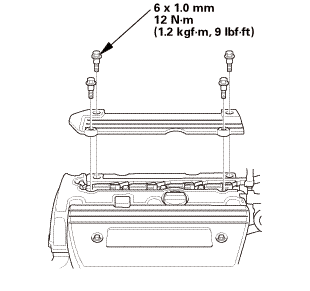
| 16. | Ignition Coil Cover |
|
|
|
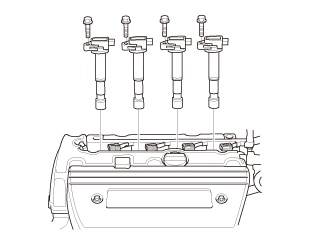
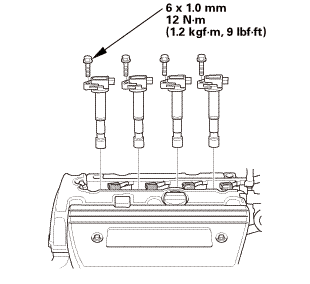
| 17. | Ignition Coil |
|
|
|
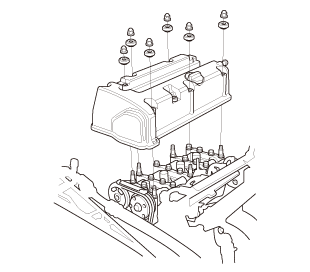
| 18. | Cylinder Head Cover |
|
|
|
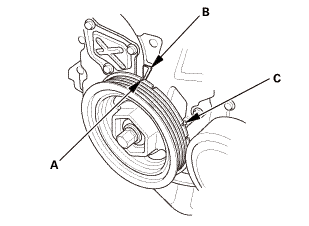
| 19. | Set The Crankshaft To Top Dead Center |
|
|
|
||||||
| 20. | Set The No.1 Piston at Top Dead Center (With Cam Chain Case/Oil Pump) |
|
|
|
| 21. | Cam Chain Case Peripheral Assembly |
|
|
|
| 22. | VTC Oil Control Solenoid Valve |
|
|
|
| 23. | Crankshaft Pulley |
|
|
|
| 24. | Side Engine Mount Bracket, Engine Side |
|
|
|
| 25. | Cam Chain Case |
|
|
|
| 26. | Cam Chain Auto-Tensioner |
|
|
|
|
|
|
||||||
|
|
|
| 27. | Cam Chain Tensioner Arm and Cam Chain Guide |
|
|
|
|
|
|
| 28. | Cam Chain |
|
| 29. | Camshaft Holder |
|
|
|
|
|
|
|
|
|
| 30. | Camshaft |
|
|
|
| 31. | Rocker Arm Assembly |
|
|
|
| 32. | Cylinder Head Assembly |
|
|
|
| 33. | Oil Pan Assembly |
|
|
|
|
|
|
| 34. | Oil Pump Chain Tensioner |
|
|
|
|
|
|
|
|
|
| 35. | Engine Oil Pump Assembly |
|
|
|
|
|
|
|
|
|
| 36. | Engine Baffle Plate |
|
|
|
 Inspection
| 1. | Connecting Rod and Crankshaft End Play - Inspection |
|
1. |
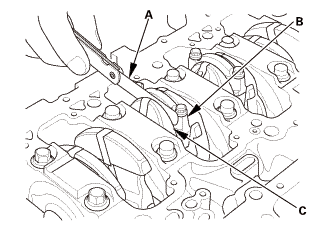
Measure the connecting rod end play with a feeler gauge (A) between the connecting rod (B) and the crankshaft (C). |
|||||||||
|
||||||||||
|
2. |
If the connecting rod end play is beyond the service limit, install a new connecting rod, and recheck. If it is still beyond the service limit; replace the crankshaft. |
|
3. |
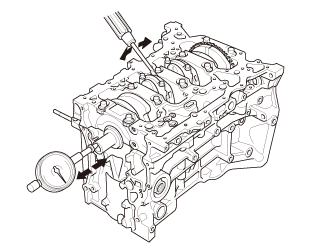
Push the crankshaft firmly away from the dial indicator by prying, and zero the dial against the end of the crankshaft. Then pull the crankshaft firmly back toward the indicator by prying; the dial reading should not exceed the service limit. |
|||||||||
|
||||||||||
|
4. |
If the crankshaft end play is beyond the service limit, replace the thrust washers and recheck. If it is still beyond the service limit, replace the crankshaft. |

Installation
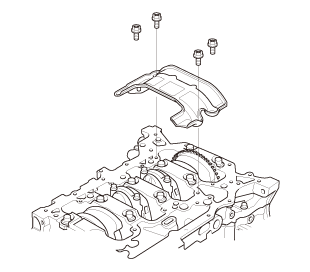
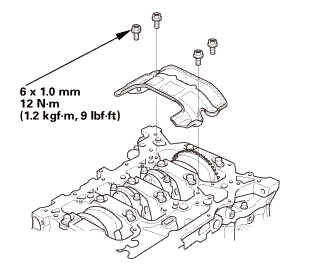
| 1. | Engine Baffle Plate |
|
|
|
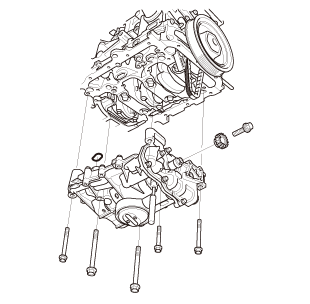
| 2. | Engine Oil Pump Assembly |
|
|
|
|
|
|
|
|
|
|
|
|
||||||
| 3. | Oil Pump Chain Tensioner |
|
|
|
| 4. | Oil Pan Assembly |
|
|
|
||||||||||||||||||||||||||
|
|
|
|||||||||||||||||
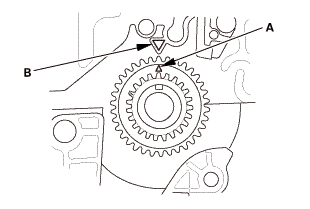
| 5. | Set The Crankshaft To Top Dead Center |
|
|
|
| 6. | Cylinder Head Assembly |
|
|
|
|
|
|
|
|
|
|
|
|
|
|
|
||||||
| 7. | Rocker Arm Assembly |
|
|
|
||||||||||||||||||||
|
|
|
||||||||||||
| 8. | Camshaft |
|
|
|
| 9. | Camshaft Holder |
|
|
|
|
|
|
||||||||||||
| 10. | Cam Chain |
|
|
|
|
|
|
|
|
|
| 11. | Cam Chain Tensioner Arm and Cam Chain Guide |
|
|
|
|
|
|
| 12. | Cam Chain Auto-Tensioner |
|
|
|
||||||
|
|
|
|
|
|
|
|
|
| 13. | Cam Chain Case |
|
|
|
|||||||||||||||||||||||||||
|
|
|
|||||||||||||||||||||
|
6. |
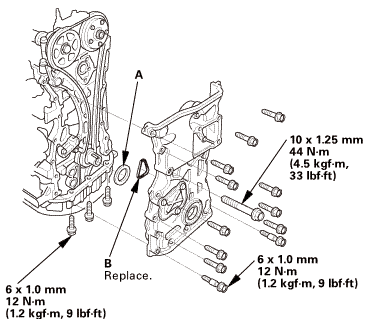
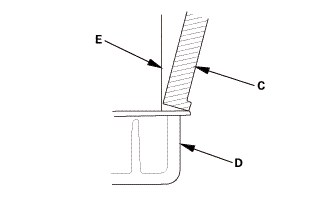
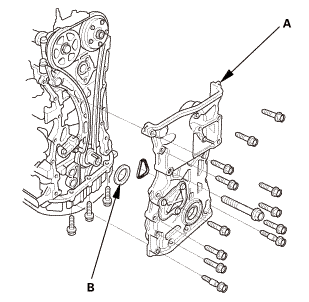
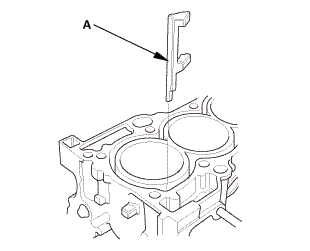
Install the spacer (A), then install a new O-ring (B) on the chain case. Set the edge of the chain case (C) to the edge of the oil pan (D), then install the chain case on the engine block (E). Wipe off the excess liquid gasket on the oil pan and the chain case mating area. |
|||||||||||||
|
NOTE: |
||||||||||||||
|
||||||||||||||
 tommi2mmu....
| 14. | Side Engine Mount Bracket, Engine Side |
|
|
|
| 15. | Crankshaft Pulley |
|
|
|
|
|
|
| 16. | VTC Oil Control Solenoid Valve |
|
|
|
||||||||||||||||||||
| 17. | Cam Chain Case Peripheral Assembly |
|
|
|
| 18. | Valve Clearance - Adjustment |
|
|
|
|
2. |
Select the correct feeler gauge for the valve clearance you are going to check. |
|||||||||
|
||||||||||
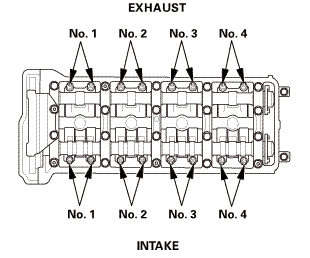
|
|
|
|
|
|
|||||||||||||||
|
|
|
|
|
|
|
|
|
| 19. | Cylinder Head Cover |
|
|
|
||||||||||||
|
|
|
||||||||||||
|
|
|
|
|
|
|||||||||||||||||
| 20. | Ignition Coil |
|
|
|
| 21. | Ignition Coil Cover |
|
|
|
| 22. | Starter |
|
|
|
| 23. | Water Passage Assembly |
|
|
|
| 24. | Alternator |
|
|
|
| 25. | WU-TWC |
|
|
|
| 26. | A/F Sensor |
|
|
|
| 27. | Injector Base Assembly |
|
|
|
| 28. | Intake Manifold and Throttle Body Assembly |
|
|
|
| 29. | Fuel Injector and Rail Assembly |
|
|
|
| 30. | Flywheel |
|
|
|
|
|
|
| 31. | Clutch Disc |
|
|
|
||||||||||||
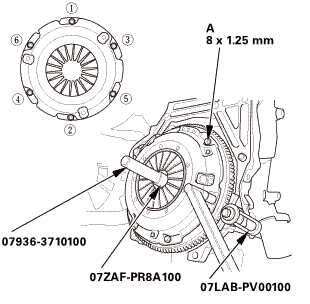
| 32. | Pressure Plate |
|
|
|
|
|
|
|||||||||||||||||||||||||||||||||
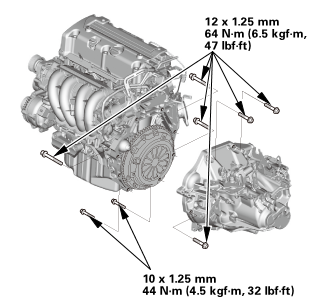
| 33. | Manual Transmission Assembly |
|
|
|
| 34. | Clutch Cover |
|
|
|
| 35. | Intermediate Shaft Assembly |
|
|
|
||||||
| 36. | Engine Wire Harness |
|
|
|
 Crankshaft and CKP Pulse Plate Removal, Installation, and Inspection (R18A9)
Removal
1.
Intake Manifold and Throttle Body Assembly (Natural Gas Model)
1.
Remove the intake air duct.
...
 Connecting Rod and Crankshaft End Play Inspection (R18A9)
Removal
1.
Intake Manifold and Throttle Body Assembly (Natural Gas Model)
1.
Remove the intake air duct.
...
See also:
Honda Civic Owners Manual. When in Operation
There is a vehicle ahead
ACC with LSF monitors if a vehicle ahead of you enters the ACC with LSF
range. If a
vehicle is detected doing so, the ACC with LSF system maintains or decelerates
your
vehicle's set speed in order to keep the vehicle's set following interval from
the
vehicle ahead. ...

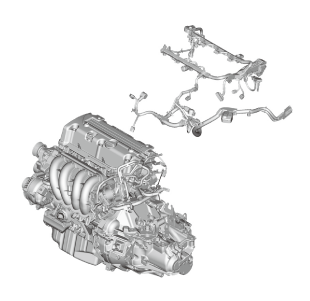
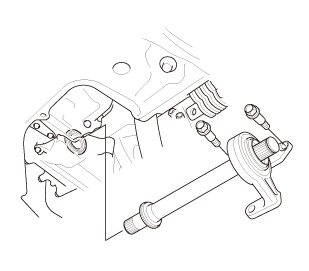
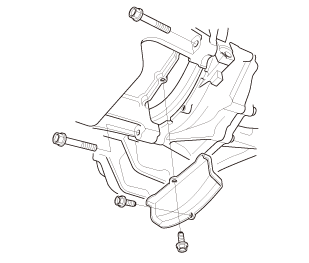
 1aah(jaal0a
 ixmm12mm

 szconn
 2.5mm
2.5mm
 ,
,

 (21m,mm
 .min)
.min)
 1aah(jaal0a
 inl25mm
 inl25mmnm
 22mmkvf-m,mm
 lbm1!
lbm1!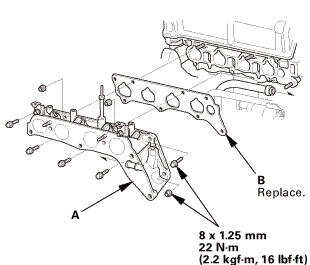
 (pm
(pm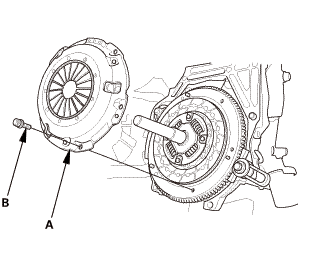
 lx125mm
 :2mmmmn-mlbm1!n-m
 n-mu.olbm1!