Honda Civic Service Manual: License Plate Light Removal and Installation - Double Lights ('13-'14: 4-door)

|
|
|
1.
|
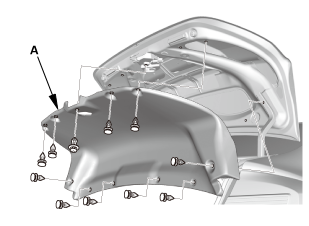
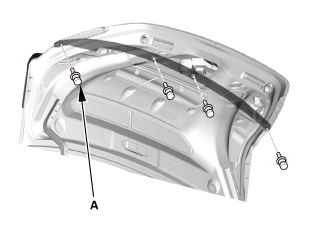
Remove the trunk lid trim panel (A).
|
|
|
|
|
1.
|
Disconnect the connectors.
|
|
2.
|
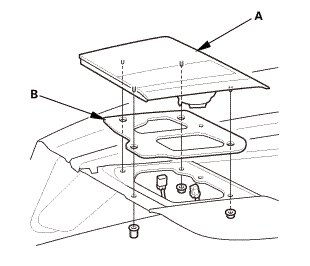
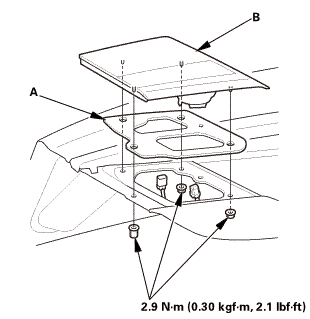
Remove the inner taillight (A).
|
|
3.
|
Remove the gasket (B) from the inner taillight.
|
|
|
|
|
2.
|
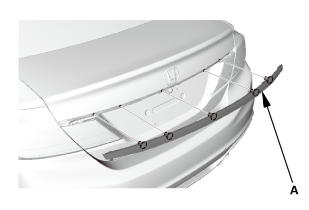
Remove the rear license trim (A).
|
|
|
|
|
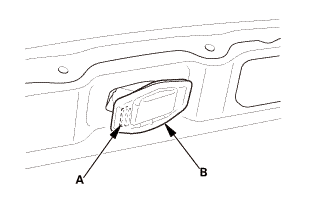
1.
|
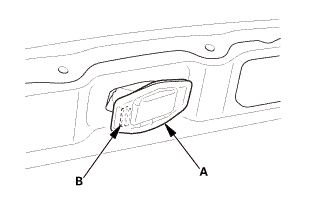
Push the license plate light assembly (A) to the side to release
the retaining spring (B), and pull out the license plate light assembly.
|
|
|
|
|
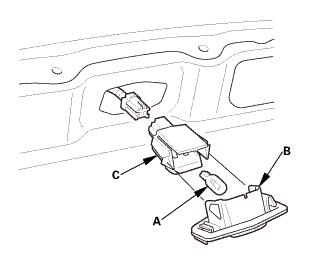
2.
|
Disconnect the connector.
|
|
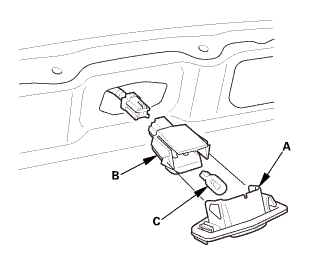
3.
|
Separate the lens (A) from the housing (B).
|
|

|
|
|
2.
|
Install the lens (B) on the housing (C).
|
|
3.
|
Connect the connector.
|
|
|
|
|
4.
|
Insert the hook (A), then lightly push the license plate light
assembly (B) in to install it.
|
|
|
|
|
1.
|
Install the rear license trim (A).
|
|
|
|
|
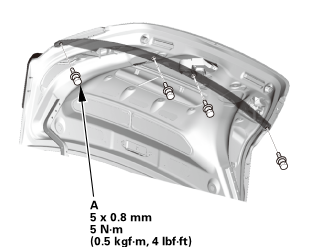
2.
|
Install the bolts (A).
|
|
|
|
|
1.
|
Install the gasket (A) to the inner taillight (B).
|
|
NOTE: Inspect the gasket, replace it if it is distorted or stays
compressed.
|
|
2.
|
Install the inner taillight.
|
|
3.
|
Connect the connectors.
|
|
|

|
|
1.
|
Install the trunk lid trim panel (A).
|
|
Removal
1.
License Plate Light Assembly
1.
Push the license plate light assembly (A) to the side to release
...
 License Plate Light Removal and Installation (2-door)
 Tail Lamp