Honda Civic Service Manual: Intake Air Resonator Removal and Installation ('12-'13: K24Z7, '14: 4-door K24Z7)
1211T1

|
|
|
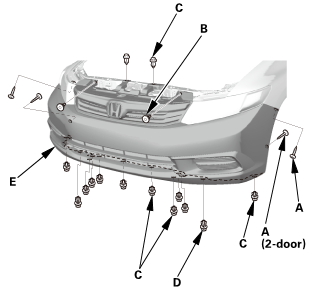
1.
|
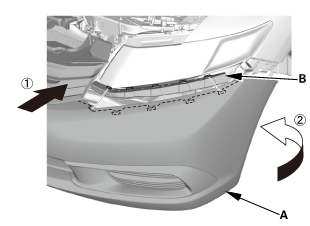
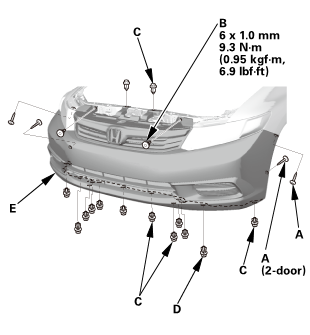
Remove the screws (A), the bolts (B), and the clips (C, D) securing
the front bumper (E).
|
|
|
|
|
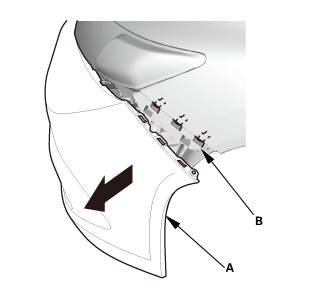
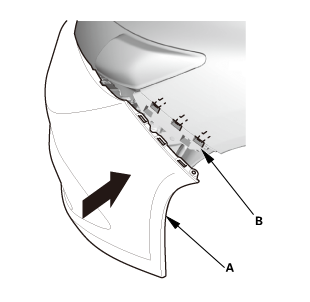
2.
|
Pull out the front bumper (A) from the side spacer (B). Repeat
this step on the opposite side.
|
|
|
|
|
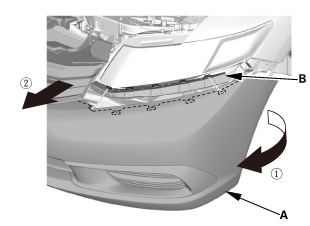
3.
|
With the help of an assistant, pull out both sides of the front
bumper (A) from the upper beam (B).
|
|
|
|
|
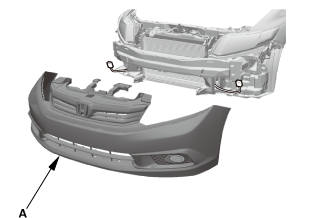
4.
|
With the help of an assistant, remove the front bumper (A).
|
|
| 2. |
Battery Terminal - Disconnection |
|
|
|
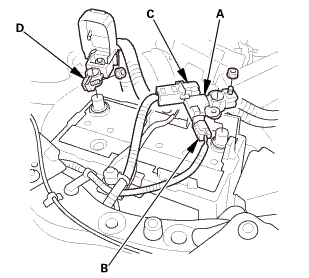
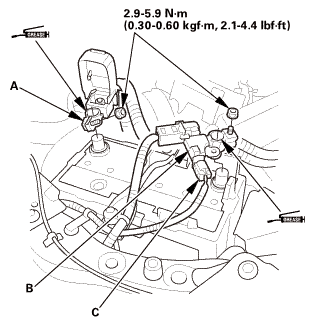
1.
|
Make sure the ignition switch is in LOCK (0), or the vehicle
ignition in the OFF mode.
|
|
2.
|
Disconnect and isolate the negative cable with the battery sensor
(A) from the battery.
|
|
NOTE:
|
|

|
Always disconnect the negative side first.
|
|
|
|
To protect the battery sensor connector (B) from
damage, do not hold it when removing the negative
terminal.
|
|
|
|
Do not disconnect the battery sensor from the
negative terminal (C).
|
|
|
|
3.
|
Disconnect the positive cable (D) from the battery.
|
|
|

|
|
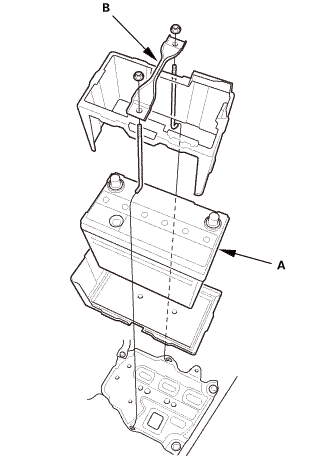
1.
|
Remove the battery setting plate (A) and the battery (B).
|
|
| 4. |
Intake Air Resonator Assembly |
|
|
|
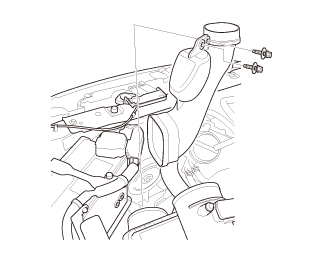
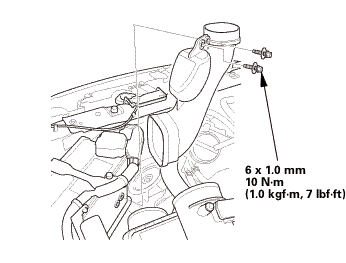
1.
|
Remove the intake air pipe.
|
|
|
|
|
2.
|
Disconnect the air intake duct tube (A).
|
|
3.
|
Remove the intake air resonator (B).
|
|

| 1. |
Intake Air Resonator Assembly |
|
|
|
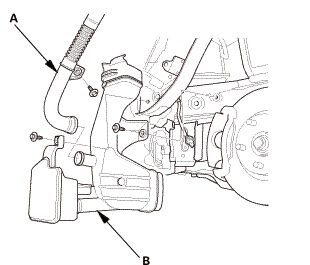
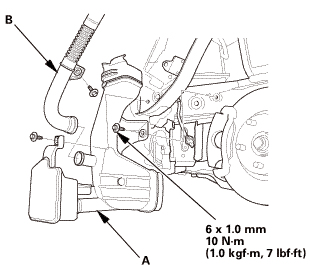
1.
|
Install the intake air resonator (A).
|
|
2.
|
Connect the air intake duct tube (B).
|
|
|
|
|
3.
|
Install the intake air pipe.
|
|
|
|
|
1.
|
Install the battery (A) and the battery setting plate (B).
|
|
NOTE: Do not deform the battery setting plate by over-tightening
the nuts.
|
|
| 3. |
Battery Terminal - Reconnection |
|
|
|
NOTE: If the battery performs abnormally, test the battery.
|
|
1.
|
Clean the battery terminals.
|
|
2.
|
Connect the positive cable (A) to the battery.
|
|
NOTE: Always connect the positive side first.
|
|
3.
|
Connect the negative cable and the battery sensor (B) to the
battery.
|
|
NOTE: To protect the battery sensor connector (C) from damage,
do not hold it when installing the negative terminal.
|
|
4.
|
Apply multipurpose grease to the terminals to prevent corrosion.
|
|
|
|
|
1.
|
With the help of an assistant, install the front bumper (A).
|
|
|
|
|
2.
|
With the help of an assistant, install both sides of the front
bumper (A) to the upper beam (B).
|
|
|
|
|
3.
|
Install the front bumper (A) to the side spacer (B). Repeat this
step on the opposite side.
|
|
|
|
|
4.
|
Install the screws (A), the bolts (B), and the clips (C, D) securing
the front bumper (E).
|
|
Removal
1.
Intake Air Pipe
1.
Remove the intake air pipe.
2.
Air Cleaner
...
1211D7
Removal
1.
Air Cleaner Housing Cover - Open
1.
Open the air cleaner cover (A).
...
See also:
Honda Civic Owners Manual. Traffic and Weather Information
You can receive traffic and weather information.
To set up a traffic & weather information
1. Select .
2. Select Settings.
3. Select Audio.
4. Select Traffic & Weather Setup.
5. Select the region.
When you do not want to receive the information, select Unregistered.
...
 Air Cleaner Removal and Installation (Except K24Z7)
 Air Cleaner Element Removal, Installation, and Inspection (K24Z7)