|

|
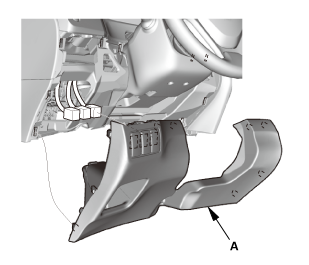
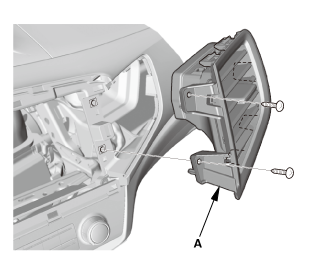
Lay a workshop towel under the parts when working on
them to protect the face panel from scratches or other damage.
|
|
|
|
Do not work in a dusty or dirty place.
|
|
|
|
Discharge static electricity from your body before and
during the work.
|
|
|
|
Do not touch the circuit board(s) with your bare hands.
|
|
|
|
Do not work with dirty hands.
|
|
|
|
Do not touch the terminal connector of the flat plate
cable with your bare hands (If you have touched it, wipe
it off thoroughly.).
|
|
|
|
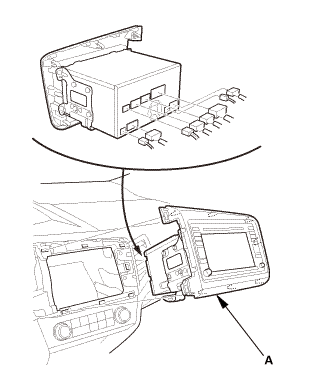
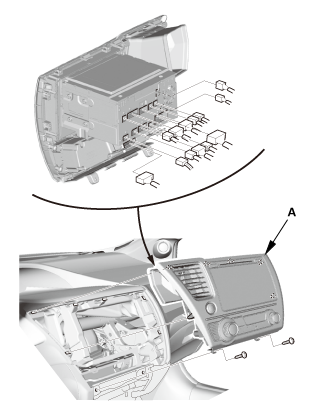
Eject the discs before removing the audio-navigation
unit to prevent damaging the CD/DVD player's load mechanism.
|
|
|
|
If you are replacing the audio-navigation unit, write
down the audio presets (if possible), then enter them into
the new audio-navigation unit.
|
|
|
|
When the audio-navigation unit is replaced or disconnected,
do the Map Matching. This part of the initialization matches
the GPS coordinates with a road on the map screen. To do
this part of the procedure, make sure that the navigation
system displays a map, and drive the vehicle on a mapped
road shown on the map screen. Do not enter a destination
at this time. When the name of the current road you are
driving on appears at the bottom of the screen, the entire
procedure is complete.
|
|


 mm3.72.7
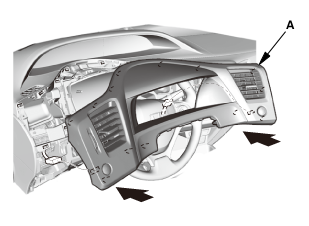
 Navigation System Symptom Troubleshooting Rearview camera image does not change
when selecting different views ('13)
Navigation System Symptom Troubleshooting Rearview camera image does not change
when selecting different views ('13) Passenger's Dashboard Trim Panel Removal and Installation (With Navigation)