Honda Civic Service Manual: Moonroof Frame/Drain Channel Slider and Cable Assembly Removal and Installation (2-door)

Removal
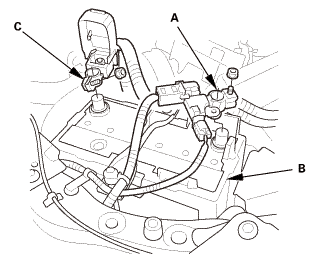
| 1. | Battery Terminal (SRS) - Disconnection |
|
|
|
|||||||||||||||
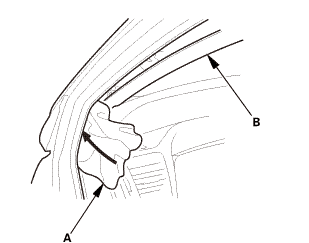
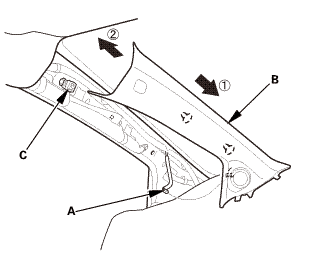
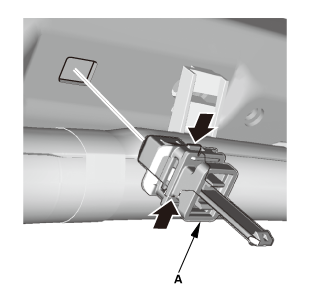
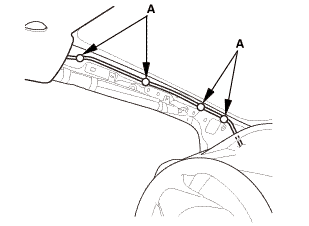
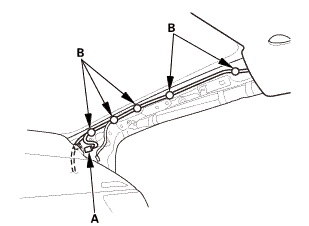
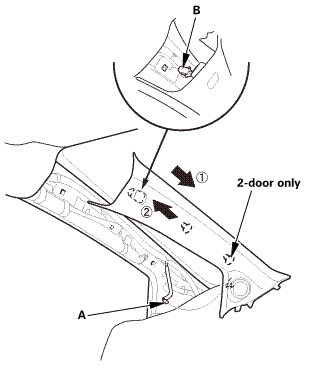
| 2. | A-Pillar Trim Both |
|
|
|
|
|
|
|
|
|
||||||
|
|
|
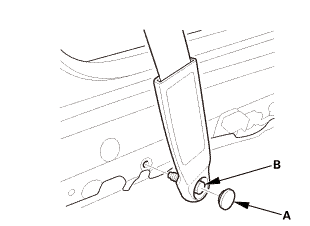
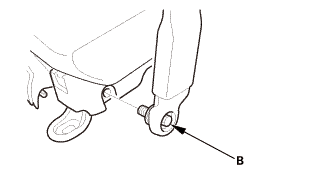
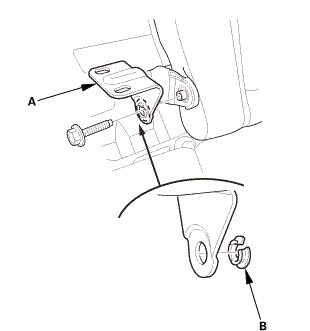
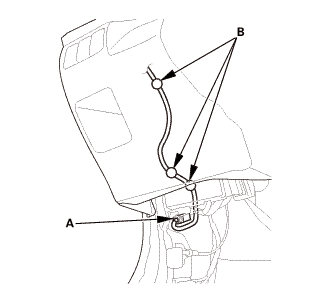
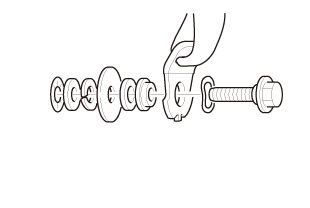
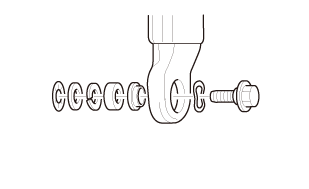
| 3. | Both Front Seat Belt Lower Anchor Bolts |
|
Driver's side
Passenger's side
|
|
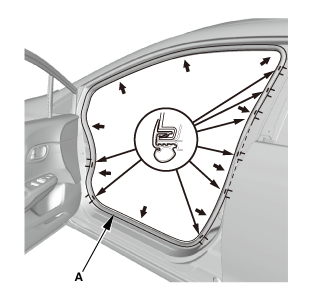
| 4. | Front Door Opening Seal As Needed Both |
|
|
|

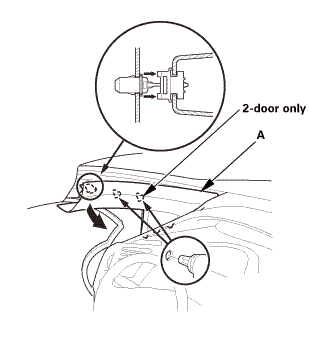
| 5. | Front Door Sill Trim - 2-Door |
|
|
|
|
|
|
|
|
|
| 6. | Front Door Sill Trim - 2-Door |
|
|
|
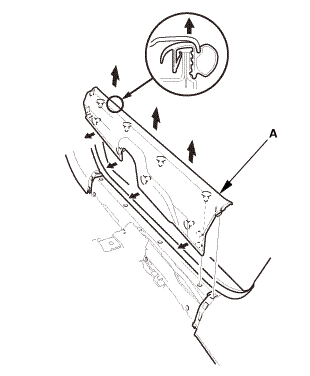
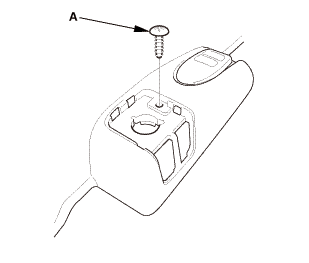
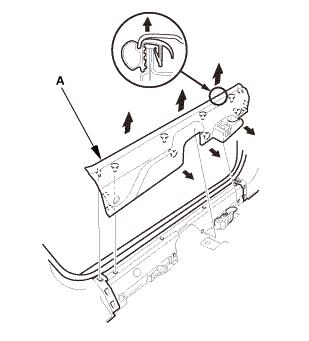
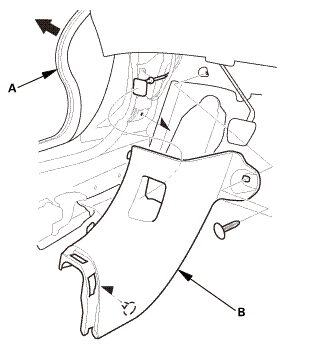
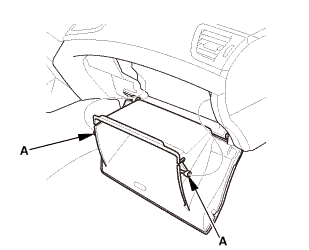
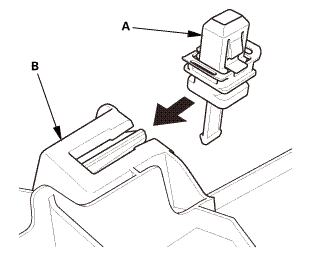
| 7. | Both Kick Panels |
|
Driver's side
Passenger's side
|
|
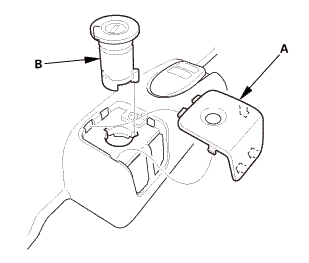
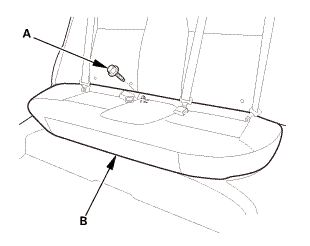
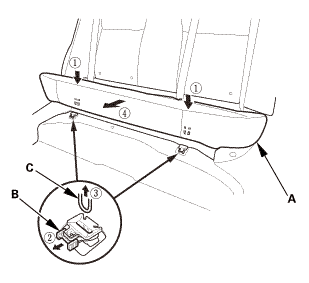
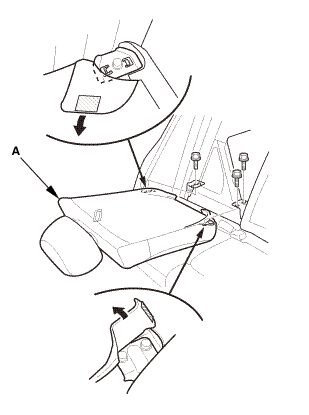
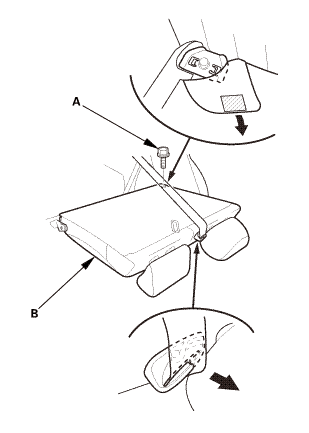
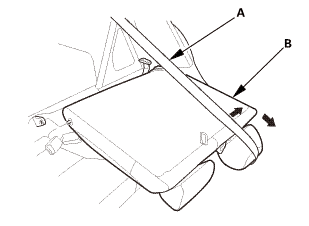
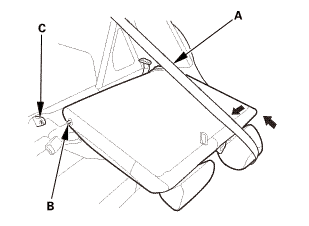
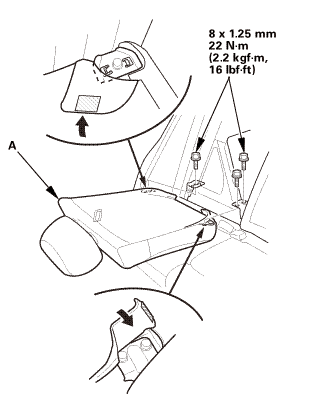
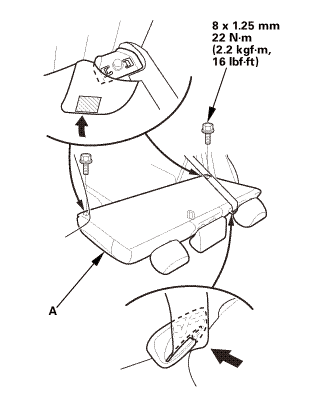
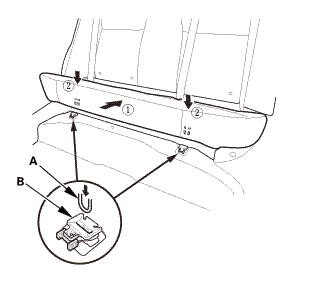
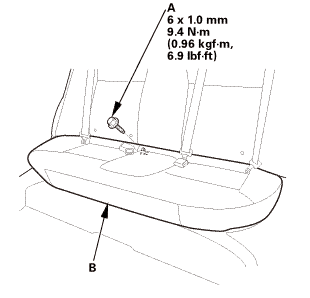
| 8. | Rear Seat Cushion |
|
|
|
|
|
|
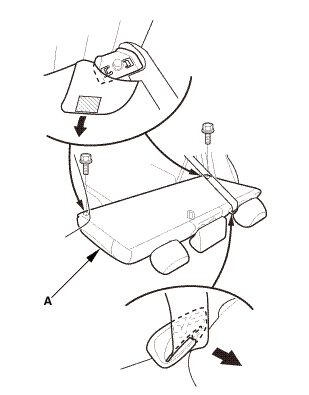
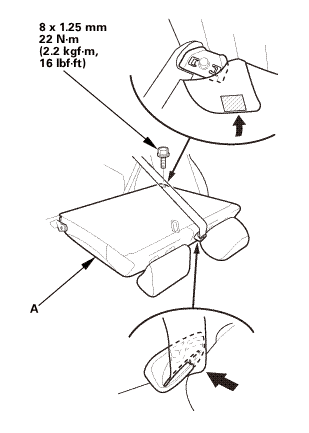
| 9. | Rear Seat-Back - Fold Down |
|
|
|
| 10. | Right Rear Seat-Back - Split Fold Down |
|
|
|
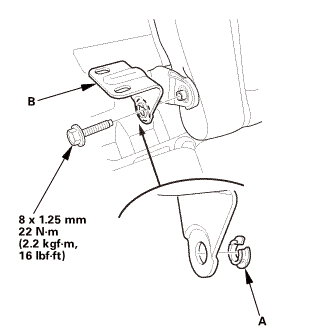
| 11. | Center Pivot Bracket - Split Fold Down |
|
|
|
| 12. | Left Rear Seat-Back - Split Fold Down |
|
|
|
|
|
|
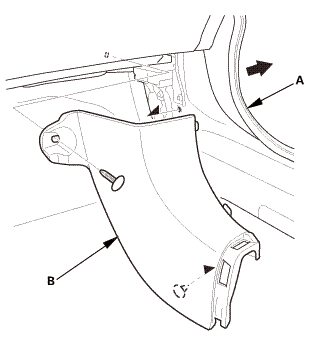
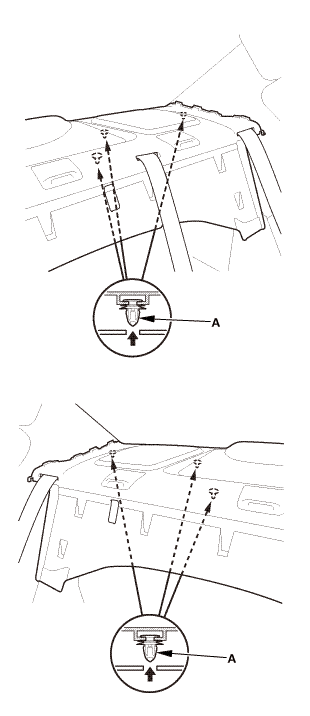
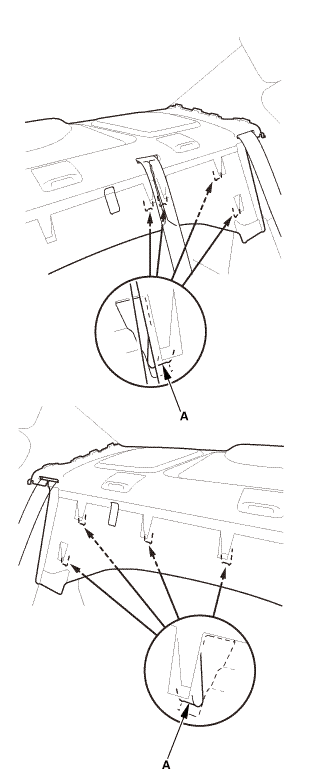
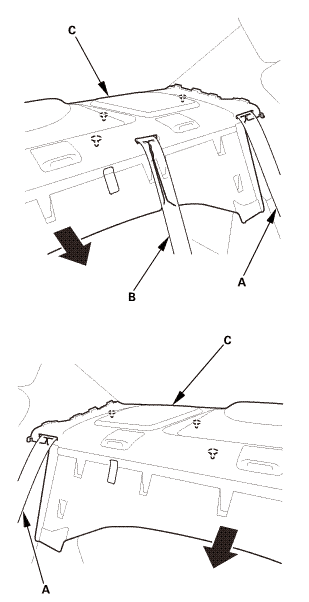
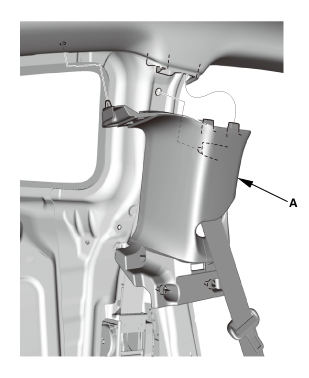
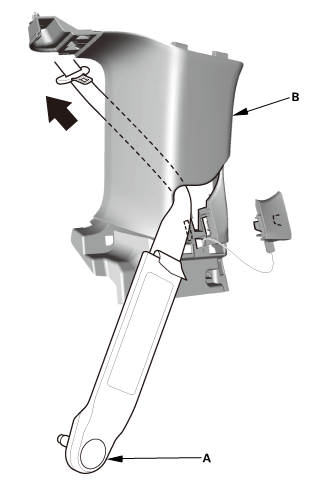
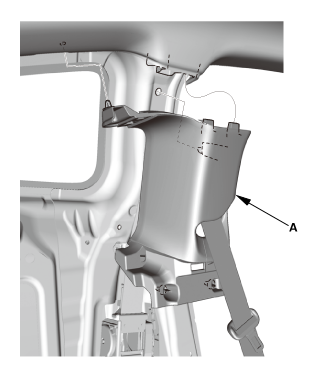
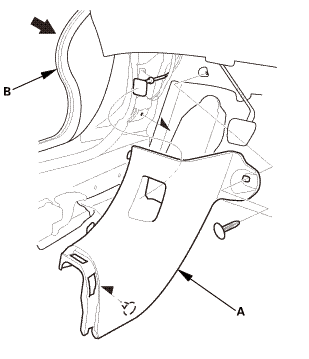
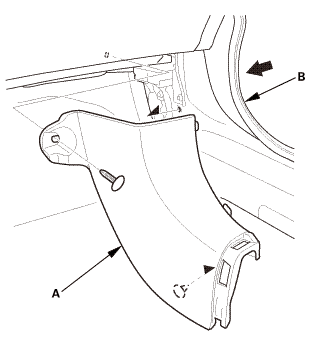
| 13. | Both Quarter Pillar Trims |
|
|
|

|
|
|
|
|
|
||||||||||||
|
|
|
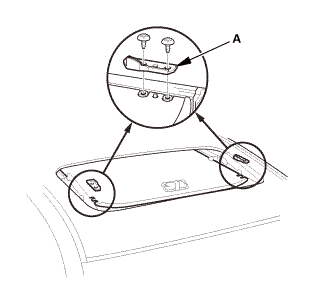
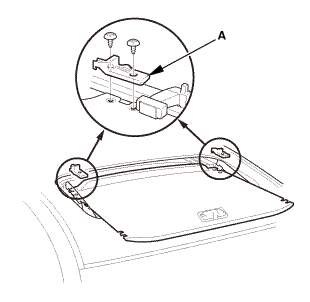
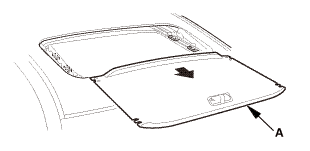
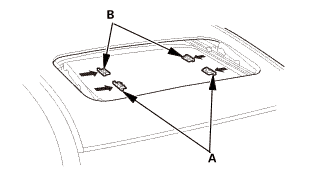
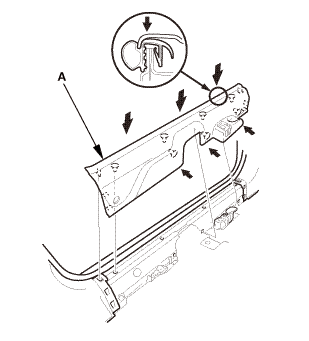
| 14. | Rear Shelf Trim |
|
|
|
|
|
|
|
|
|
|
|
|
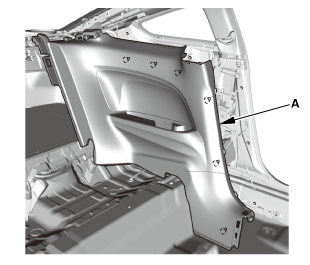
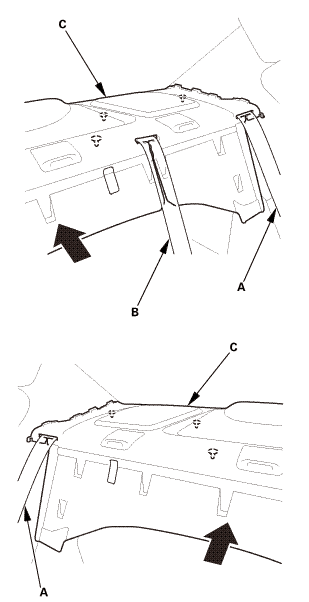
| 15. | Both Rear Side Trim Panels |
|
|
|
| 16. | Both B-Pillar Upper Trims |
|
|
|
|
|
|
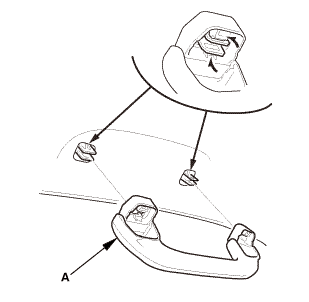
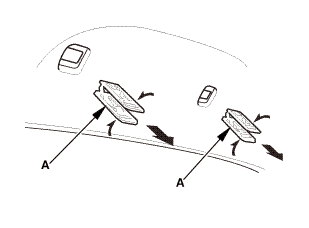
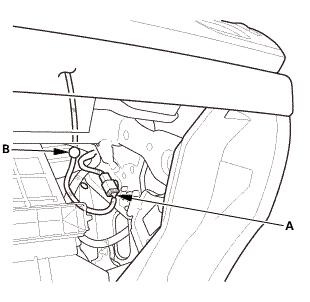
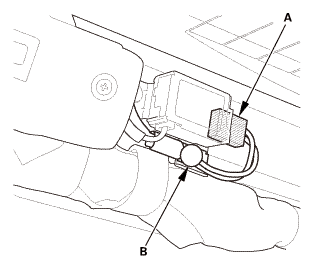
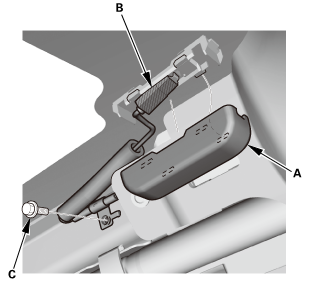
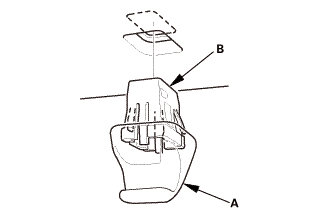
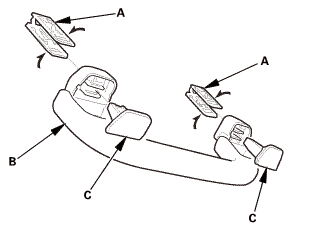
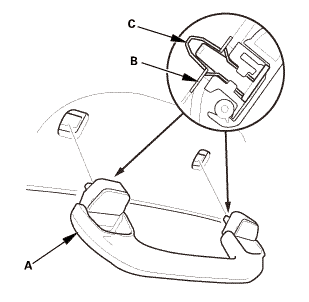
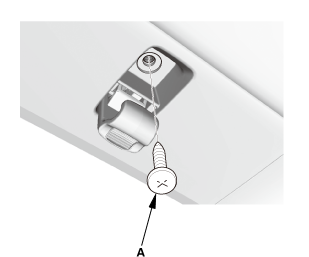
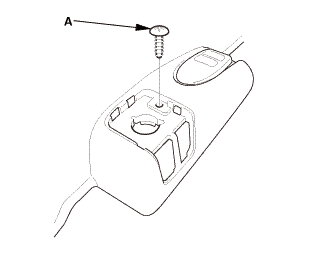
| 17. | Grab Handles for One Vehicle |
|
|
|
|
|
|
|
|
|
|
|
|
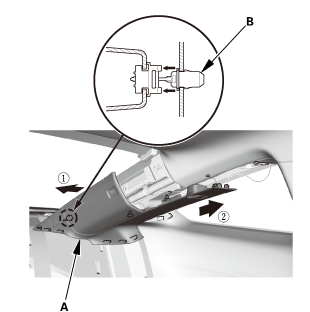
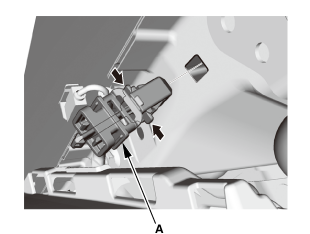
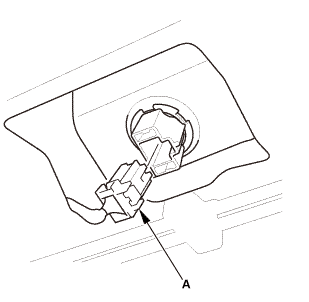
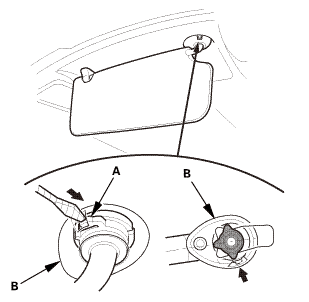
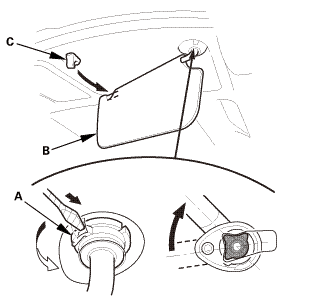
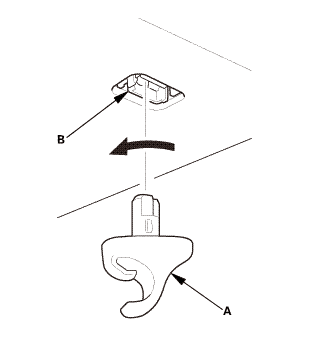
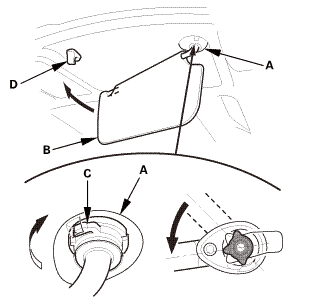
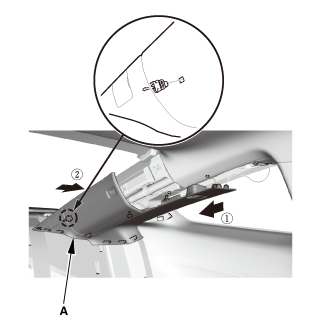
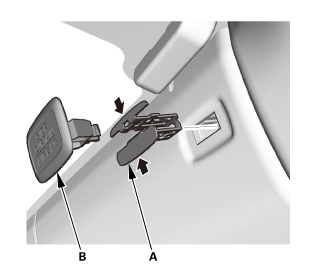
| 18. | Both Sunvisors |
|
|
|
||||||
|
|
|
||||||
|
|
|
||||||
|
|
|
|
|
|

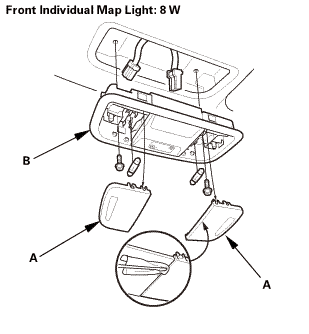
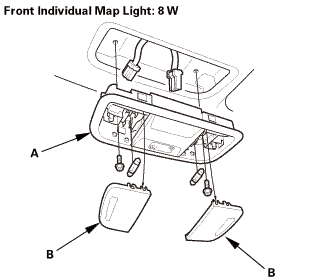
| 19. | Front Individual Map Light (without moonroof) |
|
|
|
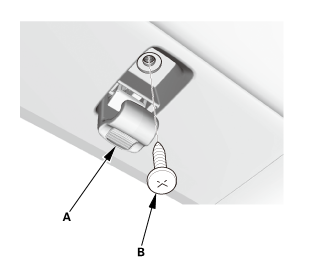
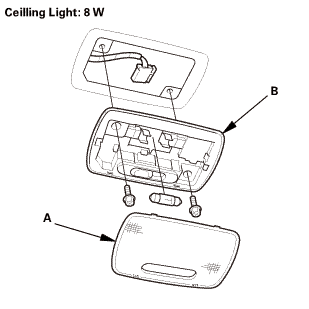
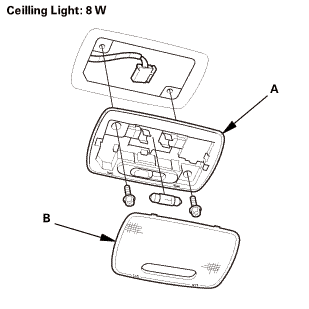
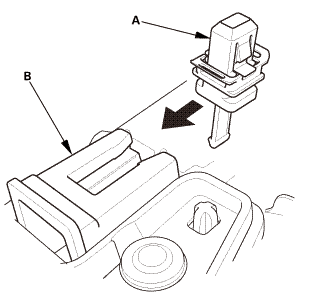
| 20. | Ceiling Light |
|
|
|
 llghr
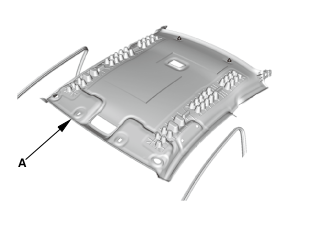
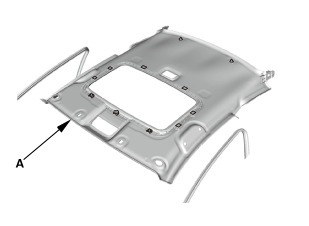
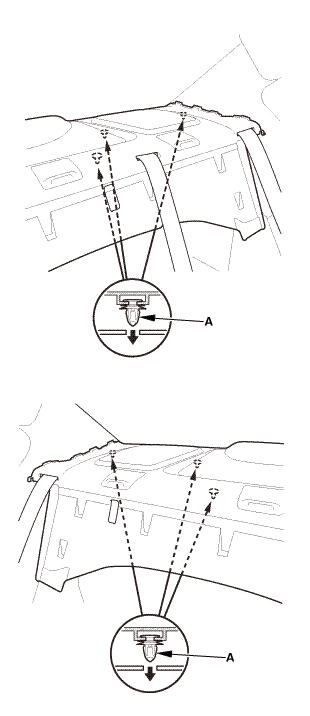
llghr| 21. | Headliner - 2-Door |
|
|
|
|
|
|
|
|
|
|
|
|
|
|
|
|
|
|
|
|
|
|
Without moonroof
With moonroof
|
|
|
|
|
||||||

| 22. | Moonroof Link Cover Both |
|
|
|
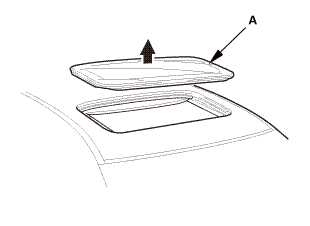
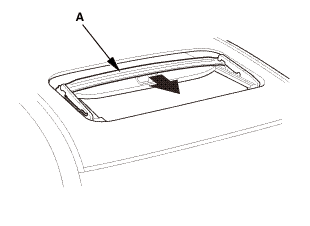
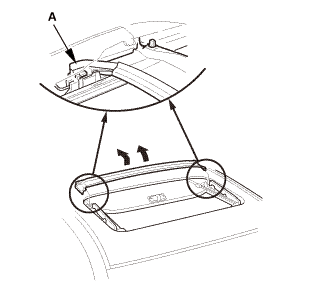
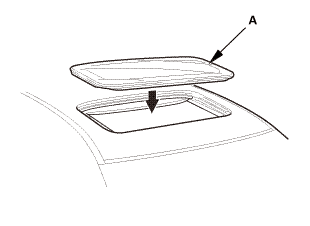
| 23. | Moonroof Glass |
|
|
|
|
|
|
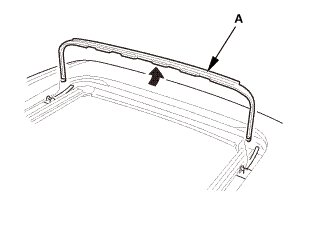
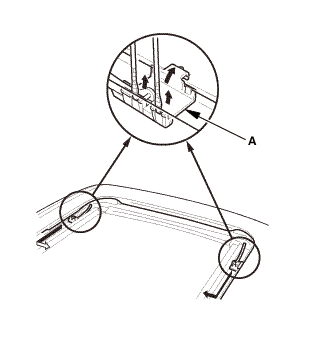
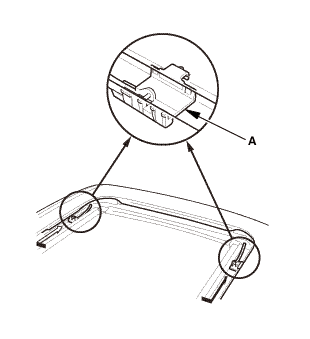
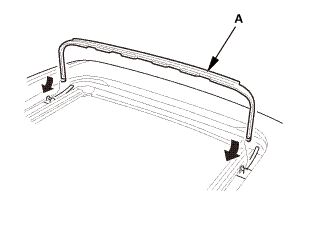
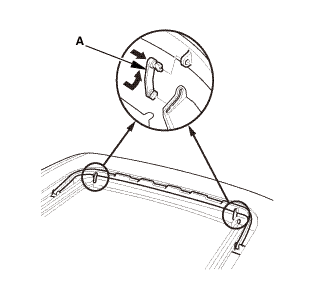
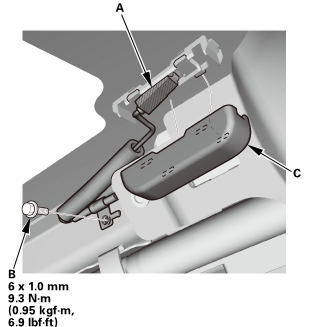
| 24. | Moonroof Deflector |
|
|
|

|
|
|
|
|
|
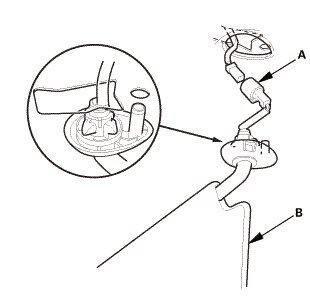
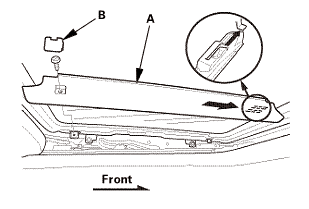
| 25. | Drain Channel |
|
|
|

|
|
|
|
|
|
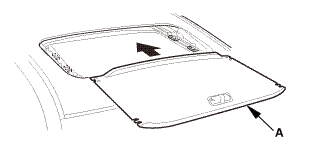
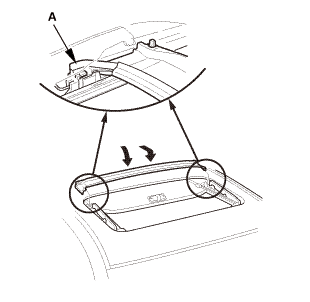
| 26. | Moonroof Sunshade |
|
|
|
|
|
|
|
|
|
|
|
|
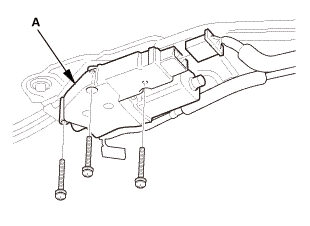
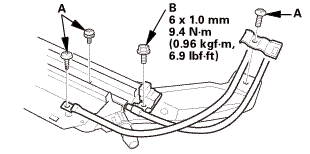
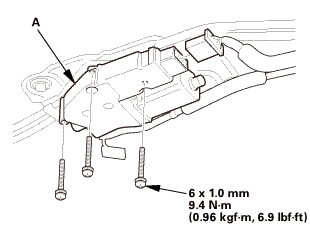
| 27. | Moonroof Motor |
|
|
|
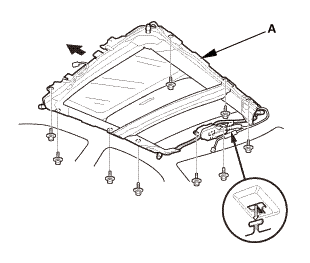
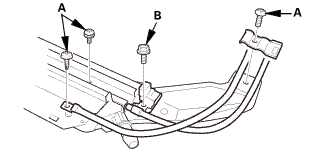
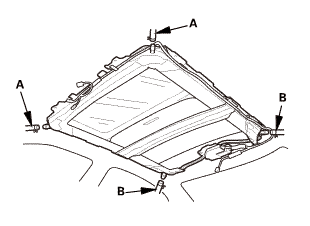
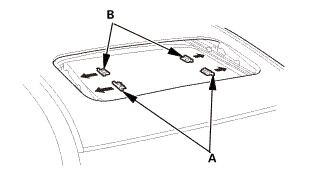
| 28. | Moonroof Frame (2-door) |
|
|
|

|
|
|
|
|
|
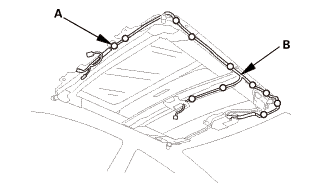
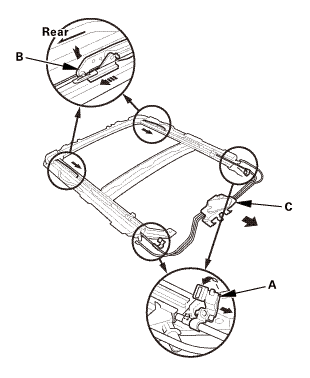
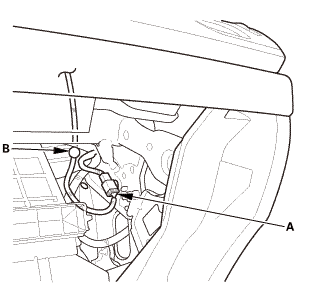
| 29. | Moonroof Cable |
|
|
|
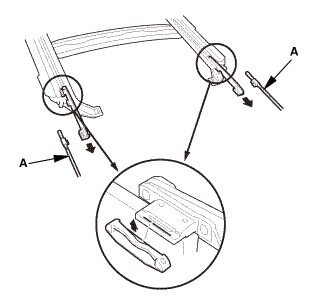
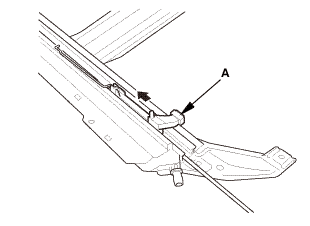
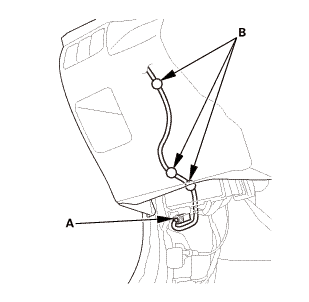
| 30. | Moonroof Drain Channel Slider |
|
|
|
|
|
|
|
|
|


Installation
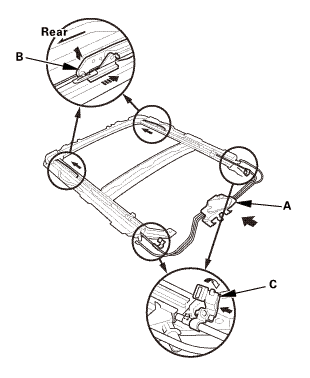
| 1. | Moonroof Drain Channel Slider |
|
|
|

|
|
|
|
|
|
|
|
|
| 2. | Moonroof Cable |
|
|
|

| 3. | Moonroof Frame |
|
|
|

|
|
|
|
|
|
| 4. | Moonroof Motor |
|
|
|
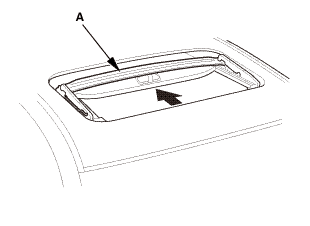
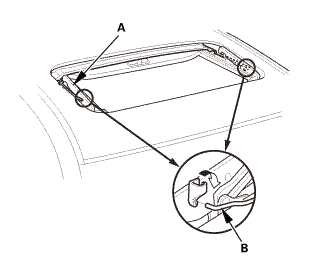
| 5. | Moonroof Sunshade |
|
|
|
|
|
|
|
|
|
|
|
|
| 6. | Drain Channel |
|
|
|
|
|
|
|
|
|
| 7. | Moonroof Deflector |
|
|
|
|
|
|
|
|
|
| 8. | Moonroof Glass |
|
|
|
|
|
|
| 9. | Moonroof Link Cover Both |
|
|
|
| 10. | Headliner - 2-Door |
|
|
|
||||||
|
Without moonroof
With moonroof
|
|
|
|
|
 asnwu
asnwu|
|
|
|
|
|
|
|
|

|
|
|
|
|
|
|
|
|

| 11. | Ceiling Light |
|
|
|
 cullingllghr
| 12. | Front Individual Map Light (without moonroof) |
|
|
|
| 13. | Both Sunvisors |
|
|
|
|
|
|
|
|
|
| 14. | Grab Handles for One Vehicle |
|
|
|
|
|
|
| 15. | Both B-Pillar Upper Trims |
|
|
|

|
|
|
| 16. | Both Rear Side Trim Panels |
|
|
|
| 17. | Rear Shelf Trim |
|
|
|
|
|
|
|
|
|
|
|
|
| 18. | Both Quarter Pillar Trims |
|
|
|
|
|
|
||||||||||||||||||||||||

|
|
|
|
|
|
| 19. | Left Rear Seat-Back - Split Fold Down |
|
|
|
|
|
|
| 20. | Center Pivot Bracket - Split Fold Down |
|
|
|
| 21. | Right Rear Seat-Back - Split Fold Down |
|
|
|
| 22. | Rear Seat-Back - Fold Down |
|
|
|
| 23. | Rear Seat Cushion |
|
|
|
|
|
|
| 24. | Both Kick Panels |
|
Driver's side
Passenger's side
|
|
| 25. | Front Door Sill Trim - 2-Door |
|
|
|

| 26. | Front Door Sill Trim - 2-Door |
|
|
|
|
|
|
|
|
|

| 27. | Front Door Opening Seal as Needed Both |
|
|
|
| 28. | Both Front Seat Belt Lower Anchor Bolts |
|
Driver's side
Passenger's side
|
|
||||||
 @@@
@@@|
Driver's side
Passenger's side
|
|
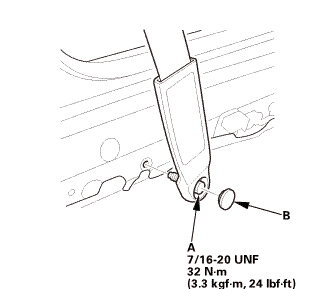 7m2nmn:mm
 unr:2inm,
| 29. | A-Pillar Trim Both |
|
|
|
|
|
|
||||||||||||||||||||||||||||||
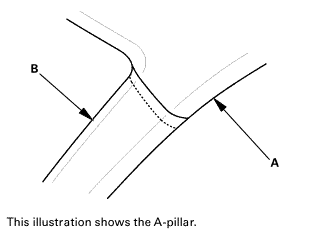
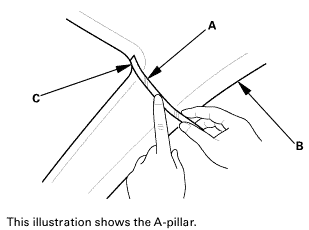
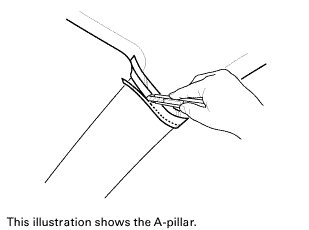
| 30. | Headliner/Pillar Trim Overlap - Check |
|
|
|
 tms
tms|
|
|
|
|
|
||||||||||||||||
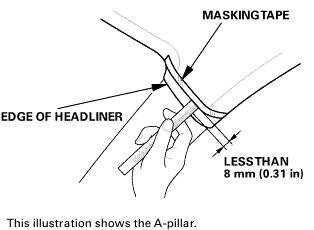 sun:orlessthan
|
|
|
 slmws
slmws| 31. | Battery Terminal (SRS) - Reconnection |
|
|
|
||||||||||||||||
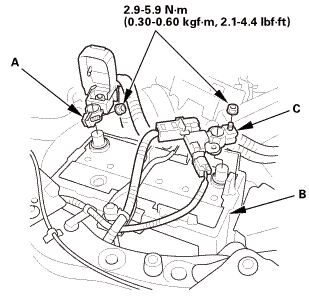 (o.2ao.sam.
 Moonroof Drain Tube Removal and Installation (4-door)
Removal
1.
Battery Terminal (SRS) - Disconnection
1.
Make sure the ignition switch is in LOCK (0).
...
 Moonroof Frame/Drain Channel Slider and Cable Assembly Removal and Installation
(4-door)
Moonroof Frame/Drain Channel Slider and Cable Assembly Removal and Installation
(4-door)
Removal
1.
Battery Terminal (SRS) - Disconnection
1.
Make sure the ignition switch is in LOCK (0).
...
See also:
Honda Civic Service Manual. VSA Modulator-Control Unit Removal and Installation (Except Natural Gas models)
413170
Removal
1.
VSA Modulator-Control Unit Assembly
1.
Turn the ignition switch to LOCK (0).
2.
Disconnect the 10 mm brake lines (A).
...
