Honda Civic Service Manual: Brake Booster Removal and Installation (Natural Gas models)

| 1. | Vehicle Lift |
|
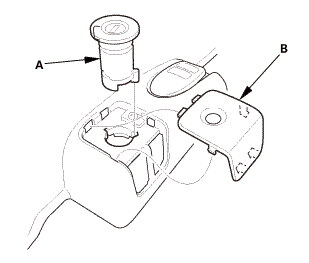
| 2. | Steering Joint Cover |
|
|
|
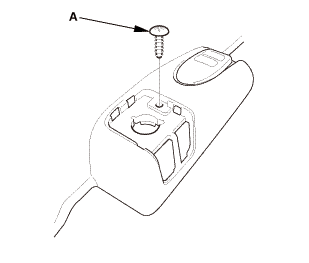
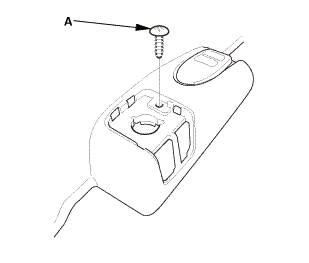
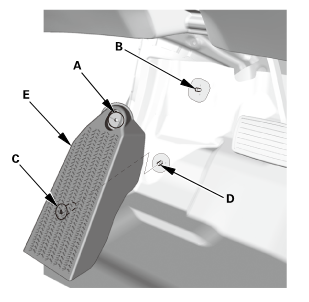
| 3. | Footrest |
|
|
|

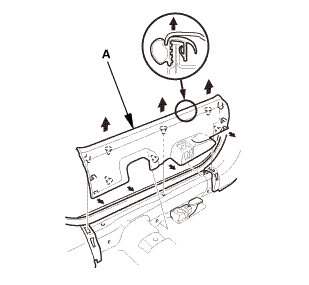
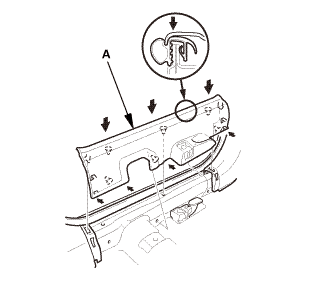
| 4. | Front Door Sill Trim - 4-Door |
|
|
|

|
|
|
|
|
|
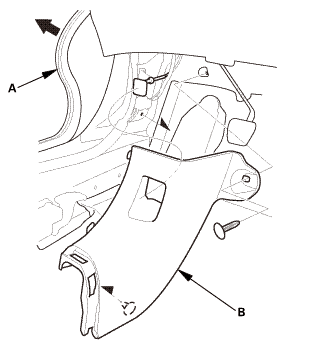
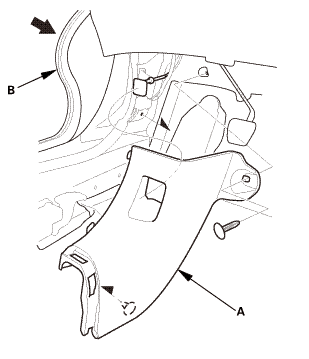
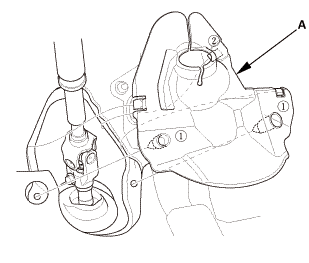
| 5. | Kick Panel |
|
|
|
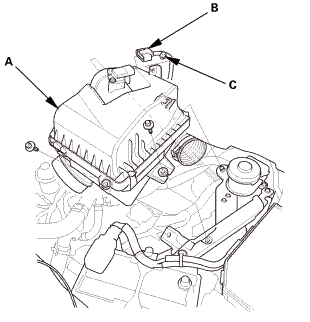
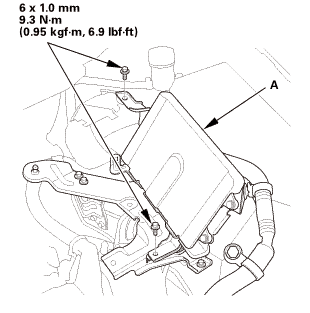
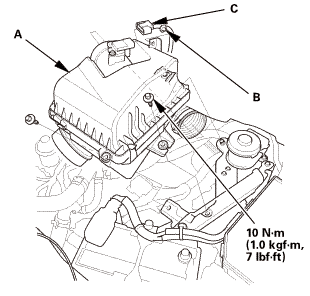
| 6. | Air Cleaner Housing (Natural Gas Model) |
|
|
|
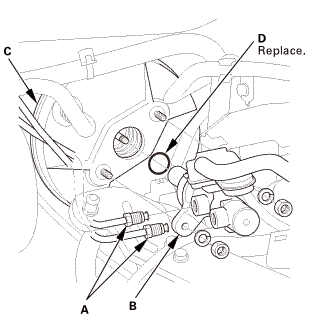
| 7. | Brake Master Cylinder |
|
|
Do not spill brake fluid on the vehicle; it may damage the paint. If brake fluid does contact the paint, wash it off immediately with water.
|


|
|
|
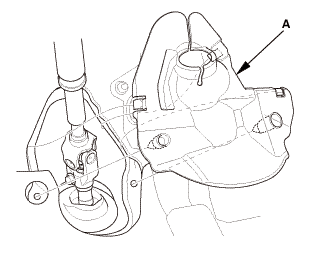
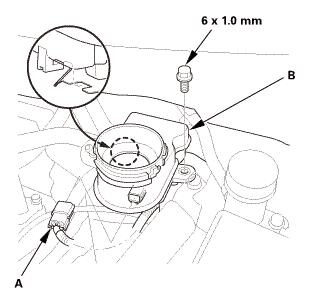
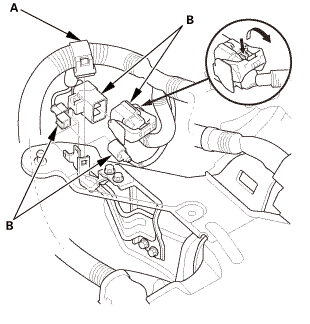
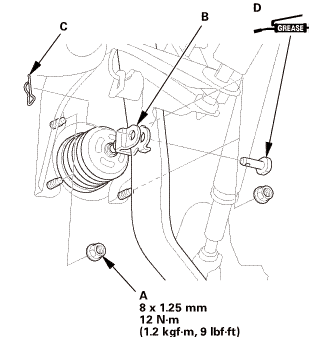
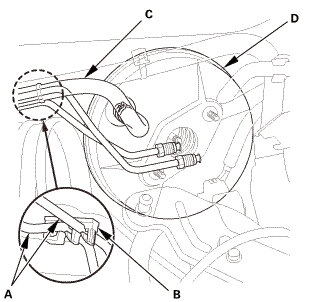
| 8. | Brake Booster Peripheral (Natural Gas Model) |
|
|
|

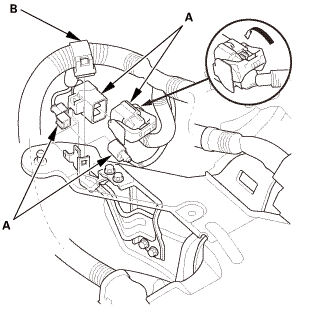
| 9. | Engine Control Module - Move |
|
|
|
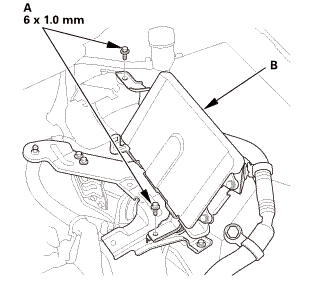
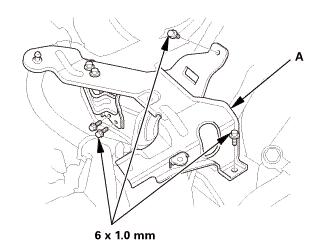
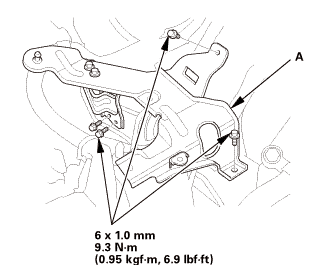
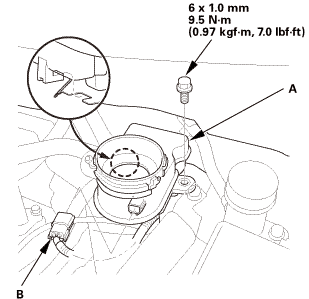
| 10. | Air Cleaner Bracket (Natural Gas Model) |
|
|
|
|
|
|
| 11. | Brake Booster (Natural Gas Model) |
|
|
|
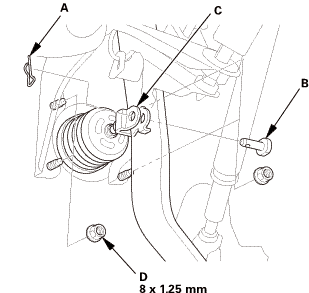
|
|
|
||||||
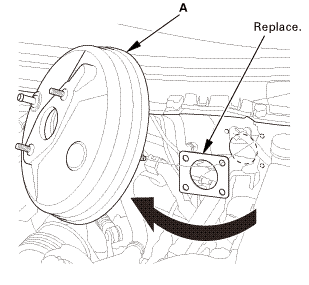

| 1. | Brake Booster (Natural Gas Model) |
|
|
|
||||||

|
|
|
||||||||||||
| 2. | Air Cleaner Bracket (Natural Gas Model) |
|
|
|
|
|
|
| 3. | Engine Control Module - Move |
|
|
|
 1.0mmmm
| 4. | Brake Booster Peripheral (Natural Gas Model) |
|
|
|
| 5. | Brake Master Cylinder |
|
|
|
||||||||||||

|
|
|
| 6. | Air Cleaner Housing (Natural Gas Model) |
|
|
|
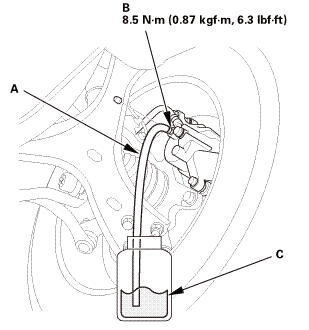
| 7. | Brake Pedal Height - Inspection (Natural Gas Model) |
|
|
|
|||||||||
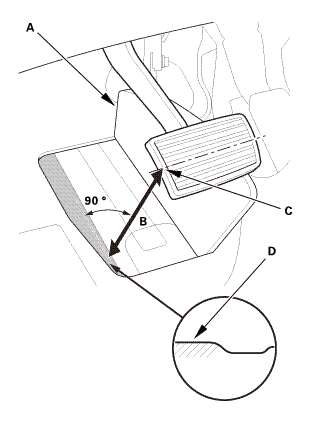
| 8. | Brake Pedal Free Play - Check |
|
|
|
|||||||||
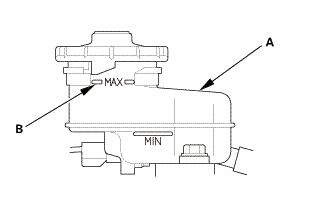
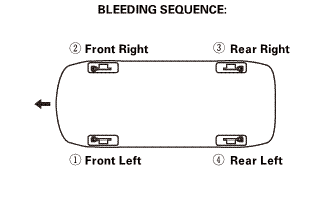
| 9. | Brake System - Bleeding (Natural Gas Model) |
|
|
Do not spill brake fluid on the vehicle; it may damage the paint. If brake fluid does contact the paint, wash it off immediately with water.
|
|
|
|
||||||
 sznuzucz
|
Front
Rear
|
|
 x.sm.x1imm
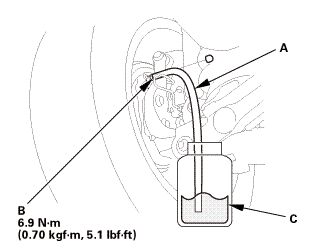
| 10. | Brake Drag - Check |
|
| 11. | Kick Panel |
|
|
|
| 12. | Front Door Sill Trim - 4-Door |
|
|
|
|
|
|
|
|
|
| 13. | Footrest |
|
|
|
| 14. | Steering Joint Cover |
|
|
|
 Hydraulic Brakes
...
 Brake Hose and Line Inspection (Natural Gas models)
Inspection
1.
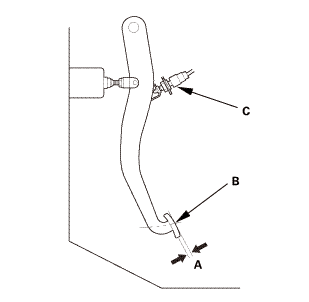
Brake Hose and Line - Inspection (Natural Gas Model)
1.
Inspect the brake hoses for damage, deterioration, leaks, interference,
and twist ...
See also:
Honda Civic Owners Manual. Opening/Closing Windows without Auto-Open/Close Function
To open: Push the switch down.
To close: Pull the switch up.
Release the switch when the window reaches
the desired position.
Opening Windows and Moonroof* with the Remote
To open: Press the unlock button, and then
within 10 seconds, press it again and hold it. If
the windows and ...
