Honda Civic Service Manual: Starter Removal, Installation, and Performance Test (K24Z7)
1161D1

| 1. |
Battery Terminal - Disconnection |
|
|
|
1.
|
Make sure the ignition switch is in LOCK (0), or the vehicle
ignition in the OFF mode.
|
|
2.
|
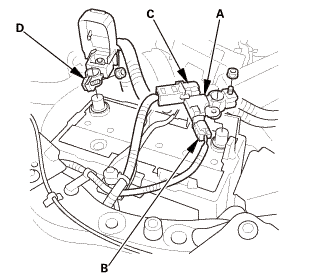
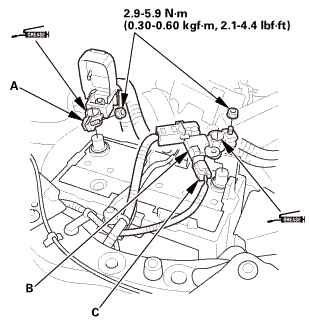
Disconnect and isolate the negative cable with the battery sensor
(A) from the battery.
|
|
NOTE:
|
|

|
Always disconnect the negative side first.
|
|
|

|
To protect the battery sensor connector (B) from
damage, do not hold it when removing the negative
terminal.
|
|
|

|
Do not disconnect the battery sensor from the
negative terminal (C).
|
|
|
|
3.
|
Disconnect the positive cable (D) from the battery.
|
|
|
|
1.
|
Raise the vehicle on a lift, and make sure it is securely supported.
|
|
|
1.
|
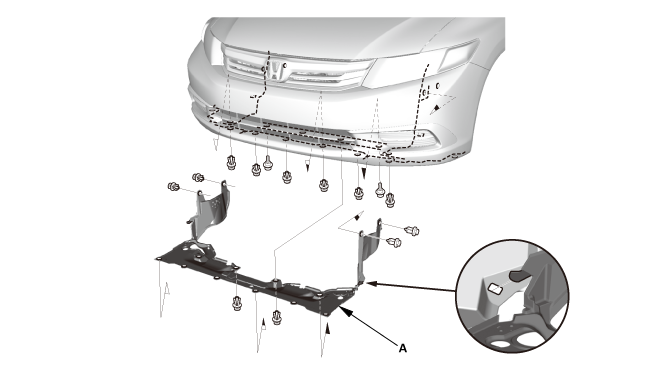
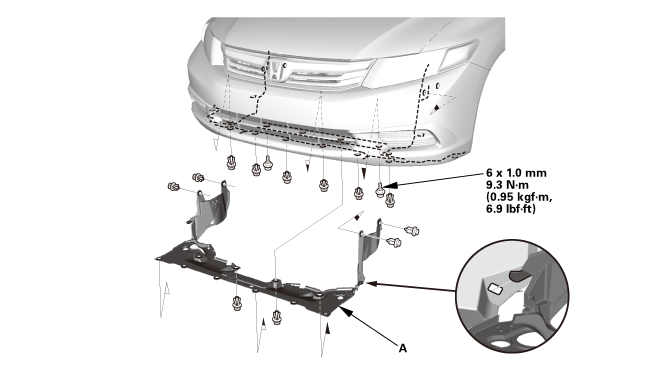
Remove the splash shield (A).
|
|
|
|
1.
|
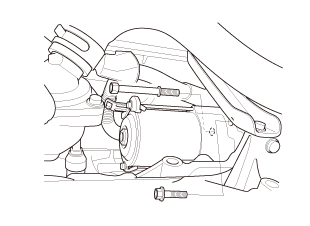
Remove the starter bolts.
|
|
|
|
|
2.
|
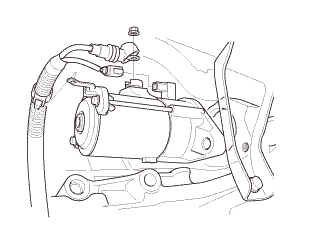
Disconnect the cable and the connector.
|
|

| 1. |
STARTER PERFOMANCE - TEST |
|
|
|
1.
|
Clamp the starter firmly in a vise.
|
|
2.
|
Make the connections for this test using the thickest (gauge)
wire possible (preferably the same gauge as used on the vehicle).
|
|
NOTE: To avoid damaging the starter, never leave the battery
connected for more than 5 seconds.
|
|
3.
|
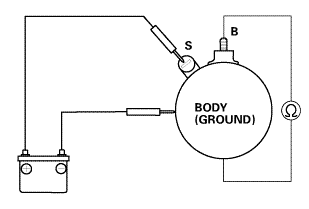
Connect the battery as shown, and check for continuity between
the B terminal and the starter body. If there is continuity, it
is working properly.
|
|
|
|
|
4.
|
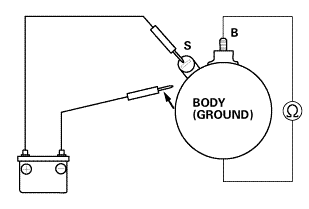
Disconnect the battery from the starter body, and check for continuity
between the B terminal and the starter body. If there is no continuity,
it is working properly.
|
|
|
|
|
5.
|
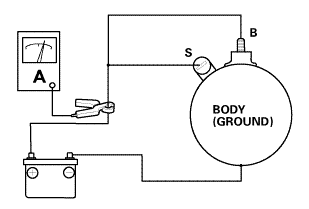
Connect the starter to the battery as shown, and confirm that
the motor runs.
|
|
6.
|
If the electric current meets the specification when the battery
voltage is at 11.5 V, the starter is working properly.
|
|
|
Specification
|
|
Electric Current: 90 A or less
|
|
|
|
|

|
|
|
2.
|
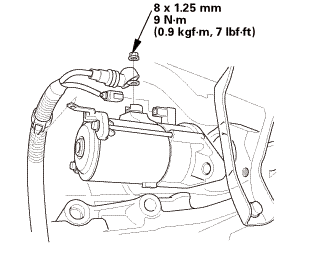
Connect the cable, and the connector. Make sure the crimped side
of the ring terminal faces away from the starter when you connect
it.
|
|
|
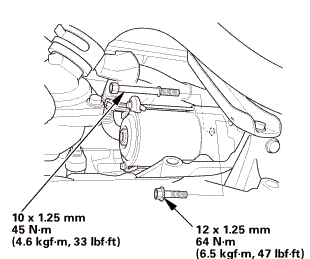 inl25mm inl25mm
|
|
|
1.
|
Install the splash shield (A).
|
| 3. |
Battery Terminal - Reconnection |
|
|
|
NOTE: If the battery performs abnormally, test the battery.
|
|
1.
|
Clean the battery terminals.
|
|
2.
|
Connect the positive cable (A) to the battery.
|
|
NOTE: Always connect the positive side first.
|
|
3.
|
Connect the negative cable and the battery sensor (B) to the
battery.
|
|
NOTE: To protect the battery sensor connector (C) from damage,
do not hold it when installing the negative terminal.
|
|
4.
|
Apply multipurpose grease to the terminals to prevent corrosion.
|
|
| 4. |
Starter After Install - Check |
|
|
1.
|
Start the engine to make sure the starter works properly.
|
|
View
1.
Starter Exploded View
Exploded View
amcanswrrcsunsrrassemblycam,__switchavnlymolyhdenumavnly
Disassembly
NOTE: Refer to the Exploded ...


 Starter Overhaul (K24Z7)
 Valvetrain


 inl25mm