Honda Civic Service Manual: A/T Gear Position Indicator Panel Assembly Removal and Installation (A/T, CVT)

|
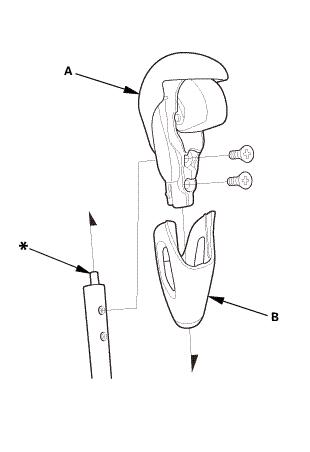
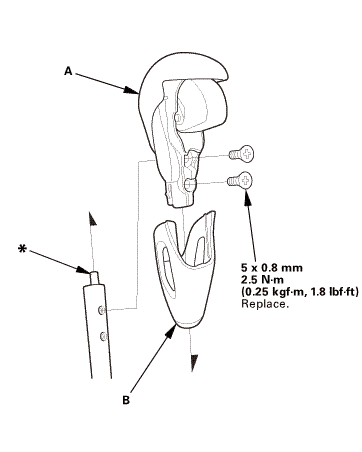
NOTE: Do not wipe off the special grease applied to the area of the shift lever marked with an asterisk (*) when you disassemble it. |
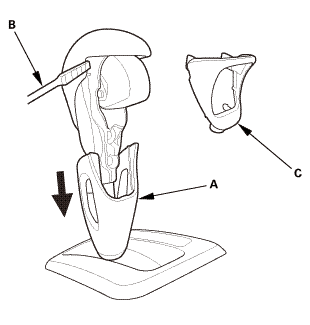
| 1. | Shift Lever Knob and Shift Lever Knob Ring |
|
|
|
|
|
|
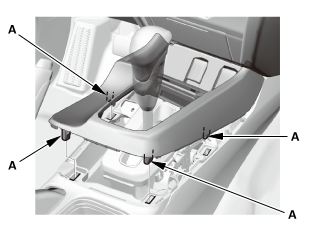
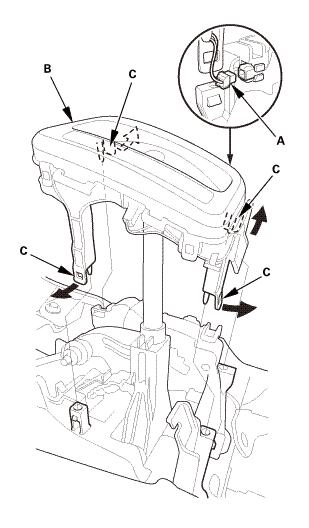
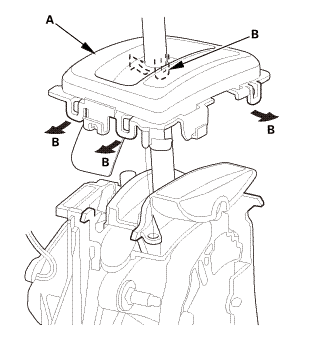
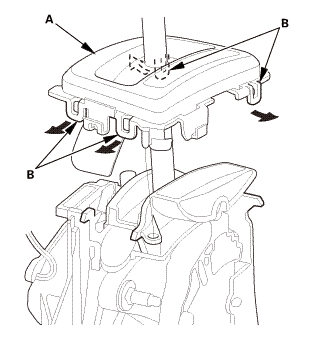
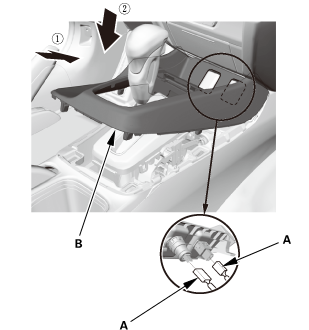
| 2. | Center Console Panel Assembly (Except '12M M/T) |
|
|
|
|
|
|

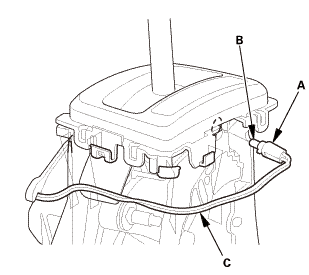
| 3. | A/T Gear Position Indicator Panel Assembly (Type A Shift Lever) |
|
|
|
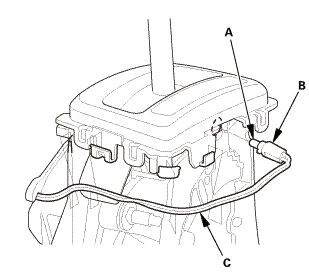
| 4. | A/T Gear Position Indicator Panel Assembly (Type B Shift Lever) |
|
|
|
|
|
|

|
NOTE: Do not wipe off the special grease applied to the area of the shift lever marked with an asterisk (*) when you assemble it. |
| 1. | A/T Gear Position Indicator Panel Assembly (Type A Shift Lever) |
|
|
|

| 2. | A/T Gear Position Indicator Panel Assembly (Type B Shift Lever) |
|
|
|
|
|
|
| 3. | Center Console Panel Assembly (Except '12M M/T) |
|
|
|
|
|
|
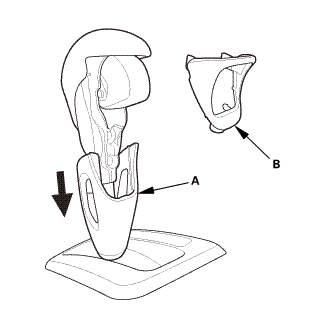
| 4. | Shift Lever Knob and Shift Lever Knob Ring |
|
1. |
Install the shift lever knob (A) and the shift lever ring (B). |
 mm
mm
|
|
|
 A/T Differential Carrier Bearing Replacement (A/T)
Removal
NOTE:
The bearing and the bearing outer race should be replaced as
a set.
...
 A/T Gear Position Indicator Panel Light Harness Removal and Installation (A/T,
CVT)
A/T Gear Position Indicator Panel Light Harness Removal and Installation (A/T,
CVT)
NOTE: Do not wipe off the special grease applied to the area of the shift
lever marked with an asterisk (*) when you disassemble it.
1.
Center Console Panel Ass ...
See also:
Honda Civic Owners Manual. Fuel Economy and CO2 Emissions
Improving Fuel Economy and Reducing CO2 Emissions
Achieving fuel economy and reducing CO2 emissions is dependent on several
factors, including driving conditions, load weight, idling time, driving habits,
and
vehicle condition. Depending on these and other factors, you may not achieve the
rate ...
