Honda Civic Service Manual: A/T Countershaft Disassembly, Reassembly, and Inspection (A/T)
 View
View
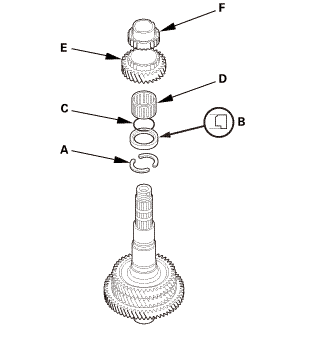
| 1. | A/T Countershaft Exploded View |
|
Exploded View |
 mmmm225mli1.immuzzmzisrsuncdlintershaf1
 Disassembly
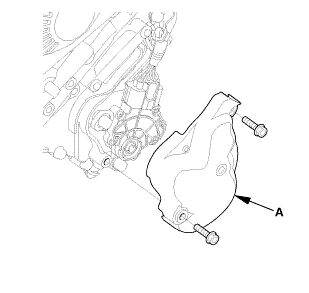
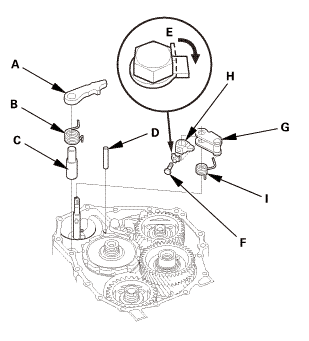
| 1. | Transmission Range Switch Cover |
|
|
|
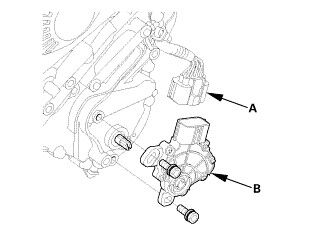
| 2. | Transmission Range Switch |
|
|
|
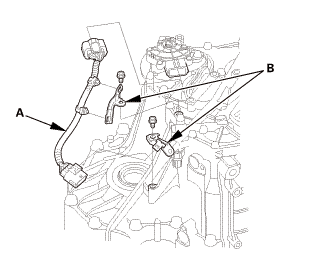
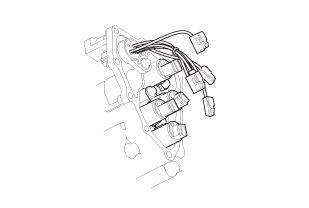
| 3. | Transmission Range Switch Subharness |
|
|
|
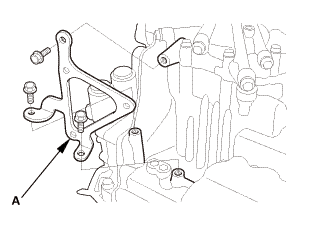
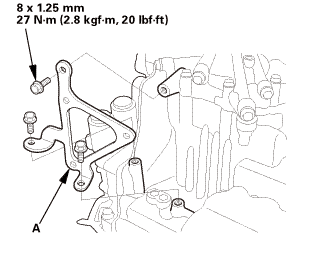
| 4. | ATF Warmer Bracket |
|
|
|
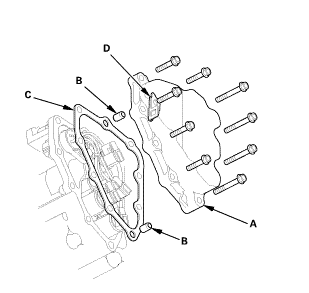
| 5. | Transmission End Cover |
|
|
|
| 6. | Input Shaft (Mainshaft) Speed Sensor |
|
|
|
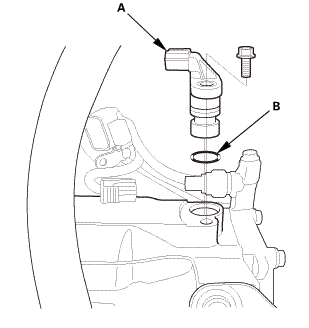
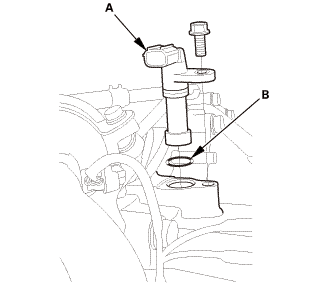
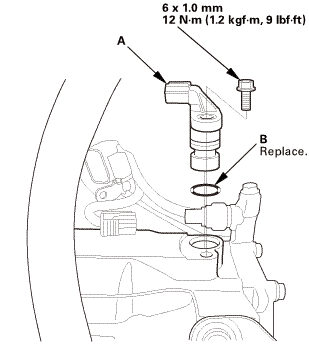
| 7. | Output Shaft (Countershaft) Speed Sensor |
|
|
|
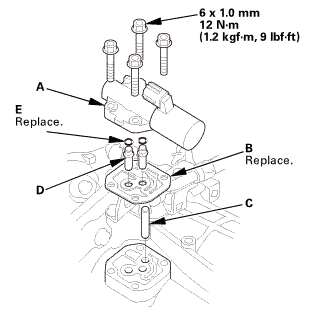
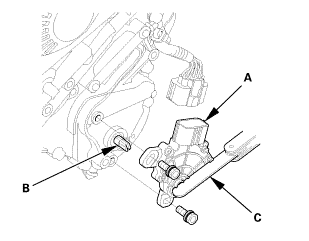
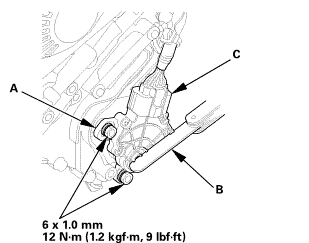
| 8. | A/T Clutch Pressure Control Solenoid Valve A |
|
|
|
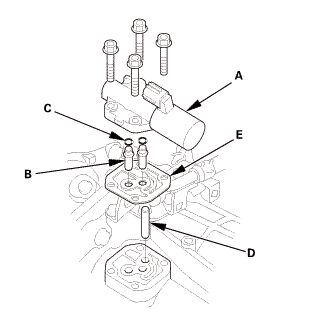
| 9. | A/T Clutch Pressure Control Solenoid Valve B and C |
|
|
|
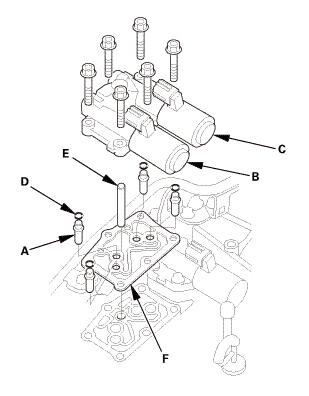
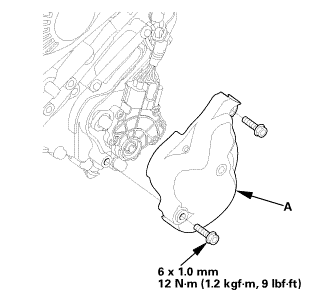
| 10. | A/T Solenoid Cover |
|
|
|
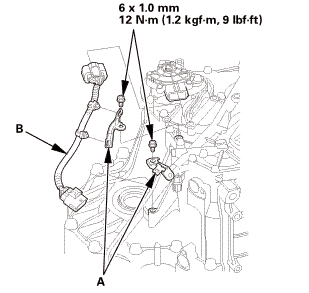
| 11. | A/T Shift Solenoid Wire Harness - Disconnection |
|
|
|
| 12. | ATF Pipe |
|
|
|
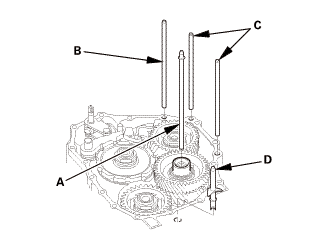
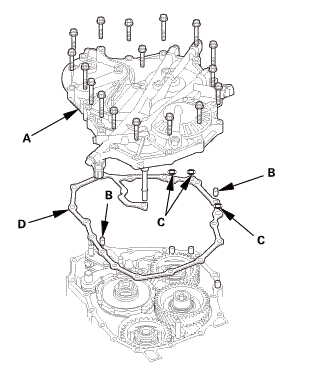
| 13. | End Cover Idler Gear Assembly |
|
|
|
|
|
|
||||||
|
|
|
||||||||||||||||||||||||

|
|
|
|
|
|
|
|
|

|
|
|
|
|
|
|
|
|
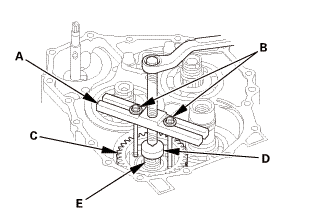
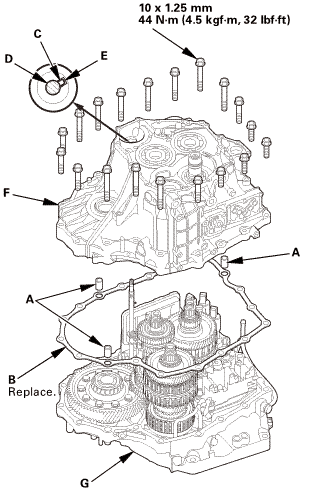
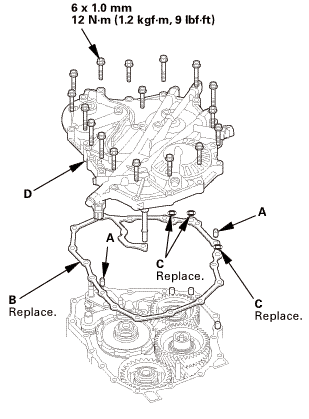
| 14. | A/T Transmission Housing |
|
|
|
||||||||||||||||||
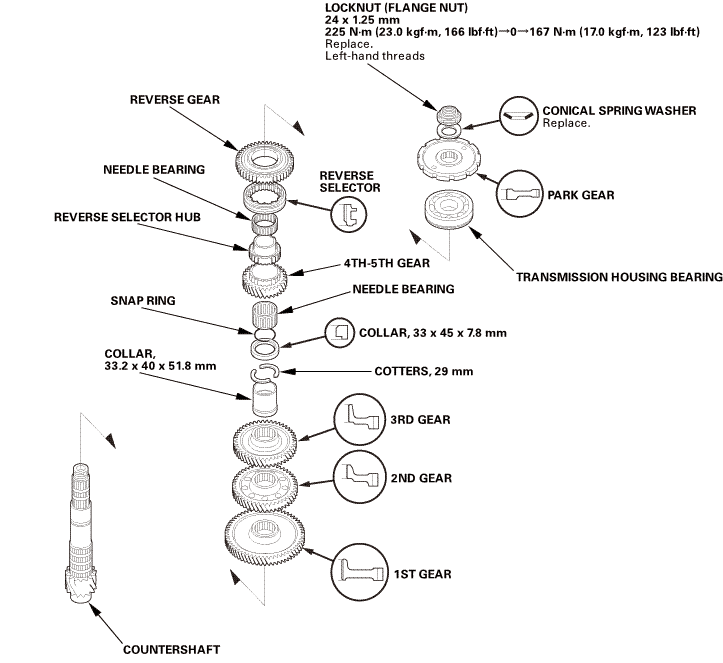
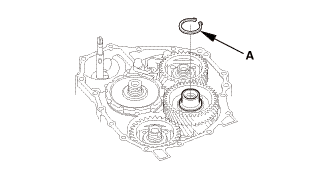
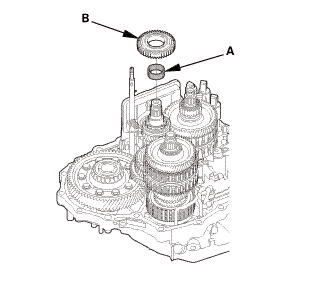
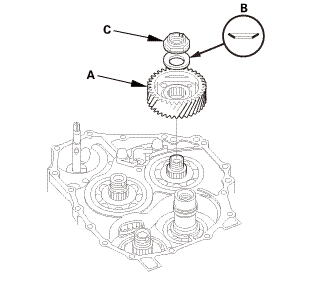
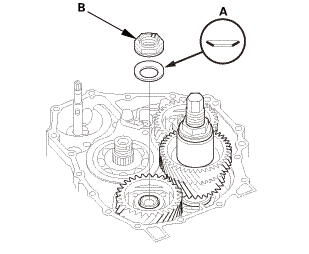
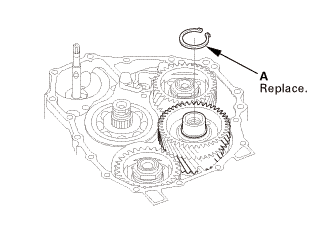
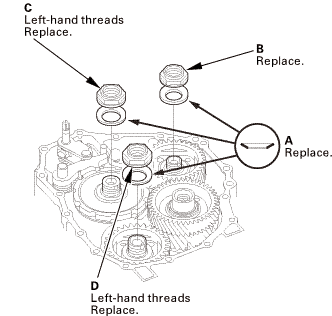
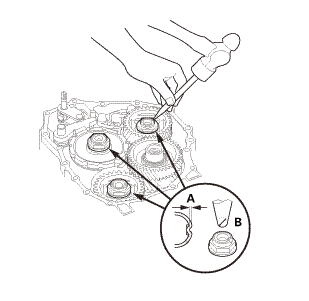
| 15. | A/T Countershaft Reverse Gear |
|
|
|
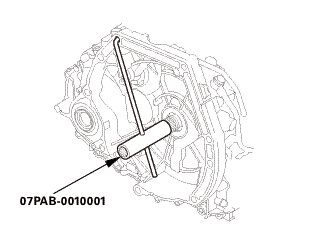
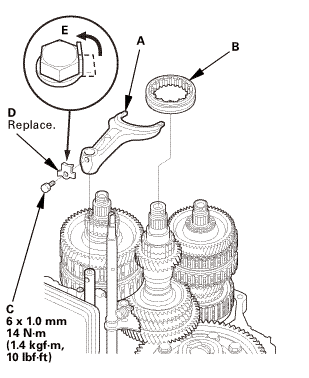
| 16. | Shift fork Shaft |
|
|
|
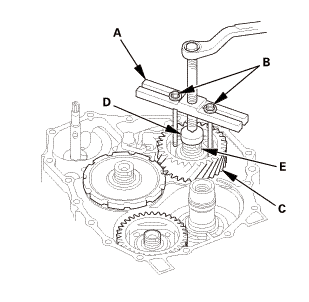
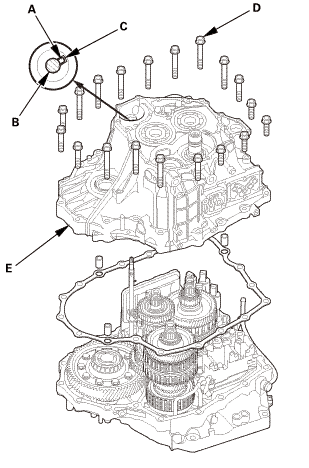
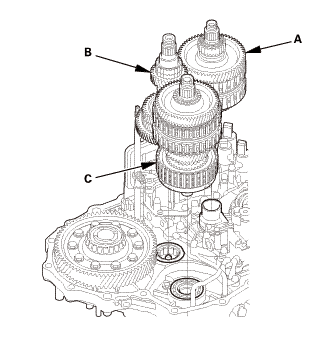
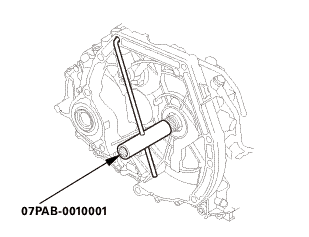
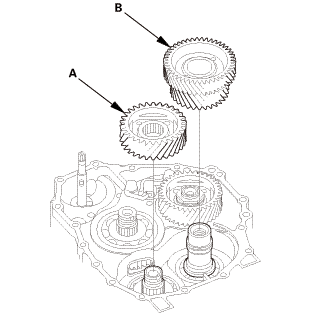
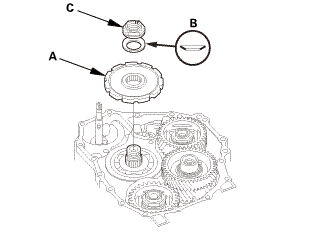
| 17. | A/T Mainshaft and Countershaft and Secondary Shaft Assembly |
|
|
|
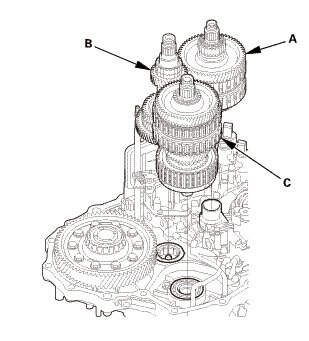
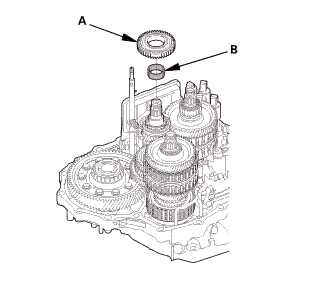
| 18. | A/T Countershaft |
|
|
|
|||||||||
|
|
|

|
|
|
 Inspection
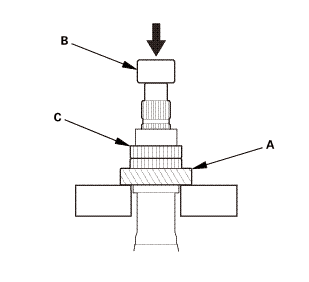
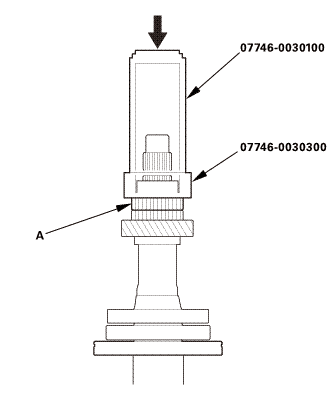
| 1. | A/T Countershaft - Inspection |
|
 Reassembly
|
NOTE: Apply a light coat of clean ATF on all moving parts before reassembly. |
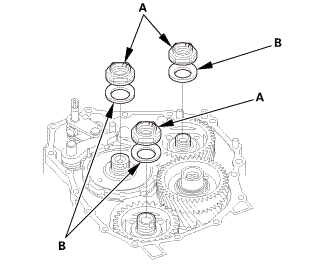
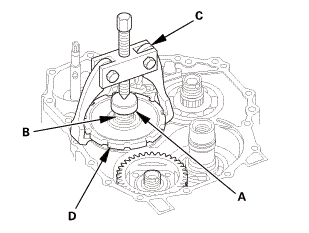
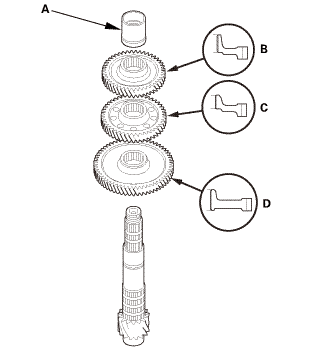
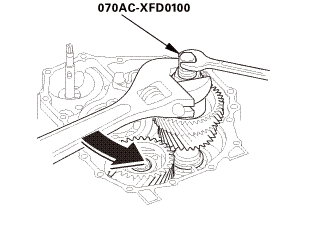
| 1. | A/T Countershaft |
|
|
|

|
|
|
|
|
|
||||||
 a11uina3a3aa
| 2. | A/T Mainshaft and Countershaft and Secondary Shaft Assembly |
|
|
|
| 3. | Shift fork Shaft |
|
|
|
| 4. | A/T Countershaft Reverse Gear |
|
|
|
| 5. | A/T Transmission Housing |
|
|
|
||||||||||||||||||||||||
 1a1.2:mmmn!(4.:
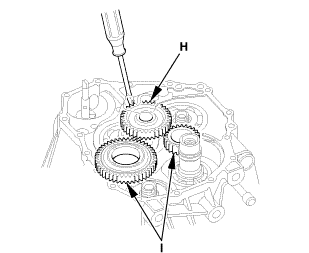
| 6. | End Cover Idler Gear Assembly |
|
|
|
|
|
|
|||||||||||||||||||||||||||||||||||
|
|
|
||||||||||||||||||||||||||||||
|
|
|
|||||||||
|
|
|
|||||||||||||||||||||
|
|
|
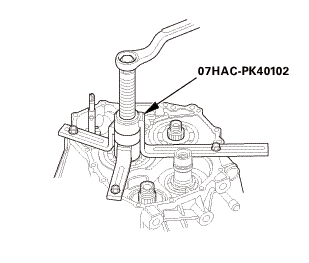
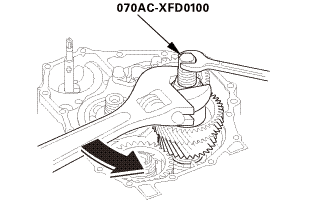 o7aacxfnmoa
|
|
|
|
|
|
||||||||||||||||||||||||||||||||||||||||||||||||||||||
|
|
|
|||||||||||||||||||||||||||||||||||||||||||||||
|
|
|
|
|
|
|||||||||
|
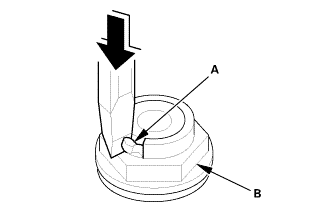
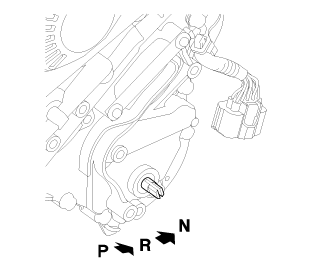
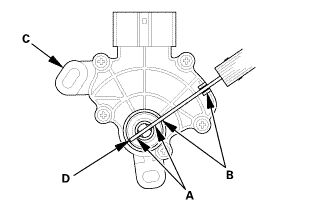
29. |
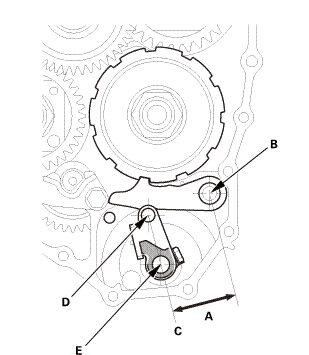
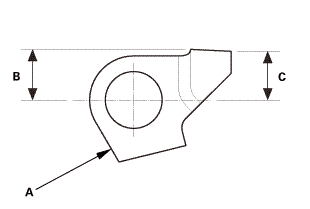
If the measurement is out of the standard, select and install the appropriate park lever stop (A) from the table. |
|
PARK LEVER STOP
|
|
30. |
After replacing the park lever stop, make sure the distance is within the tolerance. |
|
|
|
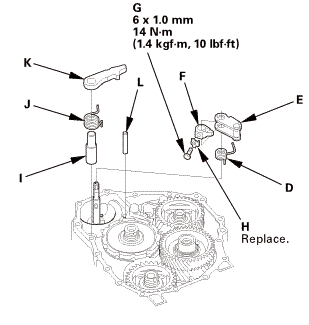
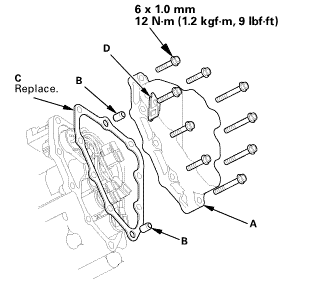
| 7. | ATF Pipe |
|
|
|
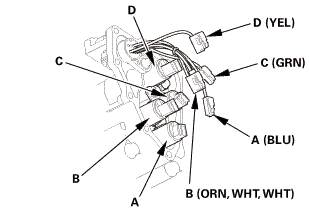
| 8. | A/T Shift Solenoid Wire Harness - Reconnection |
|
|
|
||||||||||||||||||||||
 lve.l(camwur,
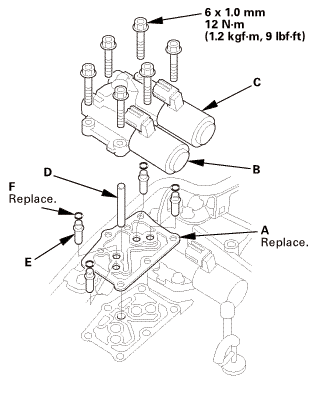
| 9. | A/T Solenoid Cover |
|
|
|
 inmm
inmm| 10. | A/T Clutch Pressure Control Solenoid Valve B and C |
|
|
|
| 11. | A/T Clutch Pressure Control Solenoid Valve A |
|
|
|
 mmi11
mmi11| 12. | Output Shaft (Countershaft) Speed Sensor (A/T) |
|
|
|
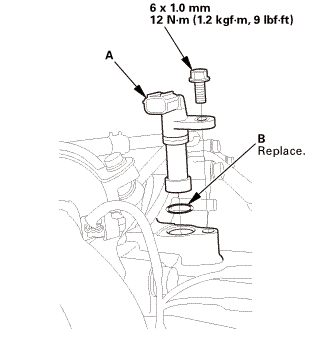
| 13. | Input Shaft (Mainshaft) Speed Sensor |
|
|
|
| 14. | Transmission End Cover |
|
|
|
 mm12u....um,!mk)
| 15. | ATF Warmer Bracket |
|
|
|
 mm27lhf!
| 16. | Transmission Range Switch Subharness |
|
|
|
| 17. | Transmission Range Switch |
|
|
|
||||||
|
|
|
||||||
|
|
|
|
|
|
||||||||||||
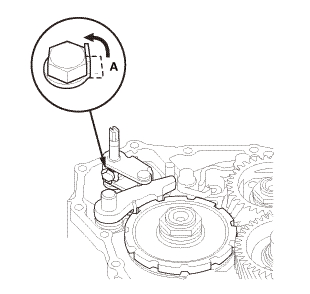
| 18. | Transmission Range Switch Cover |
|
|
|
 mmnm
mmnm
 VIN, Engine, (Motor), Transmission Numbers, and Paint Codes ('13: Natural Gas
models)
VIN, Engine, (Motor), Transmission Numbers, and Paint Codes ('13: Natural Gas
models)
Vehicle Identification Number
uxououm
a.
Manufacturer, Make, and Type of Vehicle
19X:
...
See also:
Honda Civic Owners Manual. Automatic Operation (automatic lighting control)
Automatic lighting control can be used when
the ignition switch is in ON *1.
When you turn the light switch to AUTO, the
headlights and other exterior lights will switch
on and off automatically depending on the
ambient brightness.
Models with driver information interface
You can ch ...
