Honda Civic Service Manual: Throttle Body Cleaning (Except K24Z7)
121008

Removal

Do not insert your fingers into the installed throttle body when you turn the
ignition switch to ON (II) or while the ignition switch is in ON (II). If you do,
you will seriously injure your fingers if the throttle valve is activated.
| 1. |
Air Cleaner Element - Inspection |
|
|
1.
|
Check for damage to the air cleaner element. If the air cleaner
element is damaged, replace it.
|
|
NOTE: Do not use compressed air to clean the air cleaner element.
|
|
|
|
|
1.
|
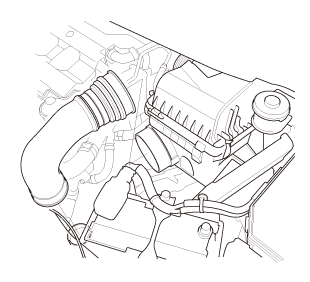
Remove the intake air pipe.
|
|
|
|
|
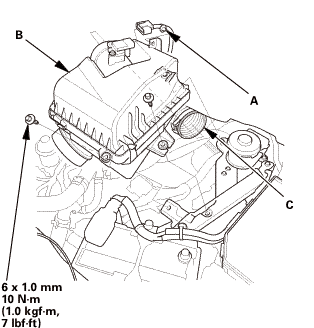
1.
|
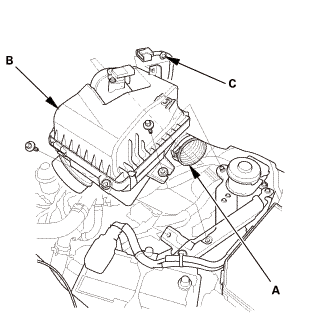
Disconnect the intake air duct (A).
|
|
2.
|
Remove the air cleaner (B).
|
|
3.
|
Remove the harness clamp (C).
|
|
| 4. |
Throttle Body Assembly |
|
1.
|
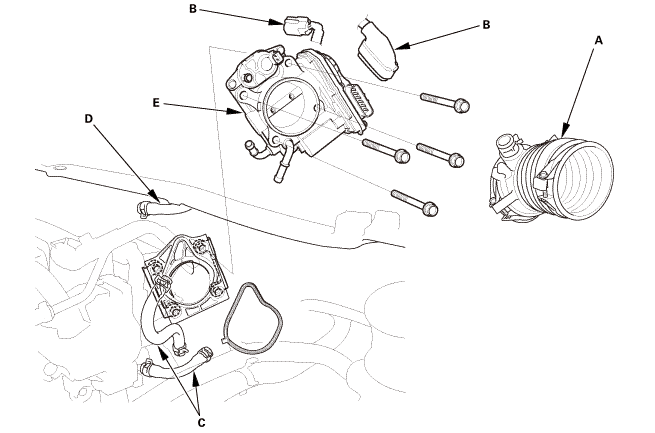
Remove the intake air duct (A).
|
|
2.
|
Disconnect the connectors (B).
|
|
3.
|
Disconnect and plug the water bypass hoses (C).
|
|
4.
|
Disconnect the vacuum hose (D).
|
|
5.
|
Remove the throttle body (E).
|
 Cleaning
| 1. |
Throttle Body - Cleaning |
|
|
|
1.
|
Clean off the carbon from the throttle valve and inside the throttle
body with a shop towel soaked with carburetor cleaner.
|
|

|
Remove the throttle body to clean it.
|
|
|
|
Be careful not to pinch your fingers.
|
|
|
|
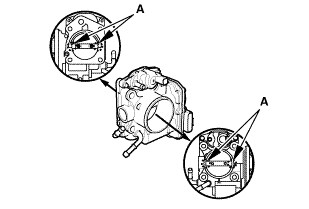
To avoid removing the molybdenum coating, do not clean
the bearing area of the throttle shaft (A).
|
|
|
|
Do not spray carburetor cleaner directly on the throttle
body.
|
|
|
|
Use genuine Honda carburetor cleaner.
|
|
|

Installation
Do not insert your fingers into the installed throttle body when you turn the
ignition switch to ON (II) or while the ignition switch is in ON (II). If you do,
you will seriously injure your fingers if the throttle valve is activated.
| 1. |
Throttle Body Assembly |
|
1.
|
Install the throttle body (A) with a new gasket (B).
|
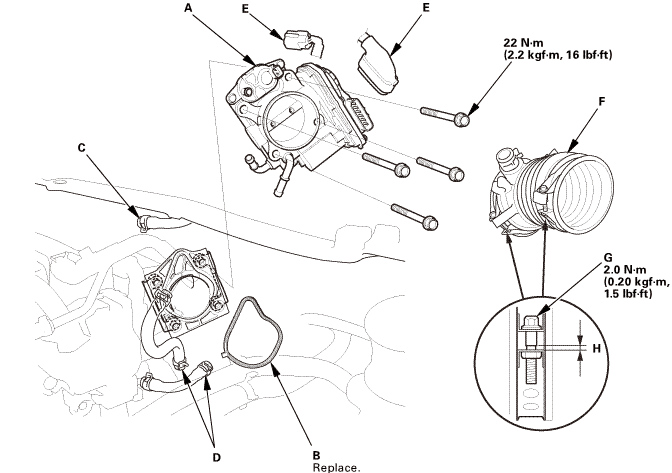 22mm(2.2
|
2.
|
Connect the vacuum hose (C).
|
|
3.
|
Connect the water bypass hoses (D).
|
|
4.
|
Connect the connectors (E).
|
|
5.
|
Install the intake air duct (F).
|
|
NOTE: After torqueing the screw of the hose band (G), make sure the clearance
(H) is less than 1.0 mm (0.4 in).
|
|
|
|
1.
|
Install the harness clamp (A).
|
|
2.
|
Install the air cleaner (B).
|
|
3.
|
Connect the intake air duct (C).
|
|
|
|
|
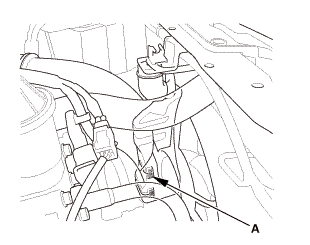
1.
|
Install the intake air pipe.
|
|
|
|
|
1.
|
Fill the coolant reservoir to the MAX mark (A) with Honda Long
Life Antifreeze/Coolant Type 2.
|
|
|
|
|
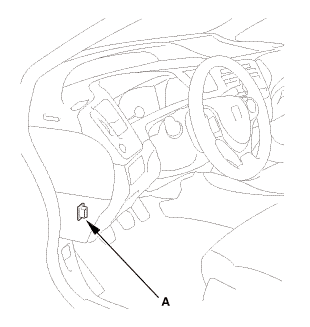
1.
|
Connect the HDS to the data link connector (DLC) (A) located
under the driver's side of the dashboard.
|
|
2.
|
Turn the ignition switch to ON (II).
|
|
3.
|
Make sure the HDS communicates with the vehicle. If it does not
communicate, go to the DLC circuit troubleshooting.
|
|
|
|
1.
|
Reset the ECM/PCM with the HDS while the engine is stopped.
|
|
2.
|
Turn the ignition switch to LOCK (0).
|
|
3.
|
Turn the ignition switch to ON (II) and wait 30 seconds.
|
|
|
|
1.
|
Select the ETCS TEST, then select the TP POSITION CHECK, and
follow the HDS screen prompt.
|
|
2.
|
Turn the ignition switch to LOCK (0).
|
|
|
|
Start the engine. Hold the engine speed at 3,000 rpm without
load (A/T in P or N, M/T in neutral) until the radiator fan comes
on, then let it idle.
|
|
|
|
1.
|
Let the engine idle for about 5 minutes with the throttle fully
closed.
|
|
NOTE: If the radiator fan comes on, do not include its running
time in the 5 minutes.
|
|
Check
1.
HDS DLC - Connection
1.
Connect the HDS to the data link connector (DLC) (A) located
under t ...
View
1.
Throttle Body - Disassembly/Reassembly
2.5
...
See also:
Honda Civic Owners Manual. Treadwear
The treadwear grade is a comparative rating based on the wear
rate of the tire when tested under controlled conditions on a
specified government test course. For example, a tire graded 150
would wear one and one-half (1 1/2) times as well on the
government course as a tire graded 100. The relati ...
 Throttle Body Carbon Accumulation Check (Except K24Z7)
 Throttle Body Disassembly and Reassembly (Except K24Z7)