Honda Civic Service Manual: Starter Overhaul (K24Z7)
 View
View
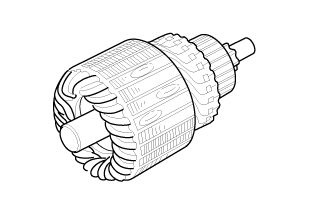
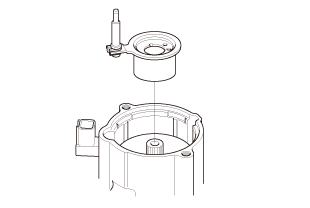
| 1. | Starter Exploded View |
|
Exploded View |
 amcanswrrcsunsrrassemblycam,__switchavnlymolyhdenumavnly
 Disassembly
|
NOTE: Refer to the Exploded View if needed during this procedure. |
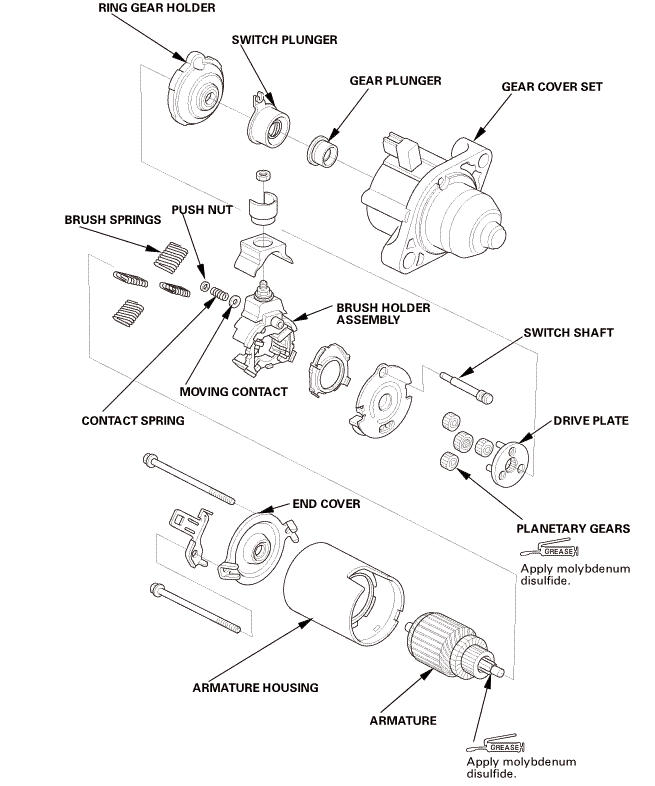
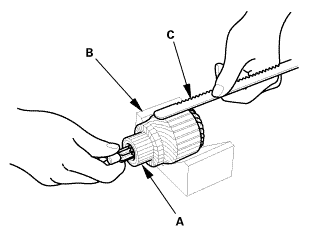
| 1. | Starter End Cover and Armature Housing |
|
|
|
|
|
|
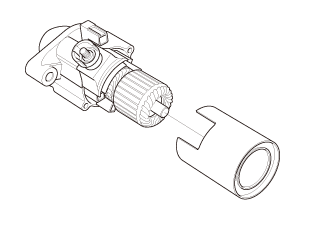
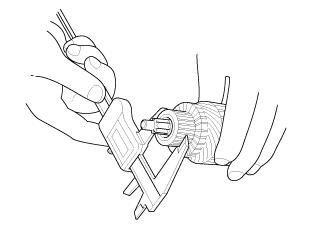
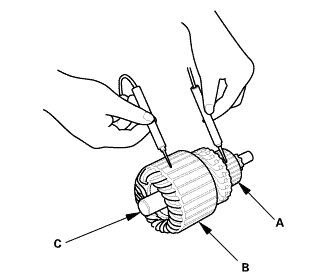
| 2. | Starter Armature |
|
|
|
| 3. | Starter Armature - Inspection |
|
|
|
|
|
|

|
3. |
Check the commutator diameter with a digital caliper or dial type caliper. If the diameter is below the service limit, replace the armature. |
|||||||||
|
||||||||||
|
4. |
Measure the commutator (A) runout: |
|||||||||
|
||||||||||
|
||||||||||

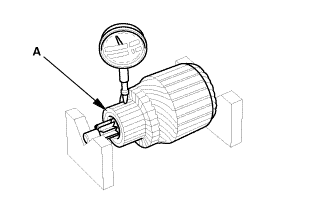
|
5. |
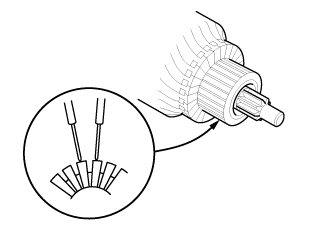
Use a digital caliper or dial type caliper to check the mica depth (A). If the mica depth is below the service limit, replace the armature. |
|||||||||
|
||||||||||
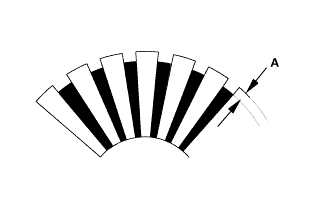
|
|
|
|
|
|
|
|
|
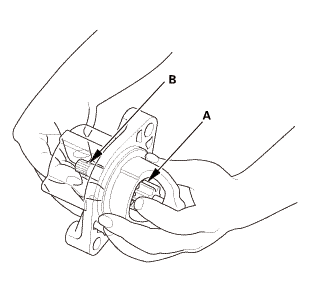
| 4. | Starter Brush Holder Assembly |
|
|
|
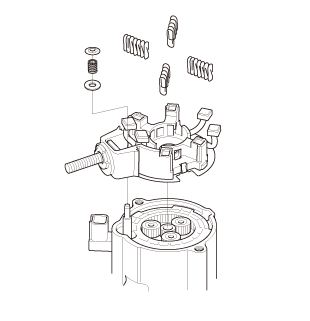
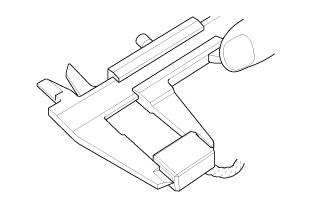
| 5. | Starter Brush Holder - Test |
|
|
|
| 6. | Starter Brush - Inspection |
|
1. |
Measure the brush length. If it is shorter than the service limit, replace the brush holder assembly. |
|||||||||
|
||||||||||
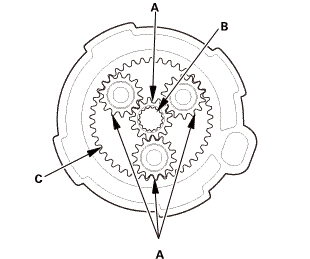
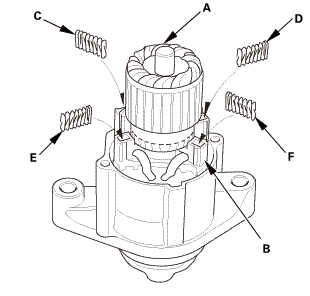
| 7. | Starter Planetary Gear - Inspection |
|
|
|
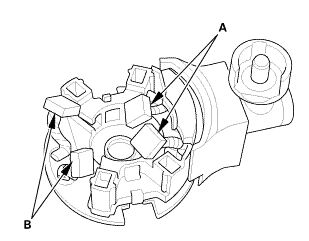
| 8. | Starter Gear Cover |
|
|
|
|
|
|
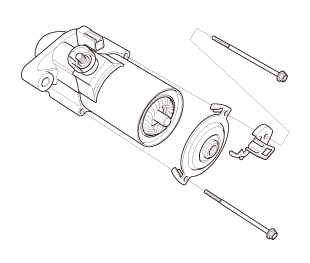
| 9. | Starter Overrunning Clutch - Inspection |
|
|
|
 Reassembly
|
NOTE: Refer to the Exploded View if needed during this procedure. |
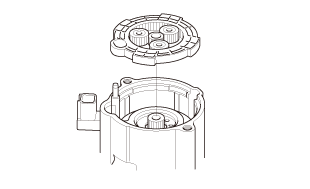
| 1. | Starter Gear Cover |
|
|
|
|
|
|
| 2. | Starter Brush Holder Assembly |
|
|
|
| 3. | Starter Armature |
|
|
|
|||||||||
| 4. | Starter End Cover and Armature Housing |
|
|
|
|
|
|
 Starting System
...
 Starter Removal, Installation, and Performance Test (K24Z7)
1161D1
1.
Battery Terminal - Disconnection
1.
Make sure the ignition switch is in LOCK (0), or the vehicle
...
See also:
Honda Civic Owners Manual. Parking Your Vehicle
When Stopped
Depress the brake pedal firmly.
With the brake pedal depressed, pull up the electric parking brake
switch slowly,
but fully.
Continuously variable transmission models
Move the shift lever from D to P.
Manual transmission models
Move the shift lever to R or ...
