Honda Civic Service Manual: Radiator Fan Motor Removal and Installation (Except K24Z7)
1151A2

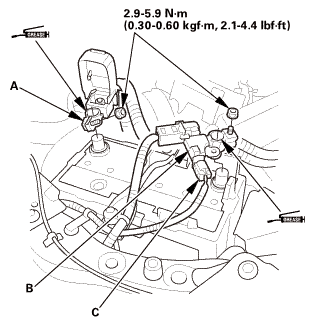
| 1. | Battery Terminal - Disconnection |
|
|
|
|||||||||||||||||||||||||||
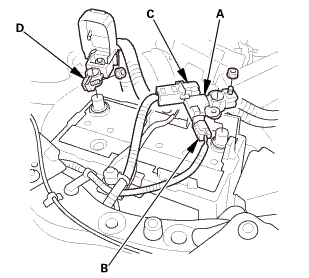

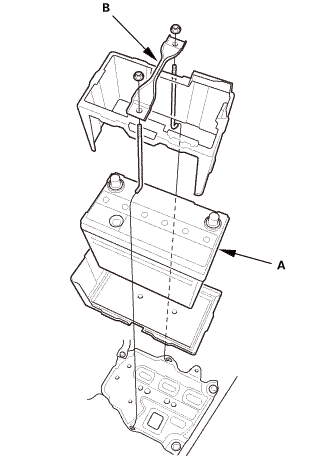
| 2. | Battery |
|
|
|

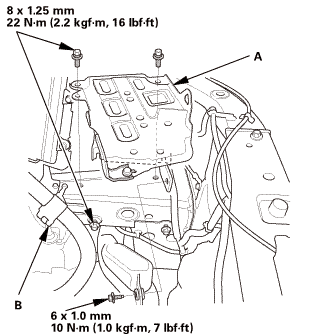
| 3. | Battery Base Assembly |
|
|
|
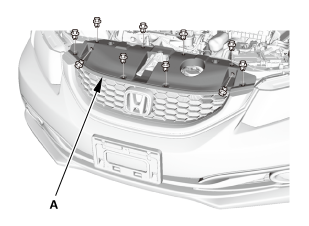
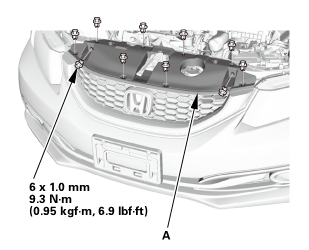
| 4. | Front Grille Cover |
|
|
|
|
|
|

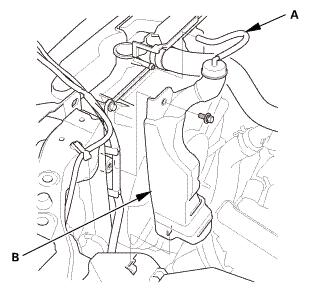
| 5. | Coolant Reservoir |
|
|
|
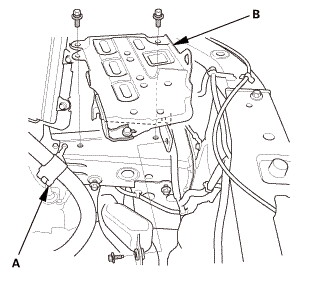
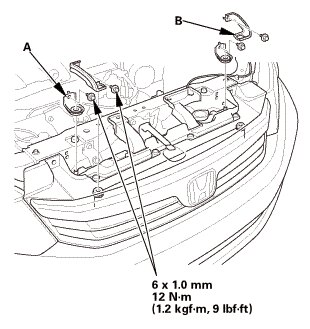
| 6. | Radiator Mounting Bracket, Upper Both |
|
|
|
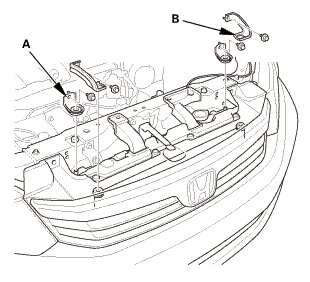
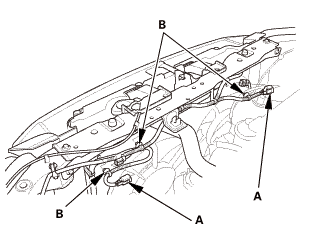
| 7. | Bulkhead - Removal |
|
|
|
|
|
|
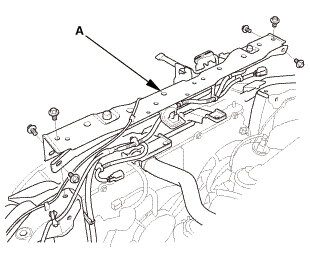
| 8. | A/C Condenser Fan Shroud Assembly |
|
|
|
| 9. | Radiator Fan Shroud Assembly |
|
|
|
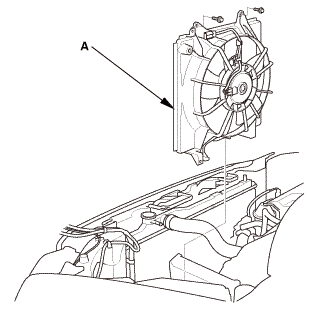
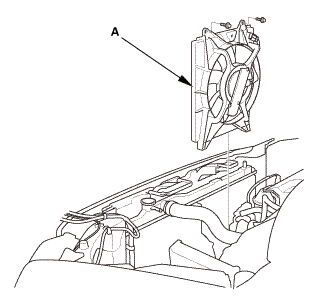
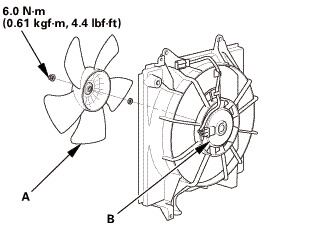
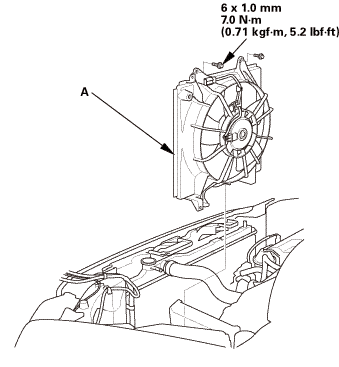
| 10. | Radiator Fan |
|
|
|

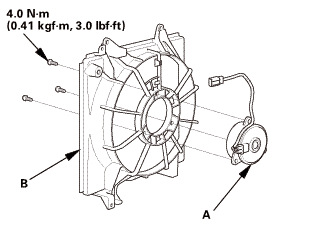
| 11. | Radiator Fan Motor |
|
|
|
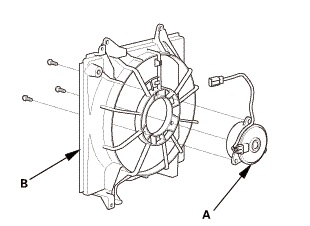

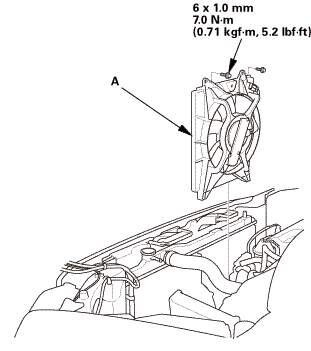
| 1. | Radiator Fan Motor |
|
|
|
| 2. | Radiator Fan |
|
|
|
| 3. | Radiator Fan Shroud Assembly |
|
|
|
| 4. | A/C Condenser Fan Shroud Assembly |
|
|
|
| 5. | Bulkhead - Installation |
|
|
|

|
|
|

| 6. | Radiator Mounting Bracket, Upper Both |
|
|
|
| 7. | Coolant Reservoir |
|
|
|

| 8. | Front Grille Cover |
|
|
|
|
|
|
| 9. | Battery Base Assembly |
|
|
|
 mm22mminu.om.7mm
| 10. | Battery |
|
|
|
||||||
| 11. | Battery Terminal - Reconnection |
|
|
|
|||||||||||||||||||
 Radiator Fan
...
 Radiator Fan Motor Removal and Installation (K24Z7)
1.
Air Cleaner Assembly
1.
Disconnect the intake air duct (A) and the intake air pipe (B).
...
See also:
Honda Civic Owners Manual. Traction
The traction grades, from highest to lowest, are AA, A, B, and C.
Those grades represent the tire's ability to stop on wet pavement
as measured under controlled conditions on specified
government test surfaces of asphalt and concrete. A tire marked
C may have poor traction performance.
...
