Honda Civic Service Manual: Fuel Pressure Regulator P1 Removal and Installation (R18A9)

| 1. | Vehicle Lift |
|
| 2. | Fuel Pressure - Relieving (Between the engine and the manual shut-off valve) (Natural Gas Model) |
|
|
Compressed natural gas is flammable and highly explosive. You could be
killed or seriously injured if leaking natural gas is ignited.
|

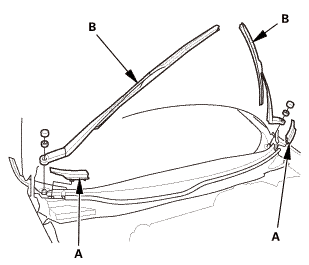
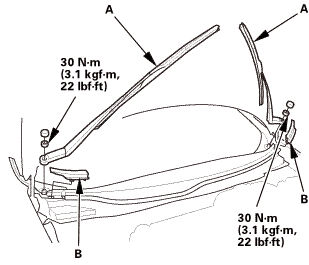
| 3. | Wiper Arm Assembly |
|
|
|
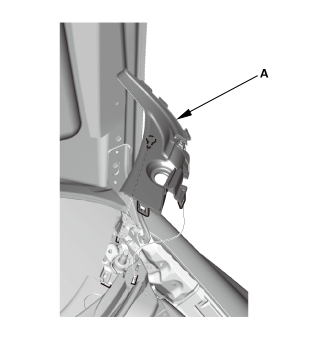
| 4. | Both Side Cowl Covers |
|
|
|
| 5. | Center Cowl Cover |
|
|
|

| 6. | Under Cowl Panel |
|
|
|

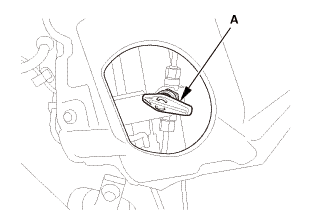
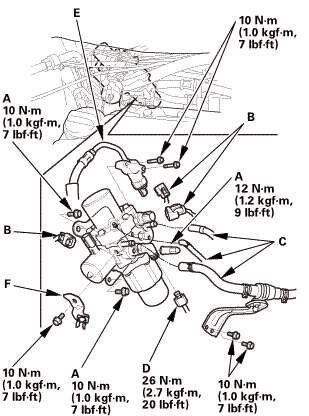
| 7. | Fuel Pressure Regulator P1 Peripheral (Natural Gas Model) |
|
|
|
||||||||||||||||||

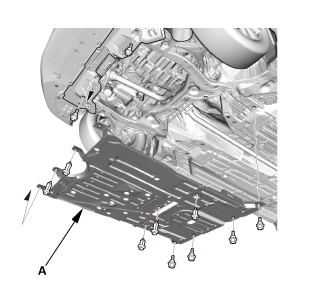
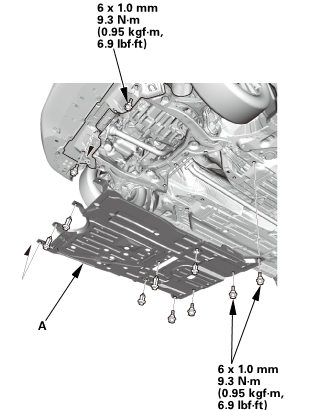
| 8. | Engine Undercover |
|
|
|
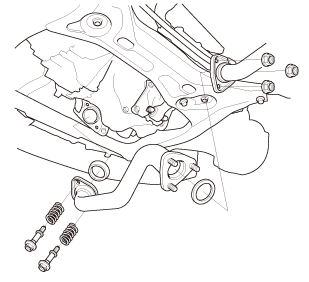
| 9. | Exhaust Pipe A (Except CVT) |
|
|
|
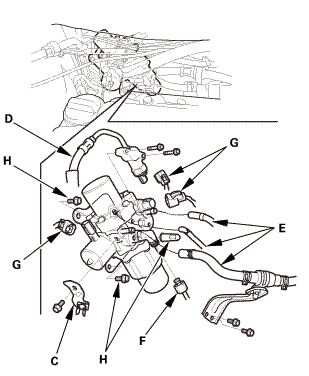
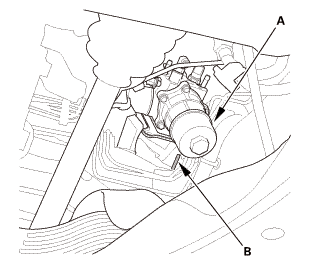
| 10. | Fuel Pressure Regulator P1 (Natural Gas Model) |
|
|
|

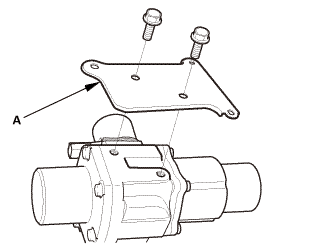
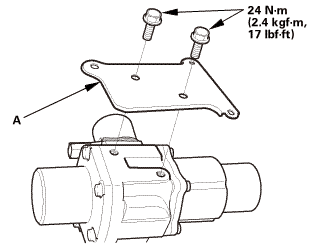
| 11. | Fuel Pressure Regulator P1 Stay (Natural Gas Model) |
|
|
|

| 1. | Fuel Pressure Regulator P1 Stay (Natural Gas Model) |
|
|
|
 17
17| 2. | Fuel Pressure Regulator P1 (Natural Gas Model) |
|
|
|


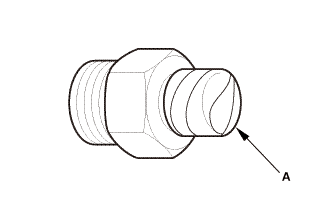
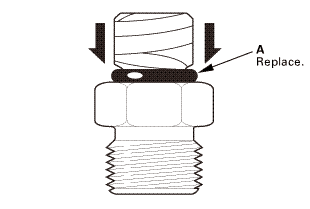
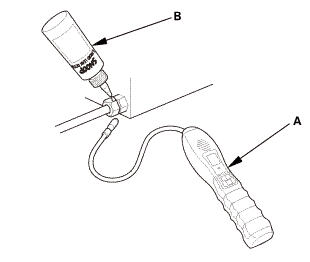
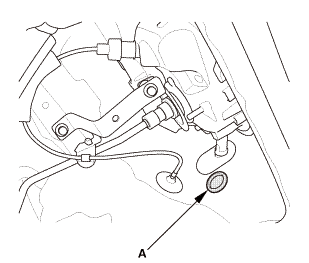
| 3. | Fuel Pipe Connector O-Ring (Natural Gas Model) |
|
|
|
||||||
|
|
|
||||||||||||
| 4. | Exhaust Pipe A (Except CVT) |
|
|
|
 inmm125mm22i21
| 5. | Engine Undercover |
|
|
|
| 6. | Fuel Pressure Regulator P1 Peripheral (Natural Gas Model) |
|
|
|
||||||||||||||||||
 in
in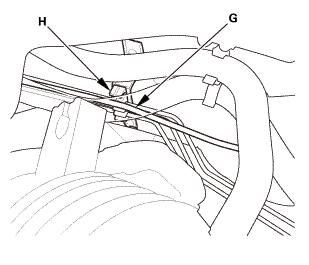
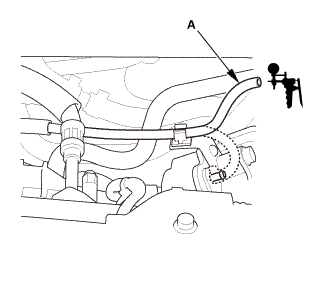
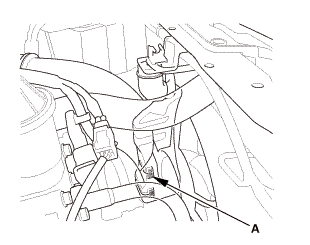
| 7. | Manual Shut-off Valve - Open (Natural Gas Model) |
|
|
|
| 8. | Fuel Supply System Leak - Inspection (Natural Gas Model) |
|
|
|
|
|
|
|
|
|
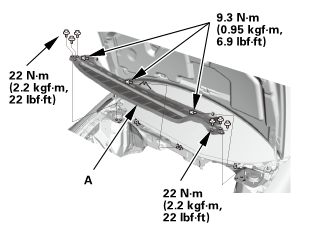
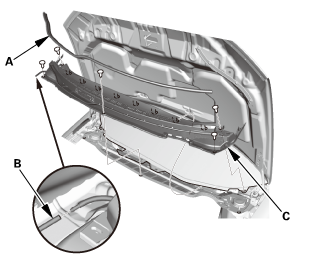
| 9. | Under Cowl Panel |
|
|
|
 22mm)2222
| 10. | Center Cowl Cover |
|
|
|
| 11. | Both Side Cowl Covers |
|
|
|
| 12. | Wiper Arm Assembly |
|
|
|
 1.122
1.122| 13. | Coolant - Refill |
|
|
|
 Fuel Pump/Fuel Gauge Sending Unit Removal and Installation (R18Z1)
Removal
1.
Fuel Filler Cap
1.
Remove the fuel fill cap to relieve the pressure in the fuel
tank.
...
 Fuel Pressure Regulator Removal and Installation (R18Z1)
121135
Removal
1.
Fuel Filler Cap
1.
Remove the fuel fill cap to relieve the pressure in the fuel
tank.
...
See also:
Honda Civic Owners Manual. Safety Checklist
For the safety of you and your passengers, make a habit of checking these
items
each time before you drive.
After everyone has entered the vehicle, be sure all doors are closed and
locked.
Locking the doors helps prevent an occupant from being ejected and an outsider
from unexpectedly open ...
