Honda Civic Service Manual: Front Brake Caliper Removal and Installation (Natural Gas models)

| 1. | Vehicle Lift |
|
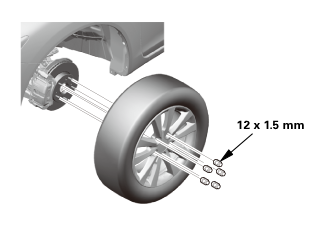
| 2. | Front Wheel |
|
|
|
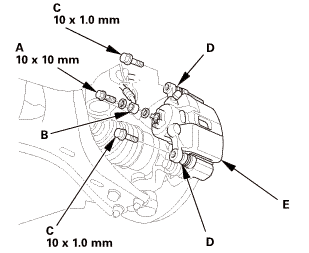
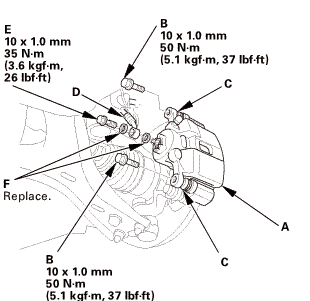
| 3. | Front Brake Caliper Body (Natural Gas Model) |
|
|
Do not spill brake fluid on the vehicle; it may damage the paint. If brake fluid does contact the paint, wash it off immediately with water.
|
||||||||||||

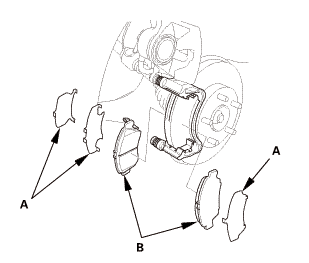
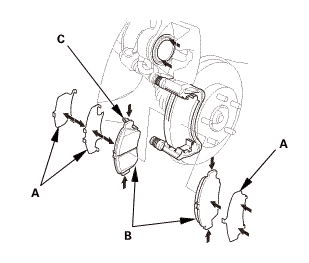
| 4. | Front Brake Pad (Natural Gas Model) |
|
|
|
|
|
|
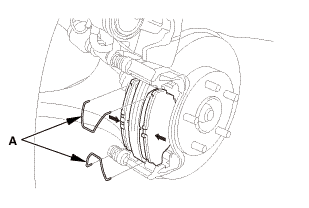
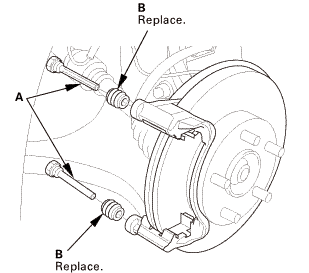
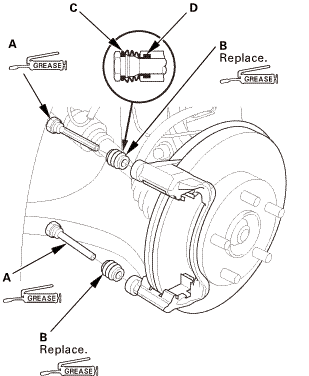
| 5. | Front Brake Caliper Pin and Boot (Natural Gas Model) |
|
|
|
|||||||||

| 1. | Front Brake Caliper Pin and Boot (Natural Gas Model) |
|
|
|
|||||||||||||||||||||||||||

| 2. | Front Brake Pad (Natural Gas Model) |
|
|
|
||||||||||||
|
|
|

| 3. | Front Brake Caliper Body (Natural Gas Model) |
|
|
|
 (5.1mn)lummm,nu-nu
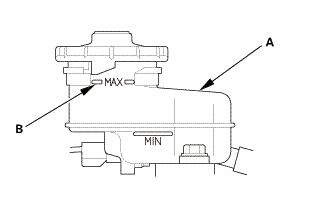
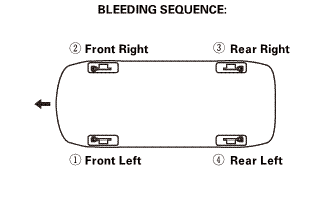
| 4. | Brake System - Bleeding (Natural Gas Model) |
|
|
Do not spill brake fluid on the vehicle; it may damage the paint. If brake fluid does contact the paint, wash it off immediately with water.
|
|
|
|
||||||
 sznuzucz
|
Front
Rear
|
|
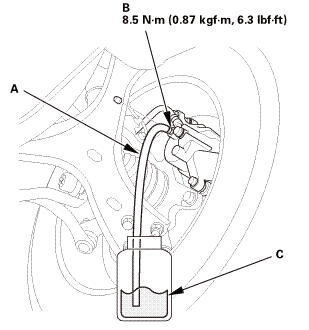 x.sm.x1imm
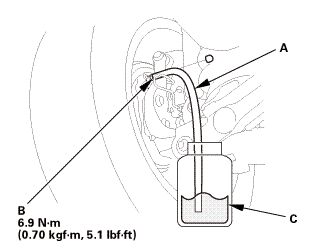
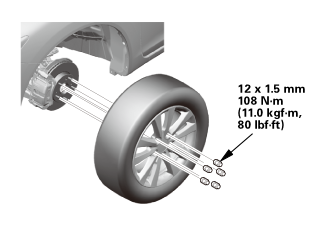
| 5. | Front Wheel |
|
|
|
||||||
 mmmln-mnomm
 Brake Calipers
...
 Rear Brake Caliper Overhaul
View
1.
Rear Brake Caliper Exploded View
Exploded View
Disassembly
Frequent inhalation of brake pad dust, regardless of material composition, co ...
See also:
Honda Civic Owners Manual. About Your Audio System
The audio system features AM/FM radio and SiriusXM’ Radio service*. It can
also
play USB flash drives, and iPod, iPhone and Bluetooth’ devices.
You can operate the audio system from the buttons and switches on the panel, the
remote controls on the steering wheel, or the icons on the touch ...
