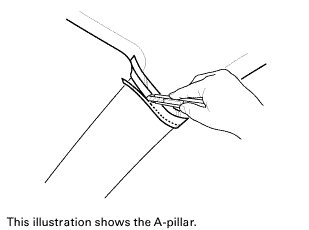
Honda Civic Service Manual: A-Pillar Trim Removal and Installation

Removal
|
SRS components are located in this area. Review the SRS component locations and the precautions and procedures before doing repairs or service. |
| 1. | Front Door Opening Seal as Needed |
|
|
|

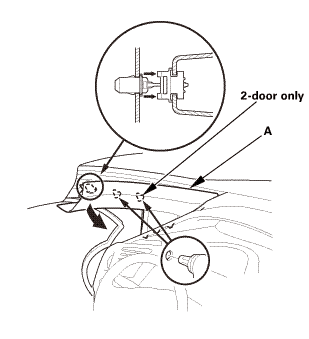
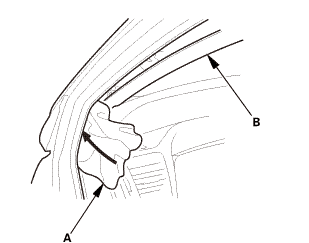
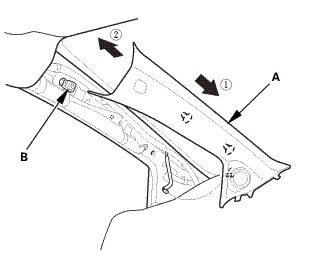
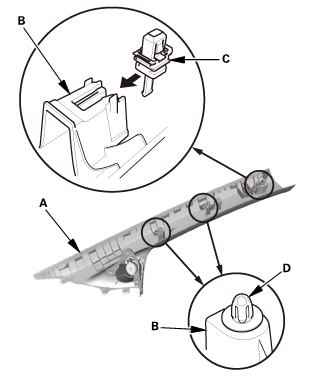
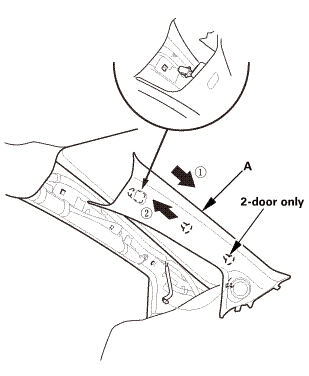
| 2. | A-Pillar Trim |
|
|
|
|
|
|
|
|
|
||||||
|
|
|

Installation
|
SRS components are located in this area. Review the SRS component locations and the precautions and procedures before doing repairs or service. |
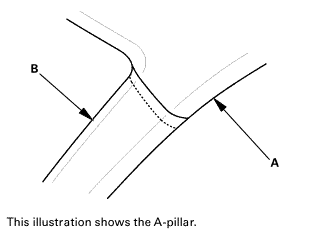
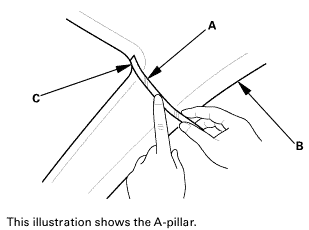
| 1. | A-Pillar Trim - Check |
|
|
|
||||||||||||||||||||||||||||||

| 2. | Headliner/Pillar Trim Overlap - Check |
|
|
|
 tms
tms|
|
|
|
|
|
||||||||||||||||
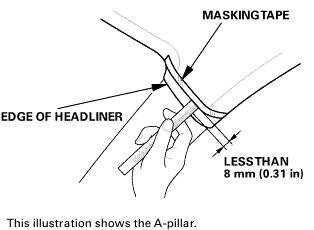 sun:orlessthan
|
|
|
 slmws
slmws| 3. | A-Pillar Trim |
|
|
|
|
|
|
|||||||||||||||||||||
| 4. | Front Door Opening Seal as Needed |
|
|
|

 Quarter Pillar Trim Removal and Installation (2-door)
Removal
SRS components are located in this area. Review the SRS component locations
and the precautions and procedures before doing repairs or service.
1.
Qua ...
 B-Pillar Upper Trim Removal and Installation (2-door)
8571B7 LEFT UPPER
8571B8 RIGHT UPPER
Removal
SRS components are located in this area. Review the SRS component locations
and the precautions and procedures before doing repairs ...
See also:
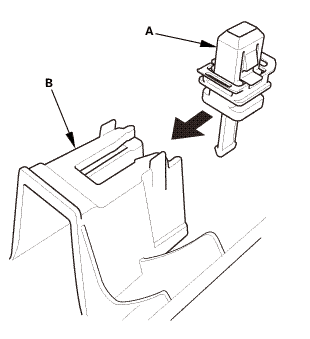
Honda Civic Service Manual. Sunlight Sensor Removal and Installation
6181D5
Removal
1.
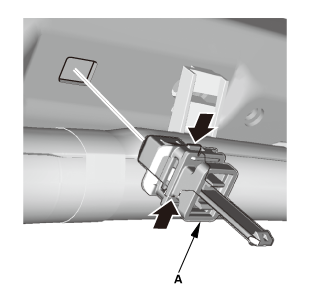
Sunlight Sensor
1.
Using a flat-tip screwdriver wrapped with protective tape, pry
up the sunlight sensor (A).
2.
Disconnect ...
